Introduction
Creating and managing candidate advertisements is a crucial aspect of recruitment, allowing for the targeted promotion of potential hires to match them with the right opportunities. The Refari Dashboard simplifies this process, offering a streamlined approach to adding, editing, and showcasing candidate adverts. Whether you're looking to highlight a candidate already in your database or introduce a new potential talent to your roster, Refari's Candidate Ads feature is designed to enhance your recruitment strategy. This guide will walk you through each step of creating a candidate advert within the Refari Dashboard, from initial setup to viewing the advert on the Talent Board, ensuring you have all the tools necessary to attract the attention of hiring managers and match candidates with their ideal roles.
Step-by-Step Guide to Creating a Candidate Advert on Refari Dashboard
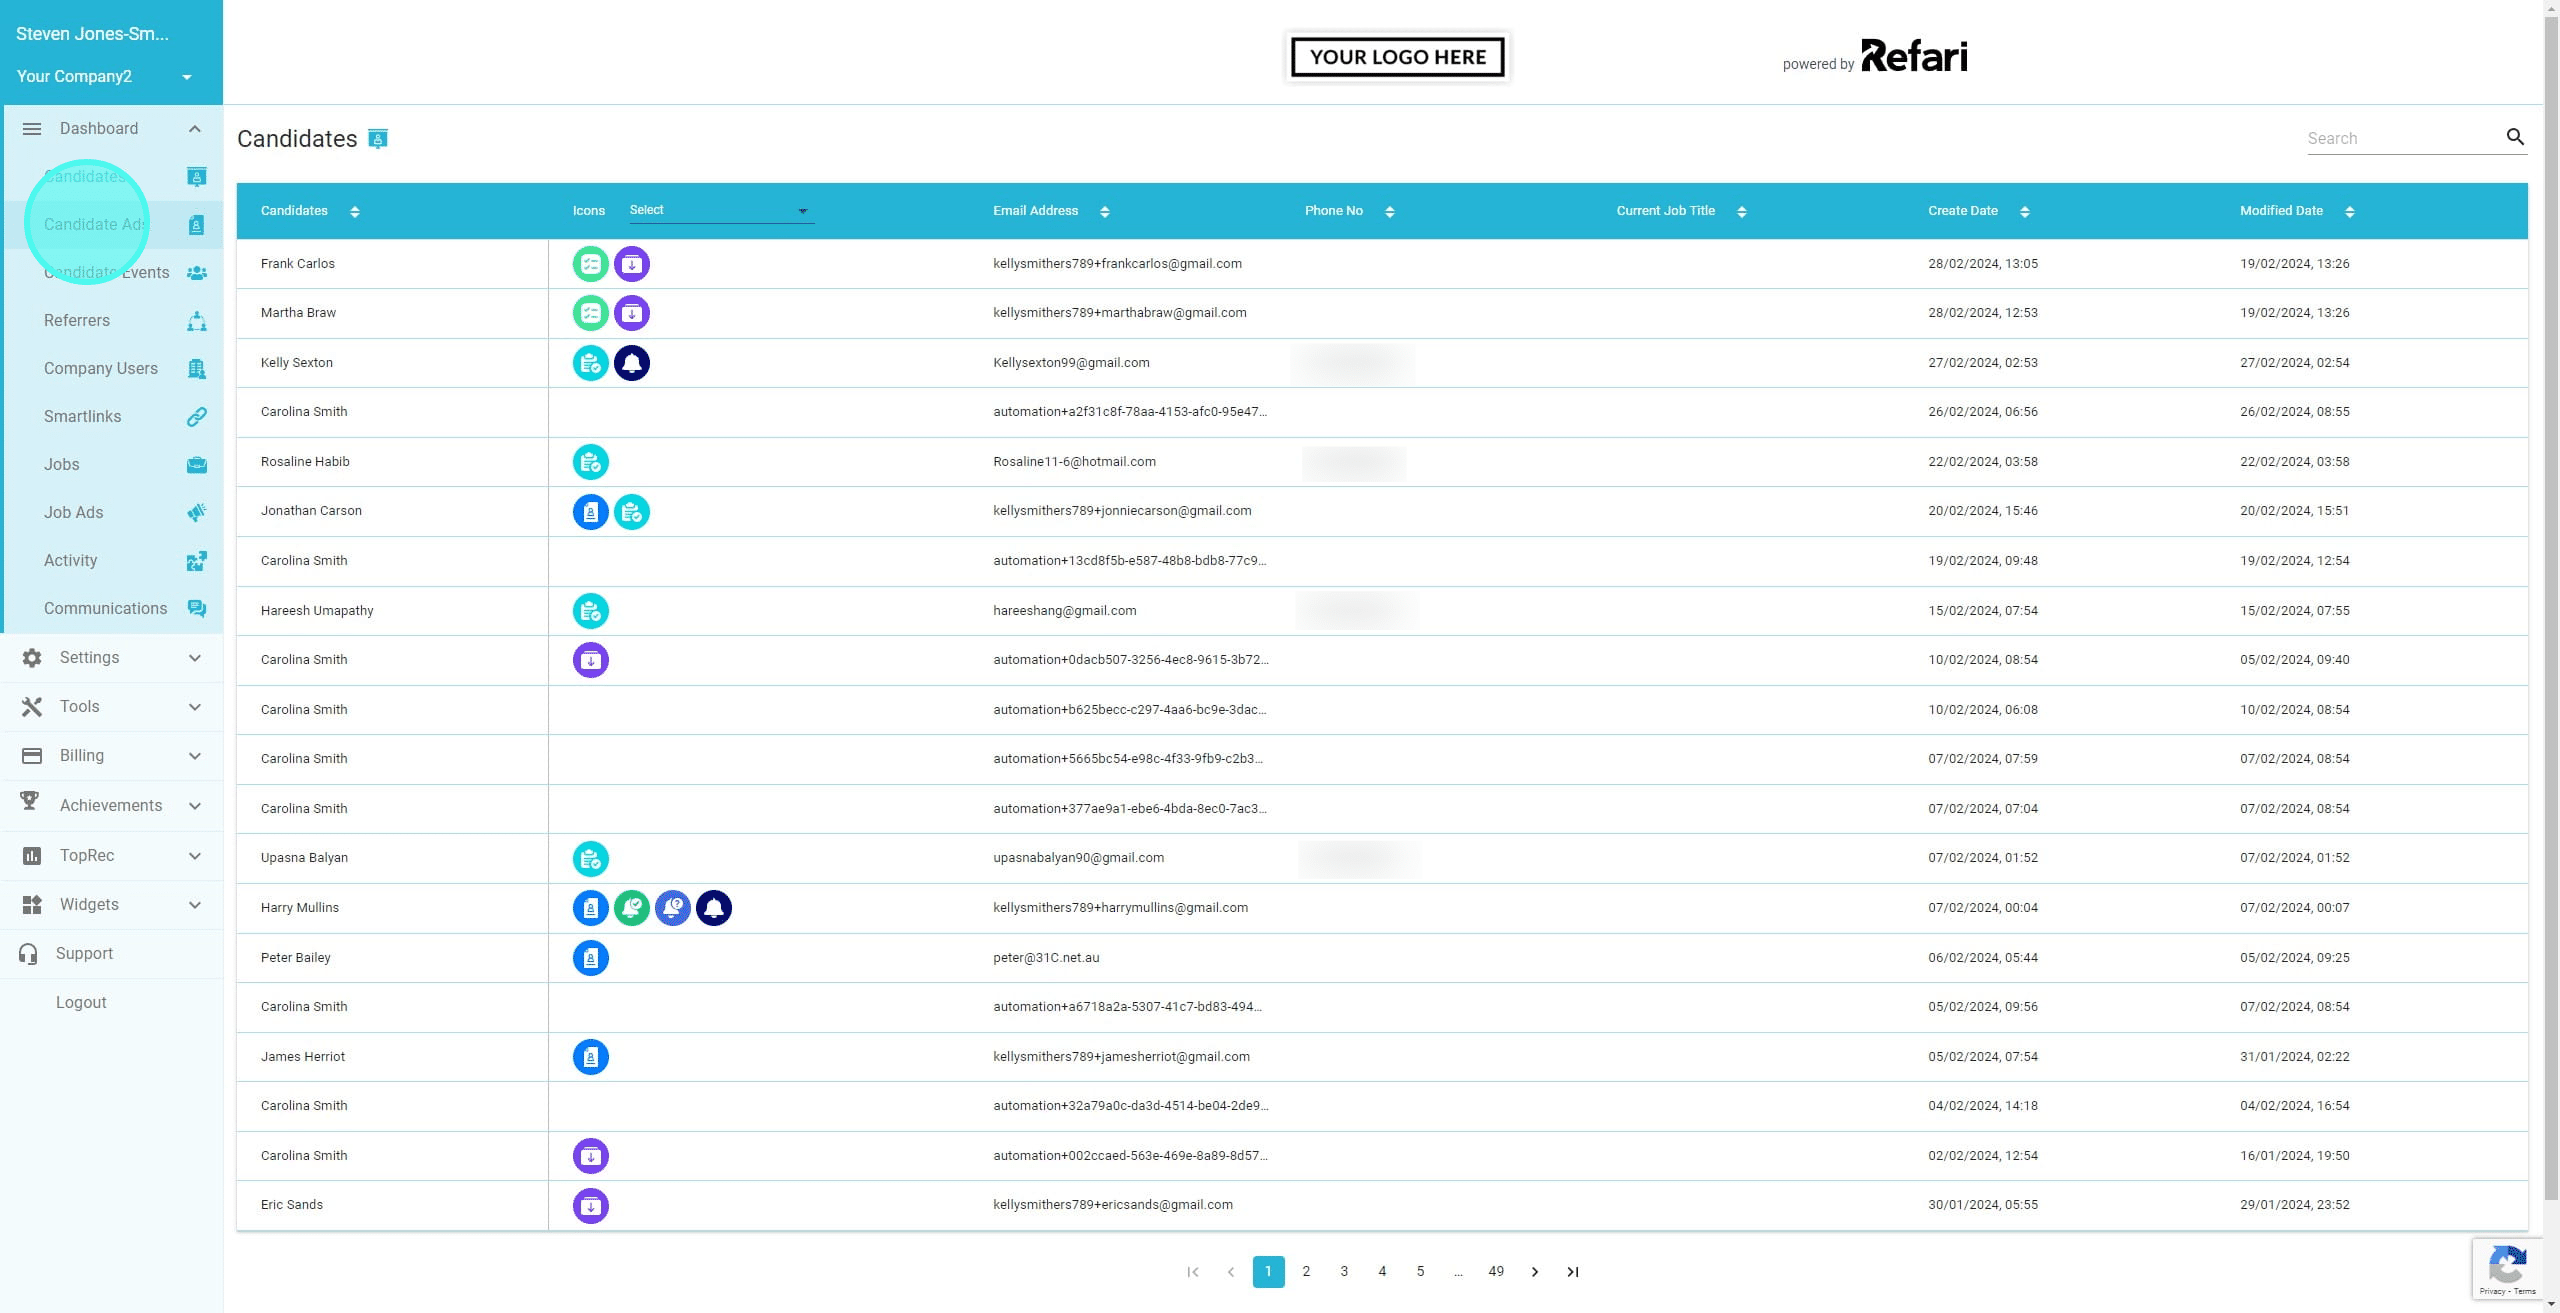
1. Navigate to Candidates in your Refari Dashboard
2. Click on "Candidate Ads" (if this is not visible, you will need to contact the Refari Team so we can turn this feature on)
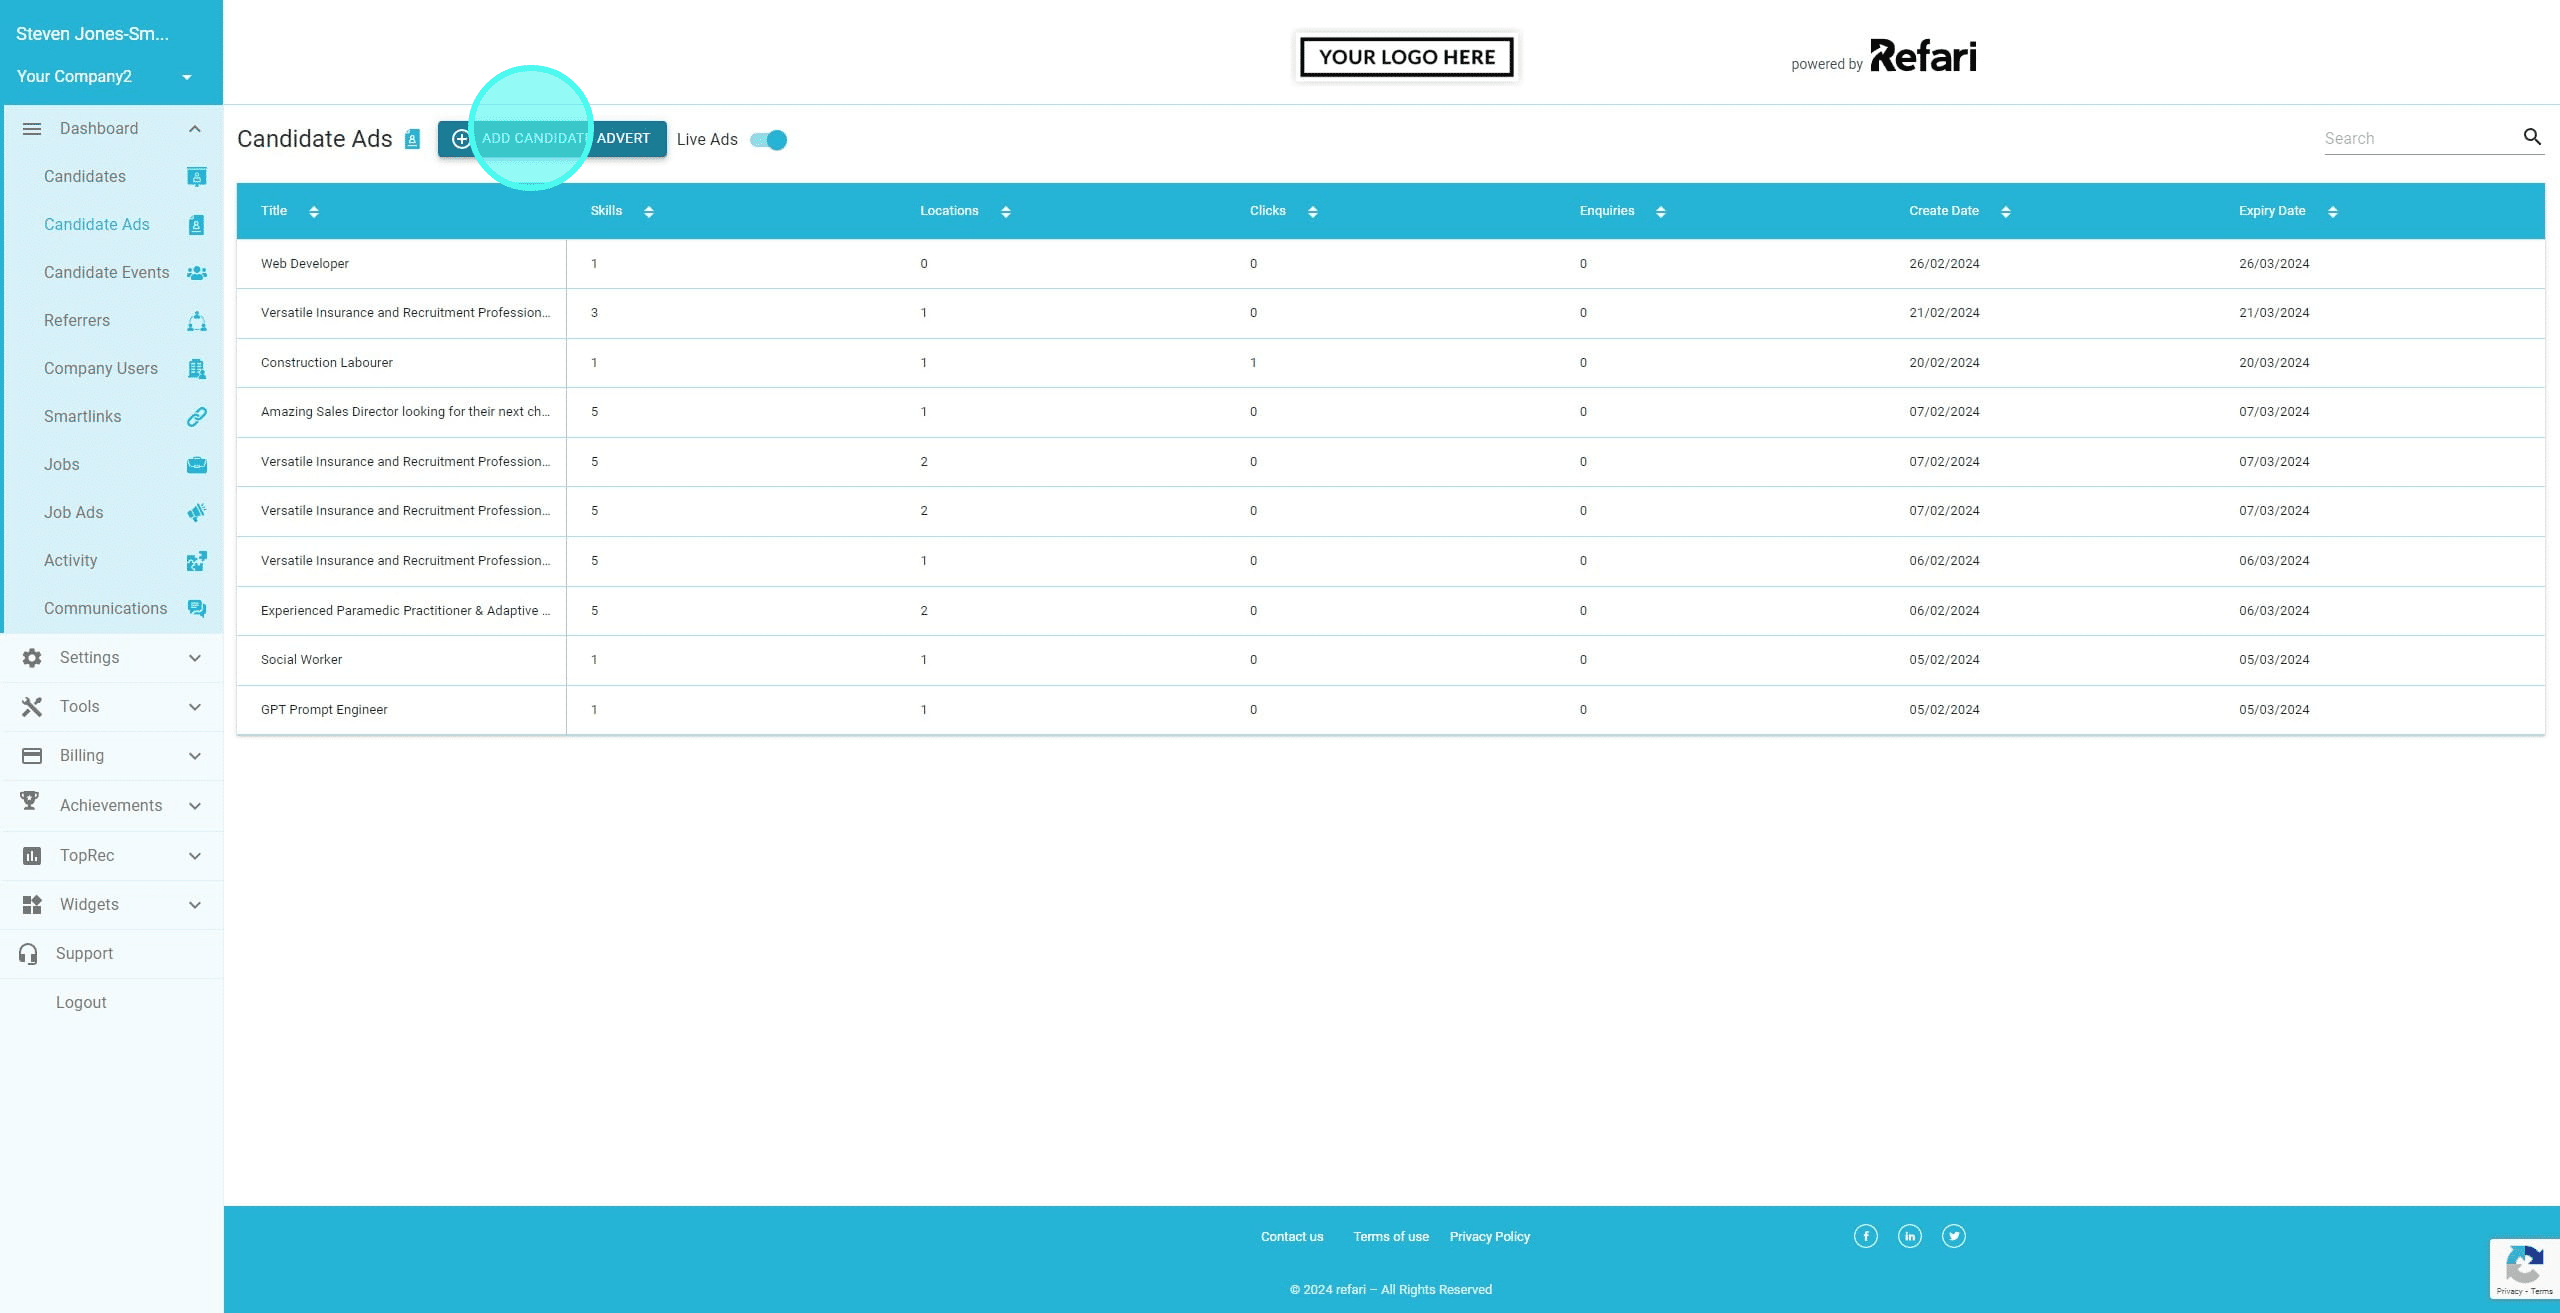
3. Click on Add Candidate Advert
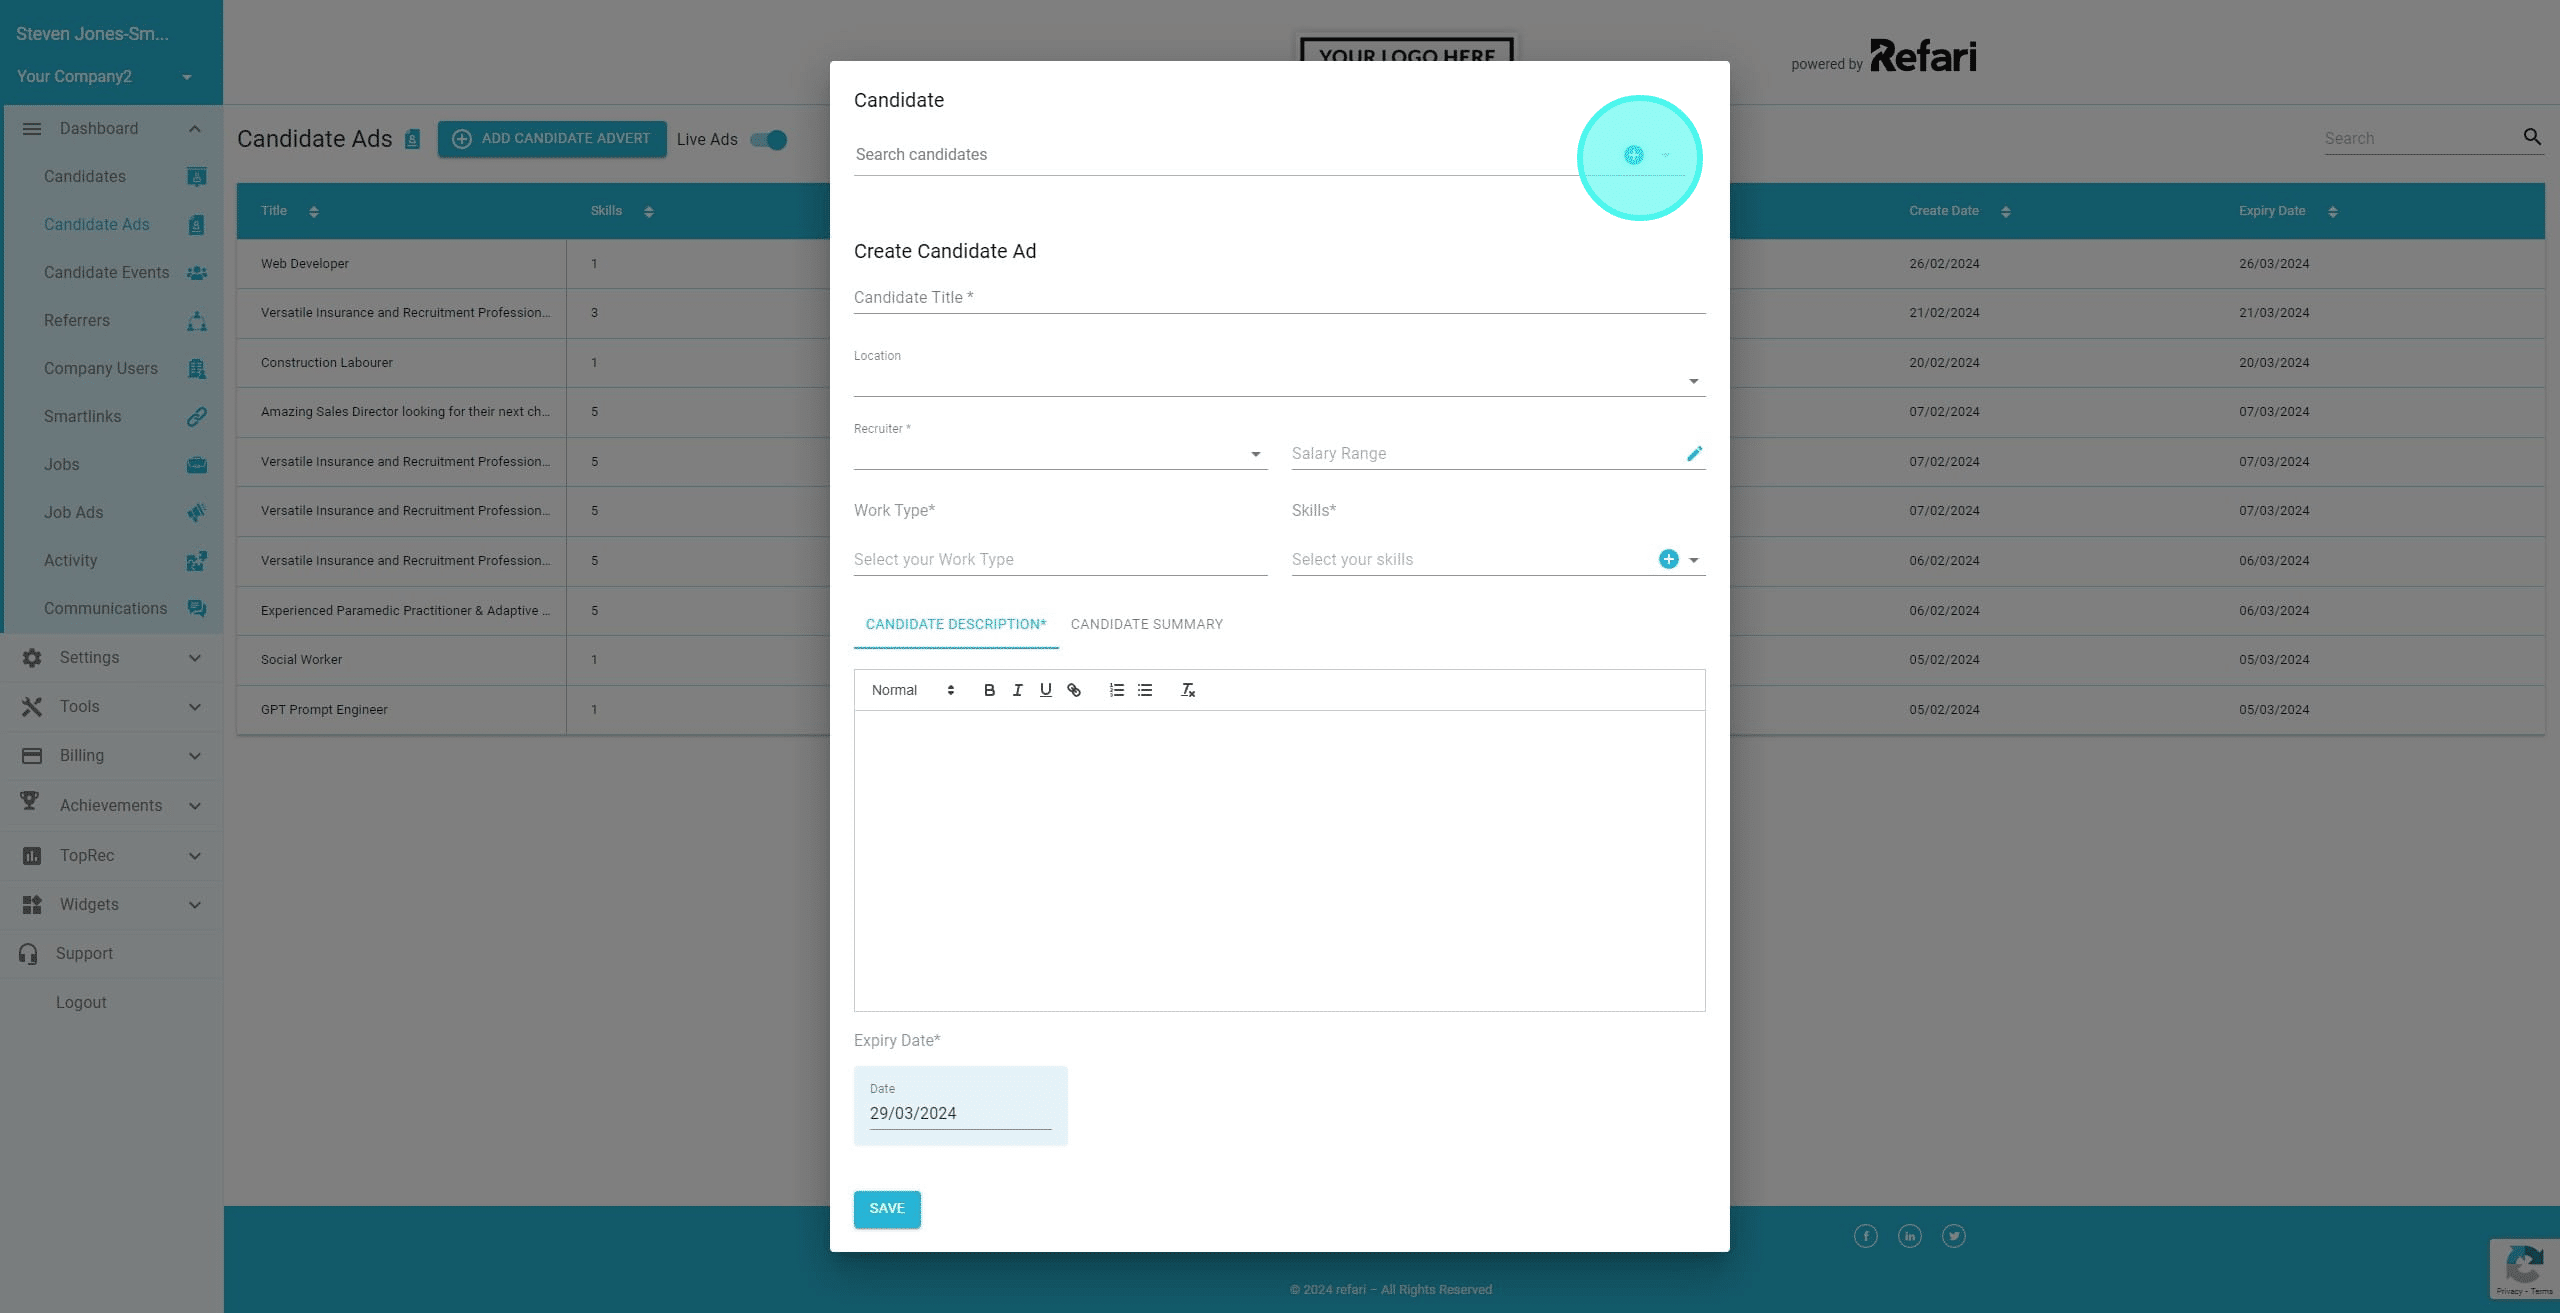
4. You can now enter the relevant information about a candidate. If they are already in your database you can simply search for them however if they are not, you can click on this + to add their first name, last name and email address.
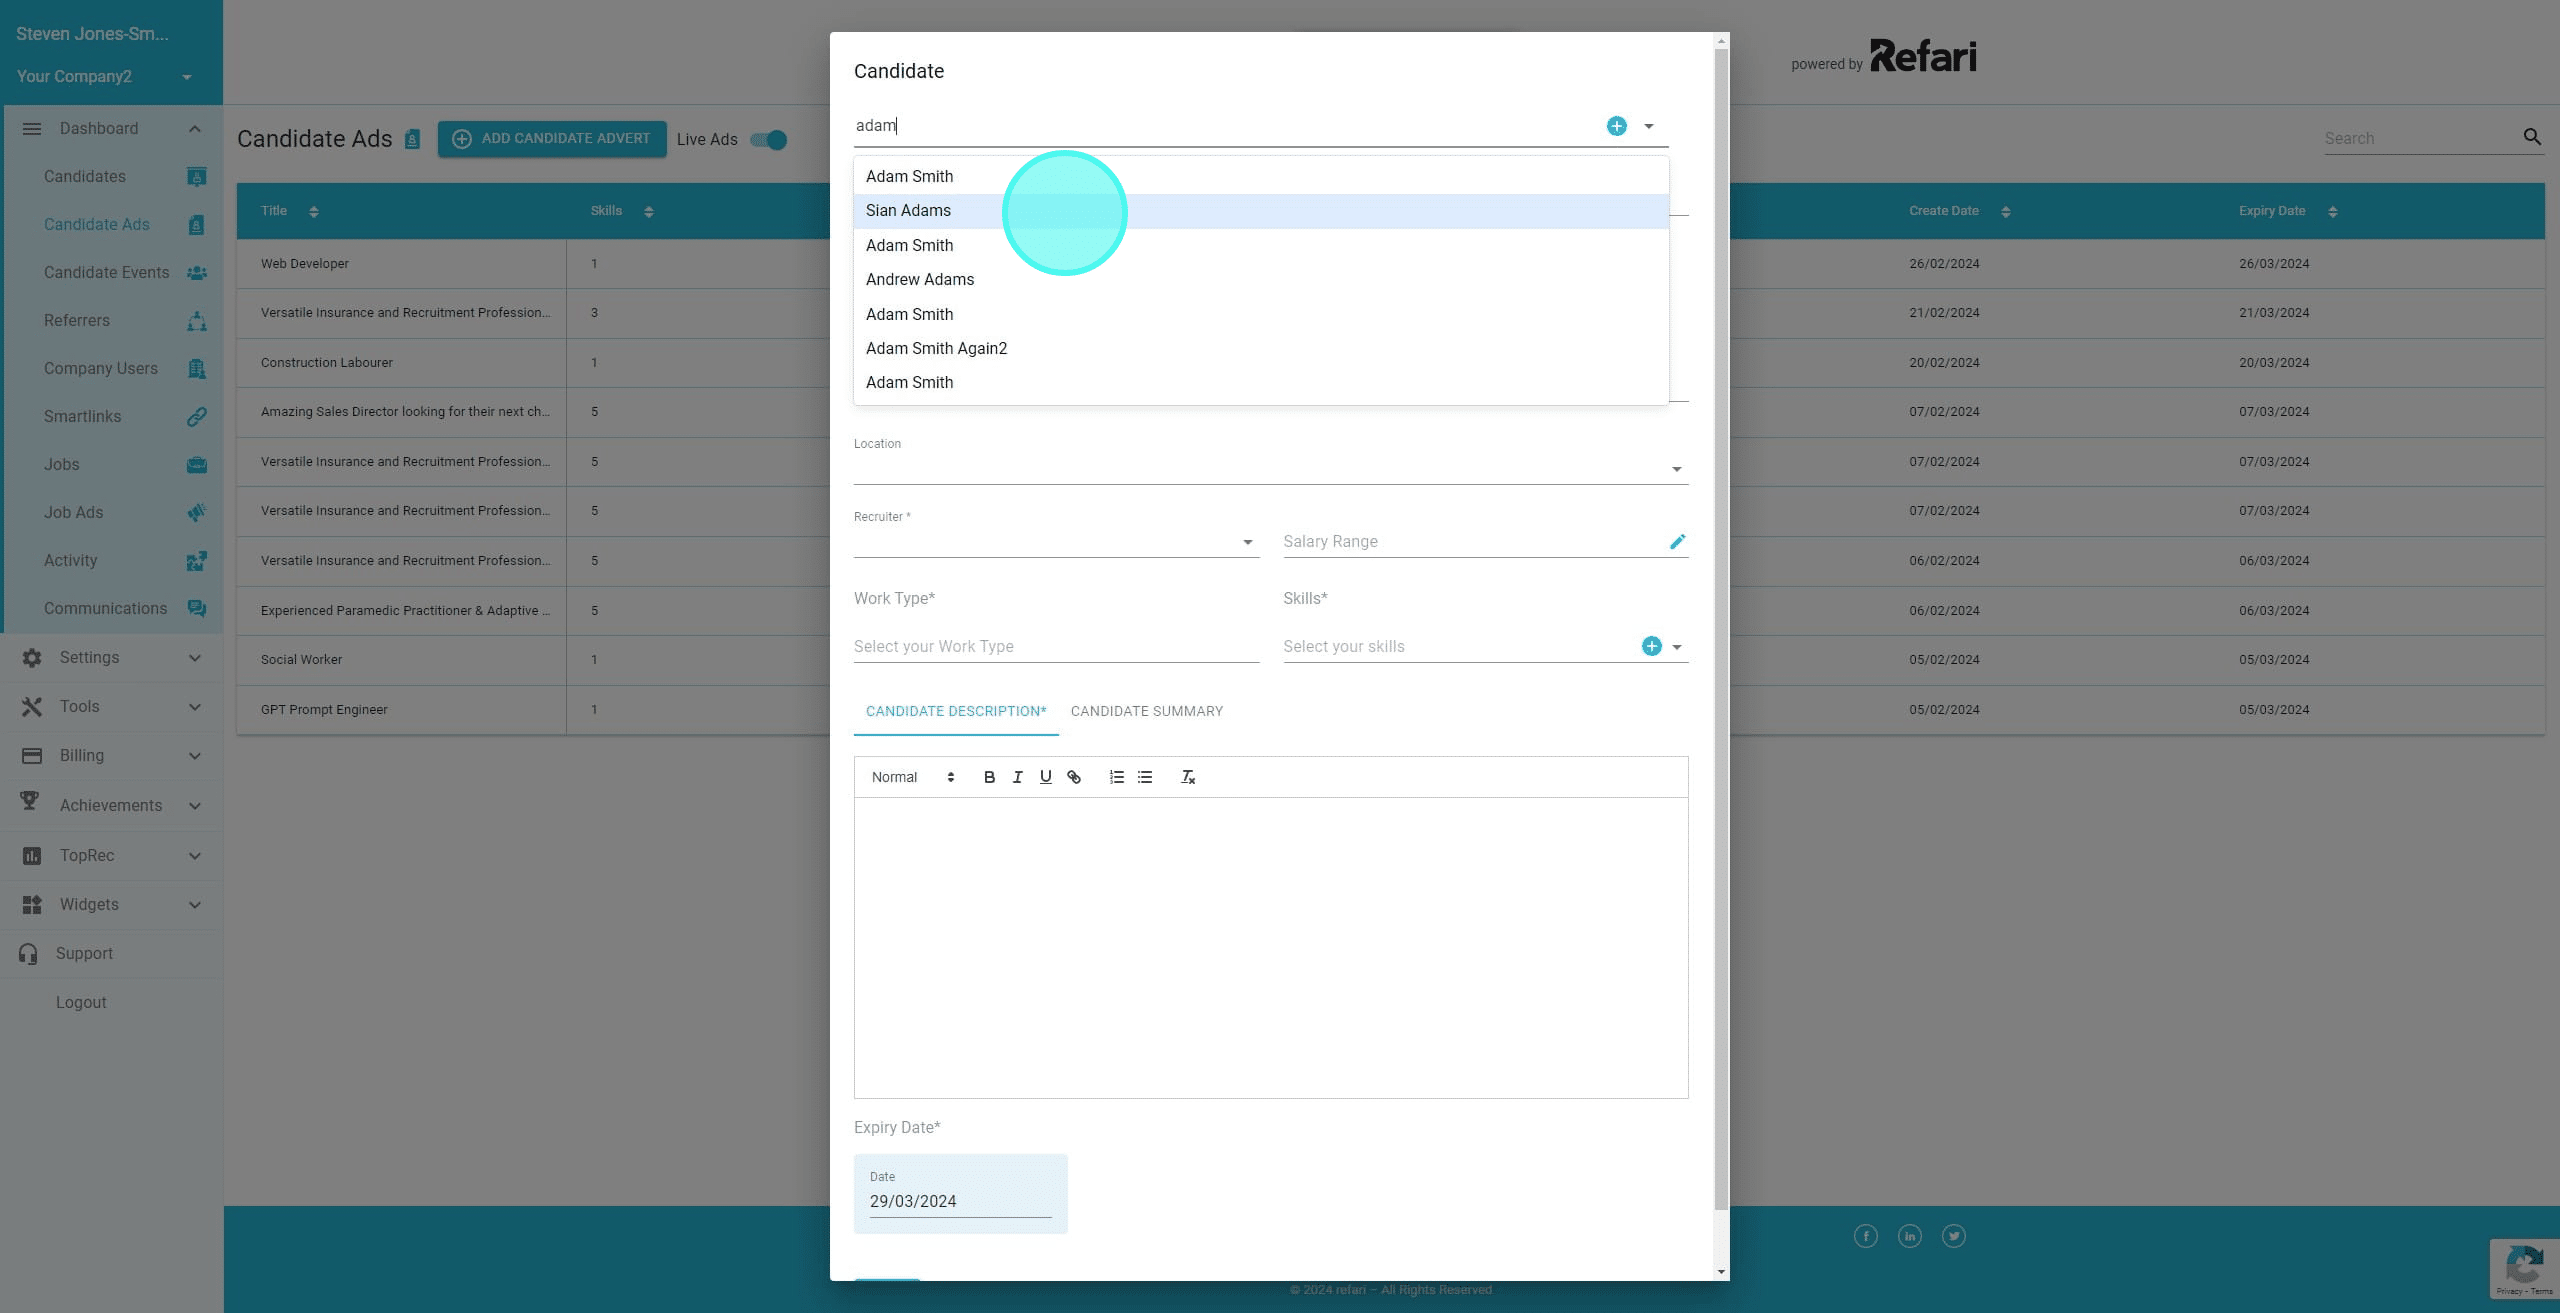
5. In this example, we are searching for candidates already in our Database and we can select from the Dropdown of those suggested based on the name entered.
6. Enter a candidate title that is eyecatching and will draw attention of the potential hiring managers
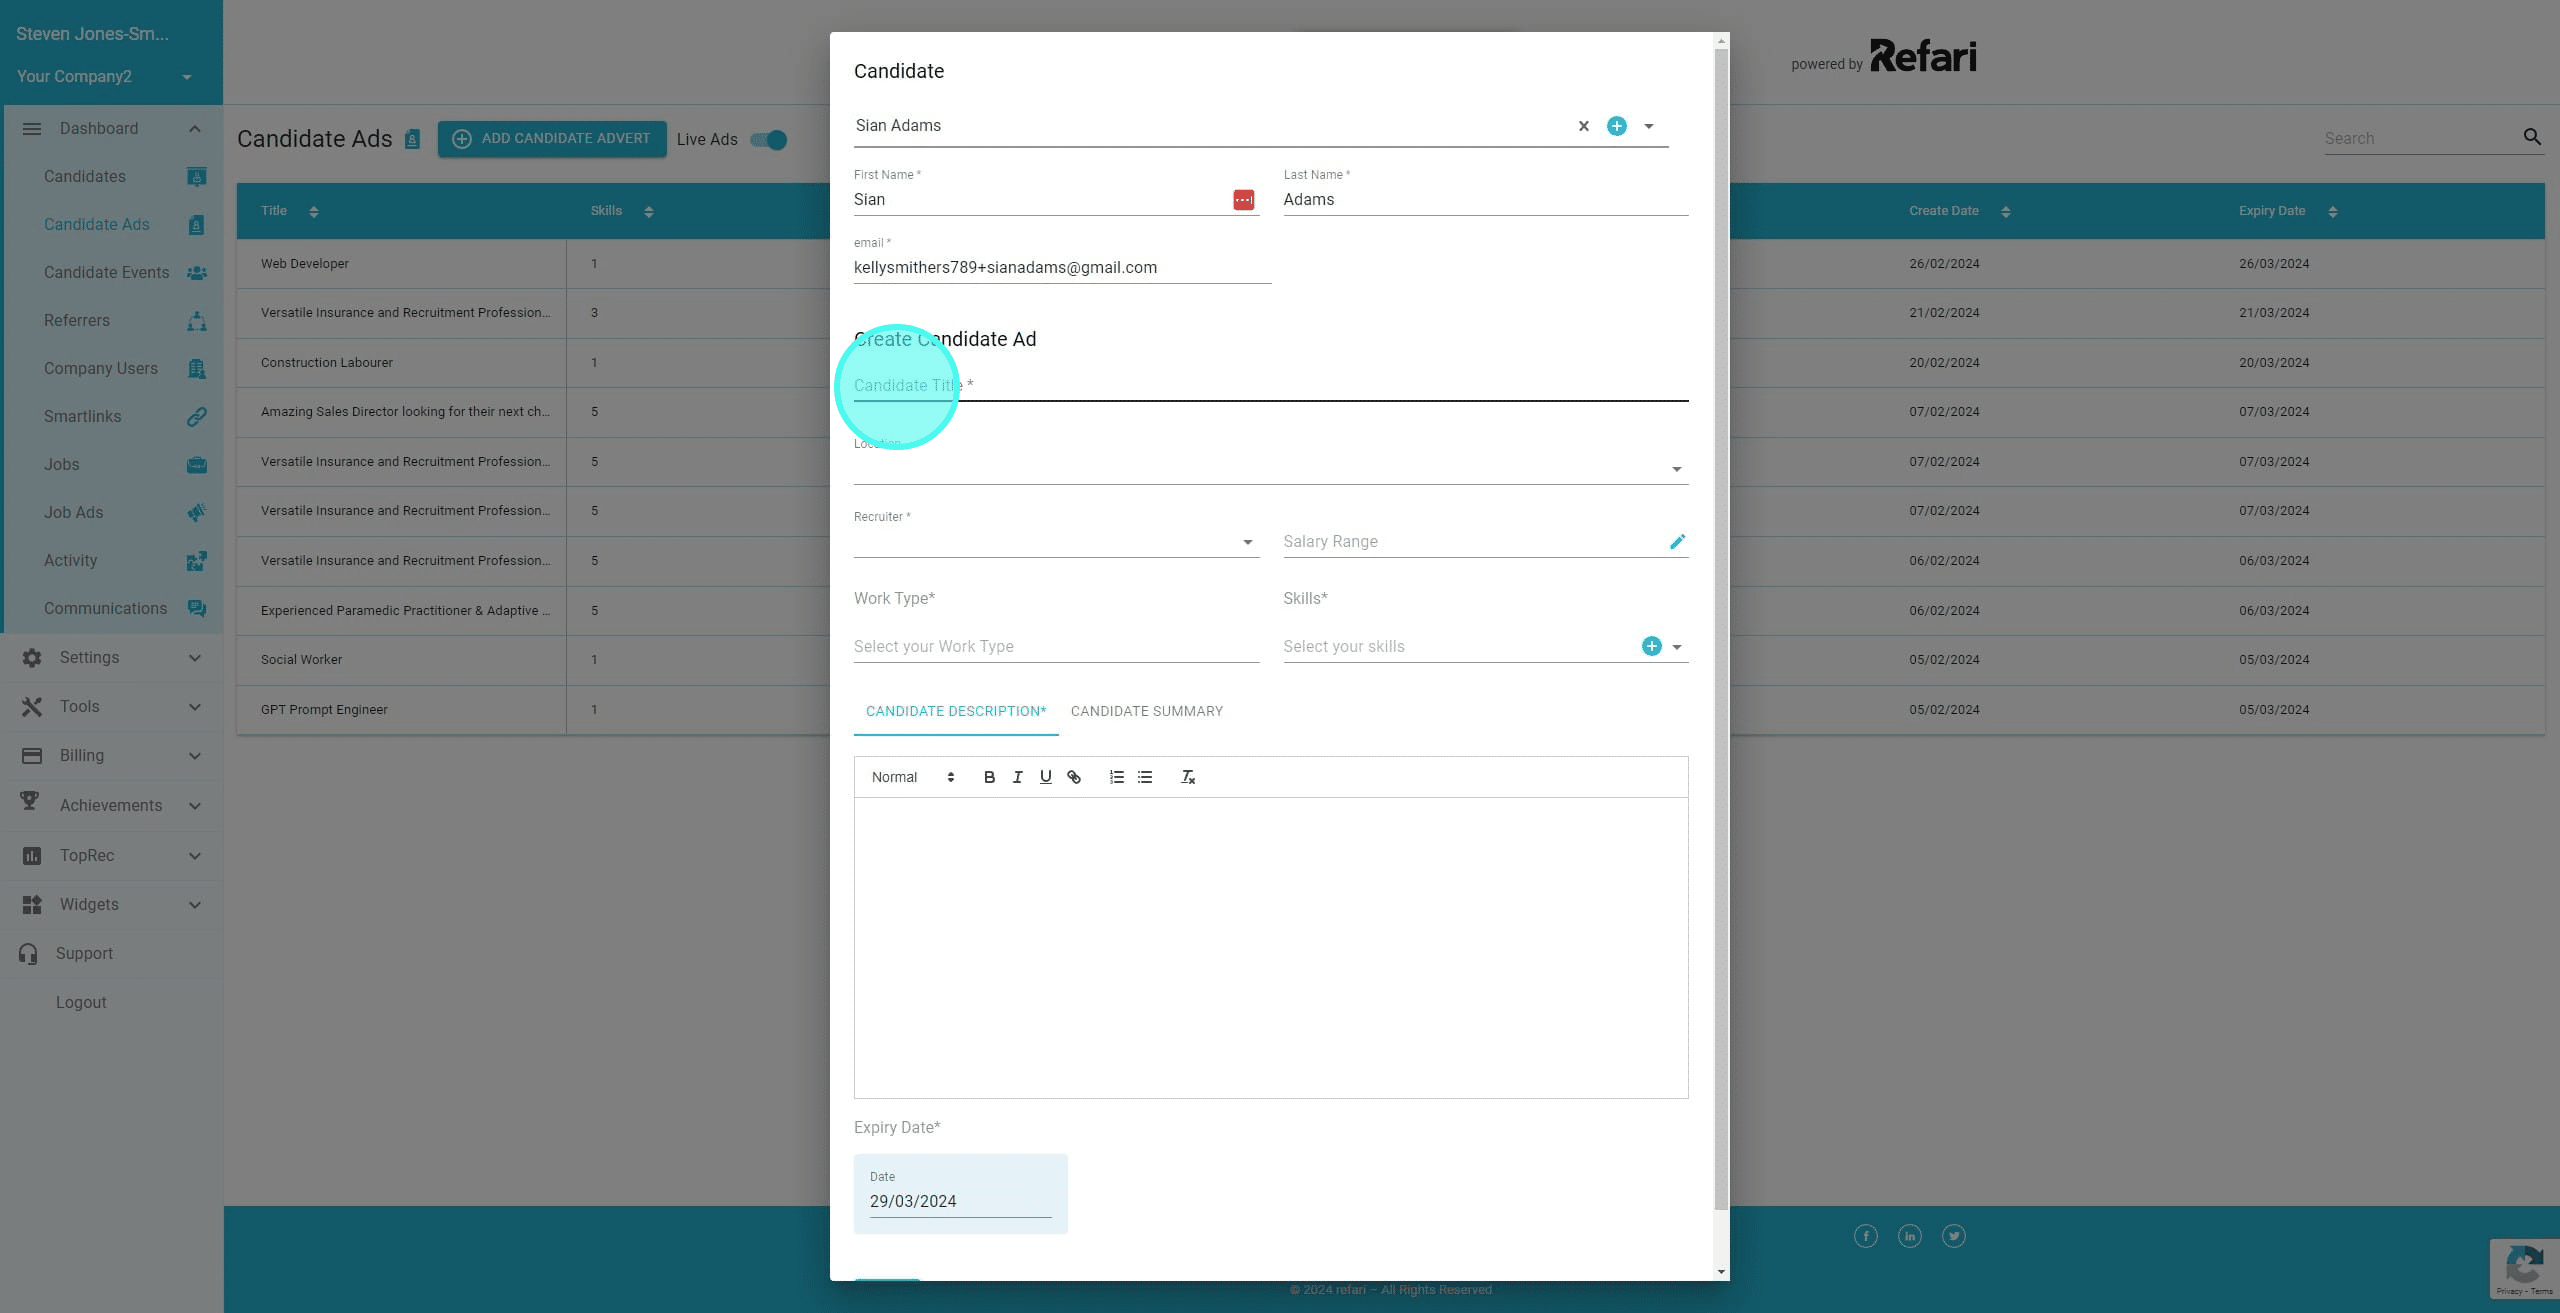
7. We can click here to add location(s) where that the candidate is happy to work
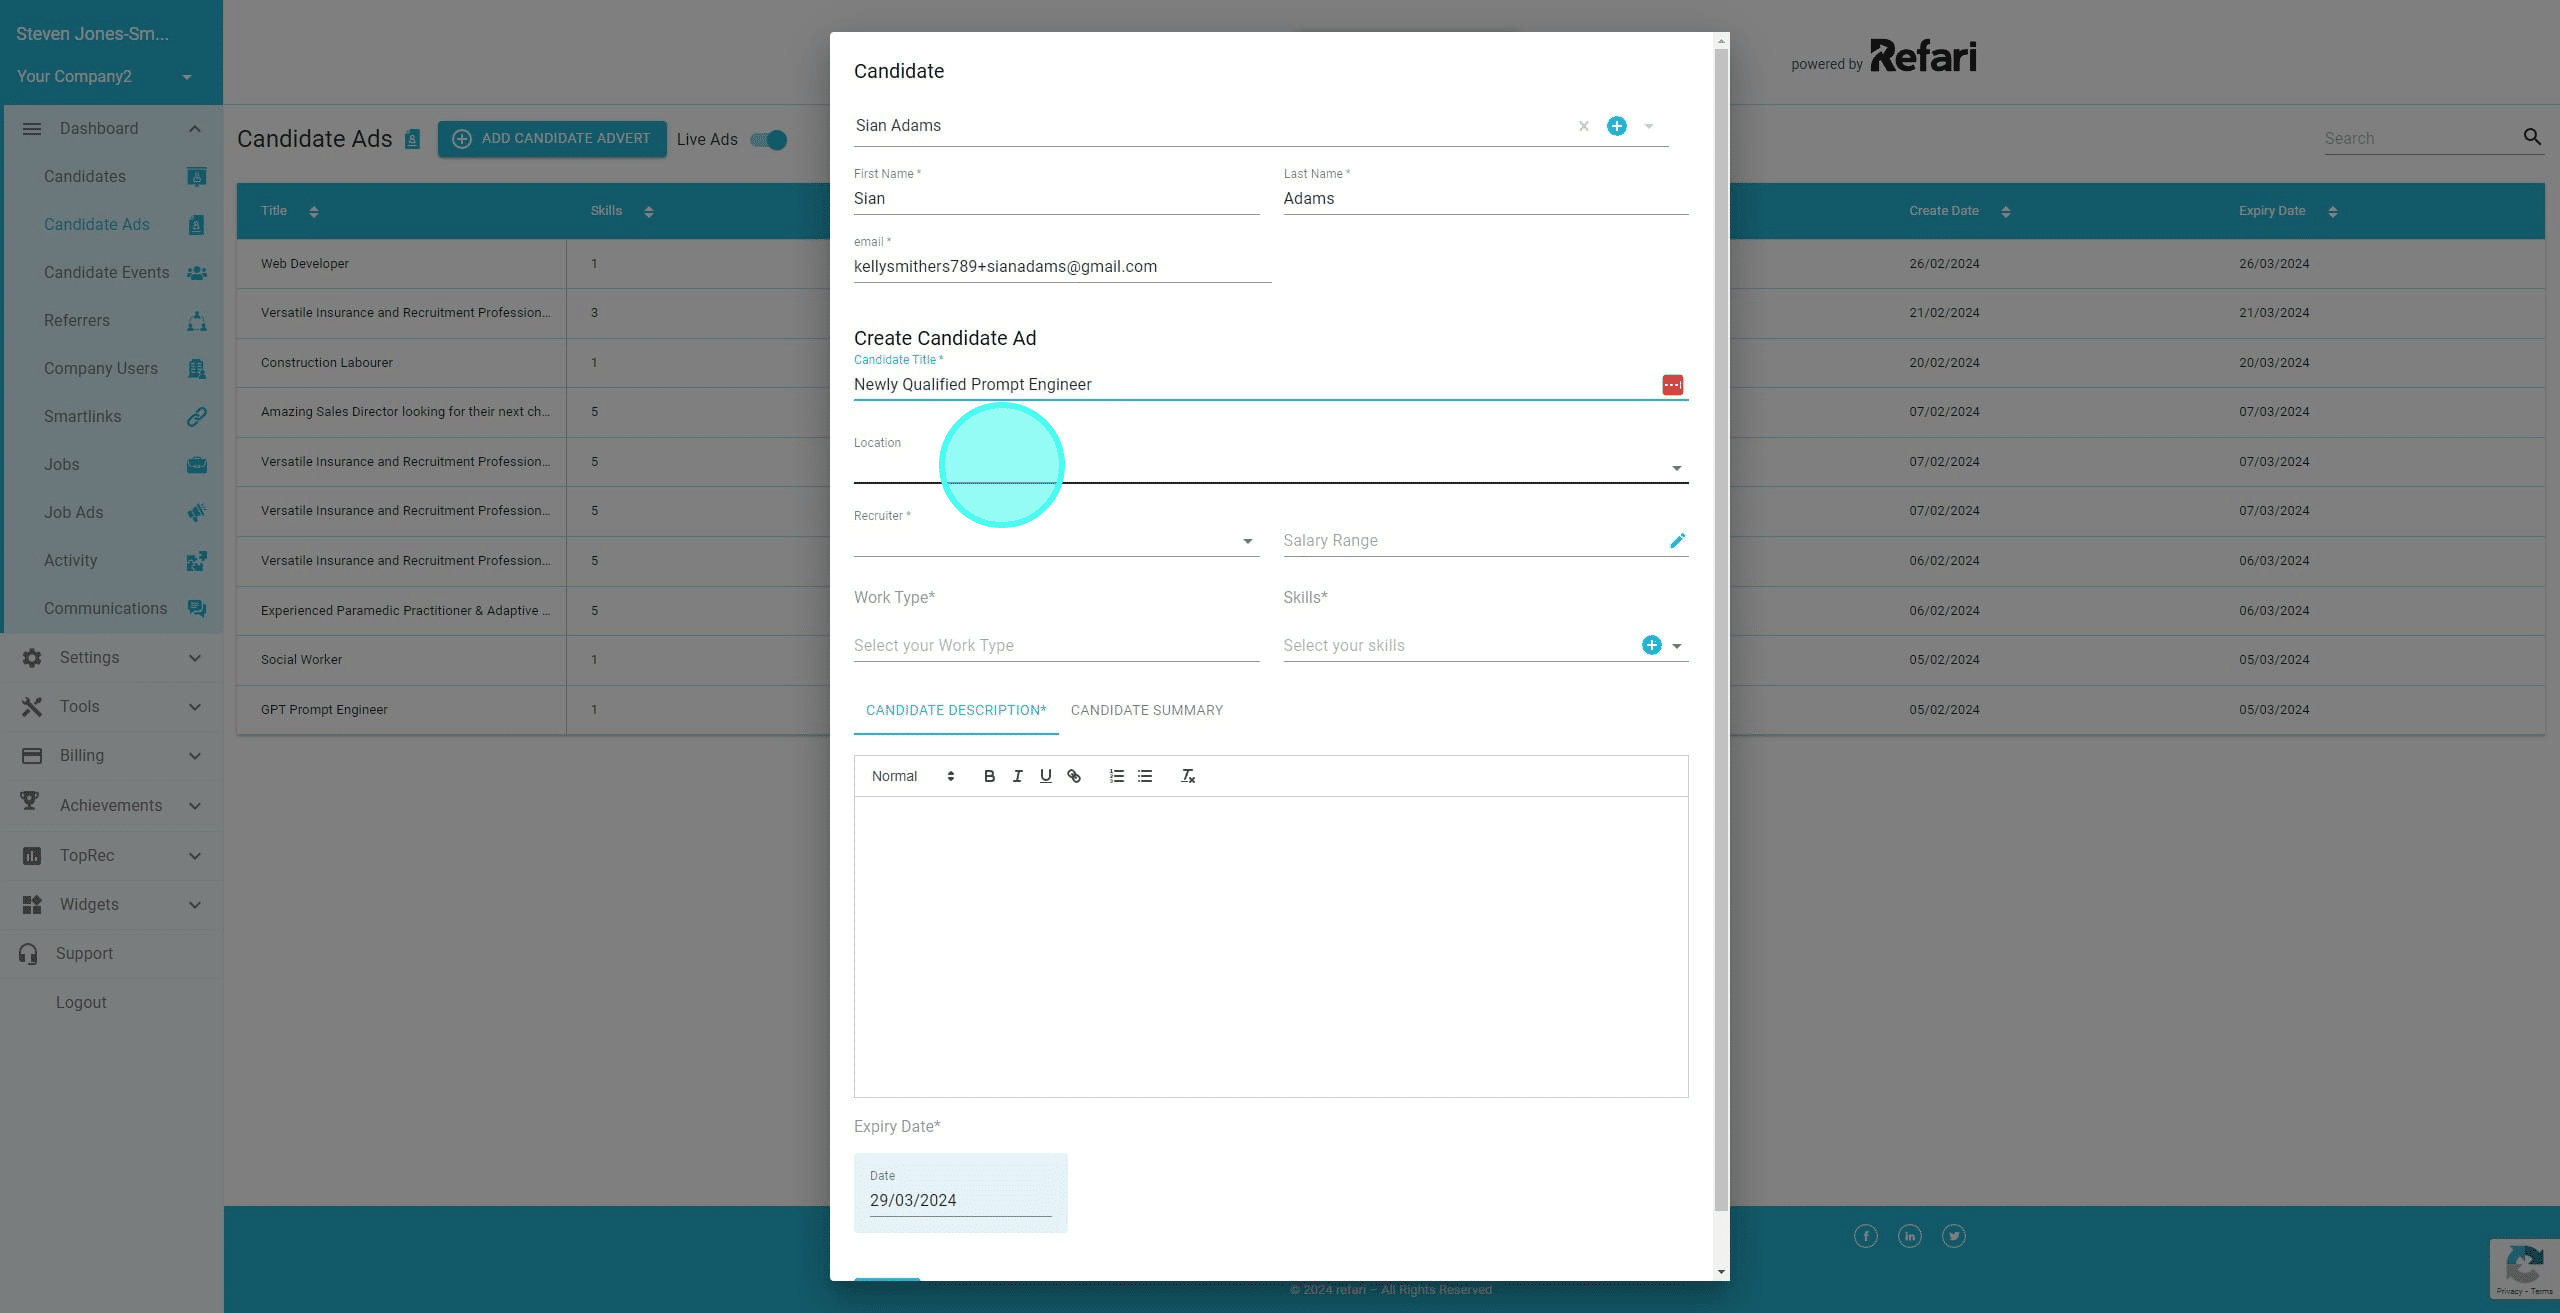
8. In this instance, the location is not currently in our database, so we are going to add another one using the Manage Locations button. If the location(s) are already in your database, you can simply select them from the dropdown and jump to step 15.
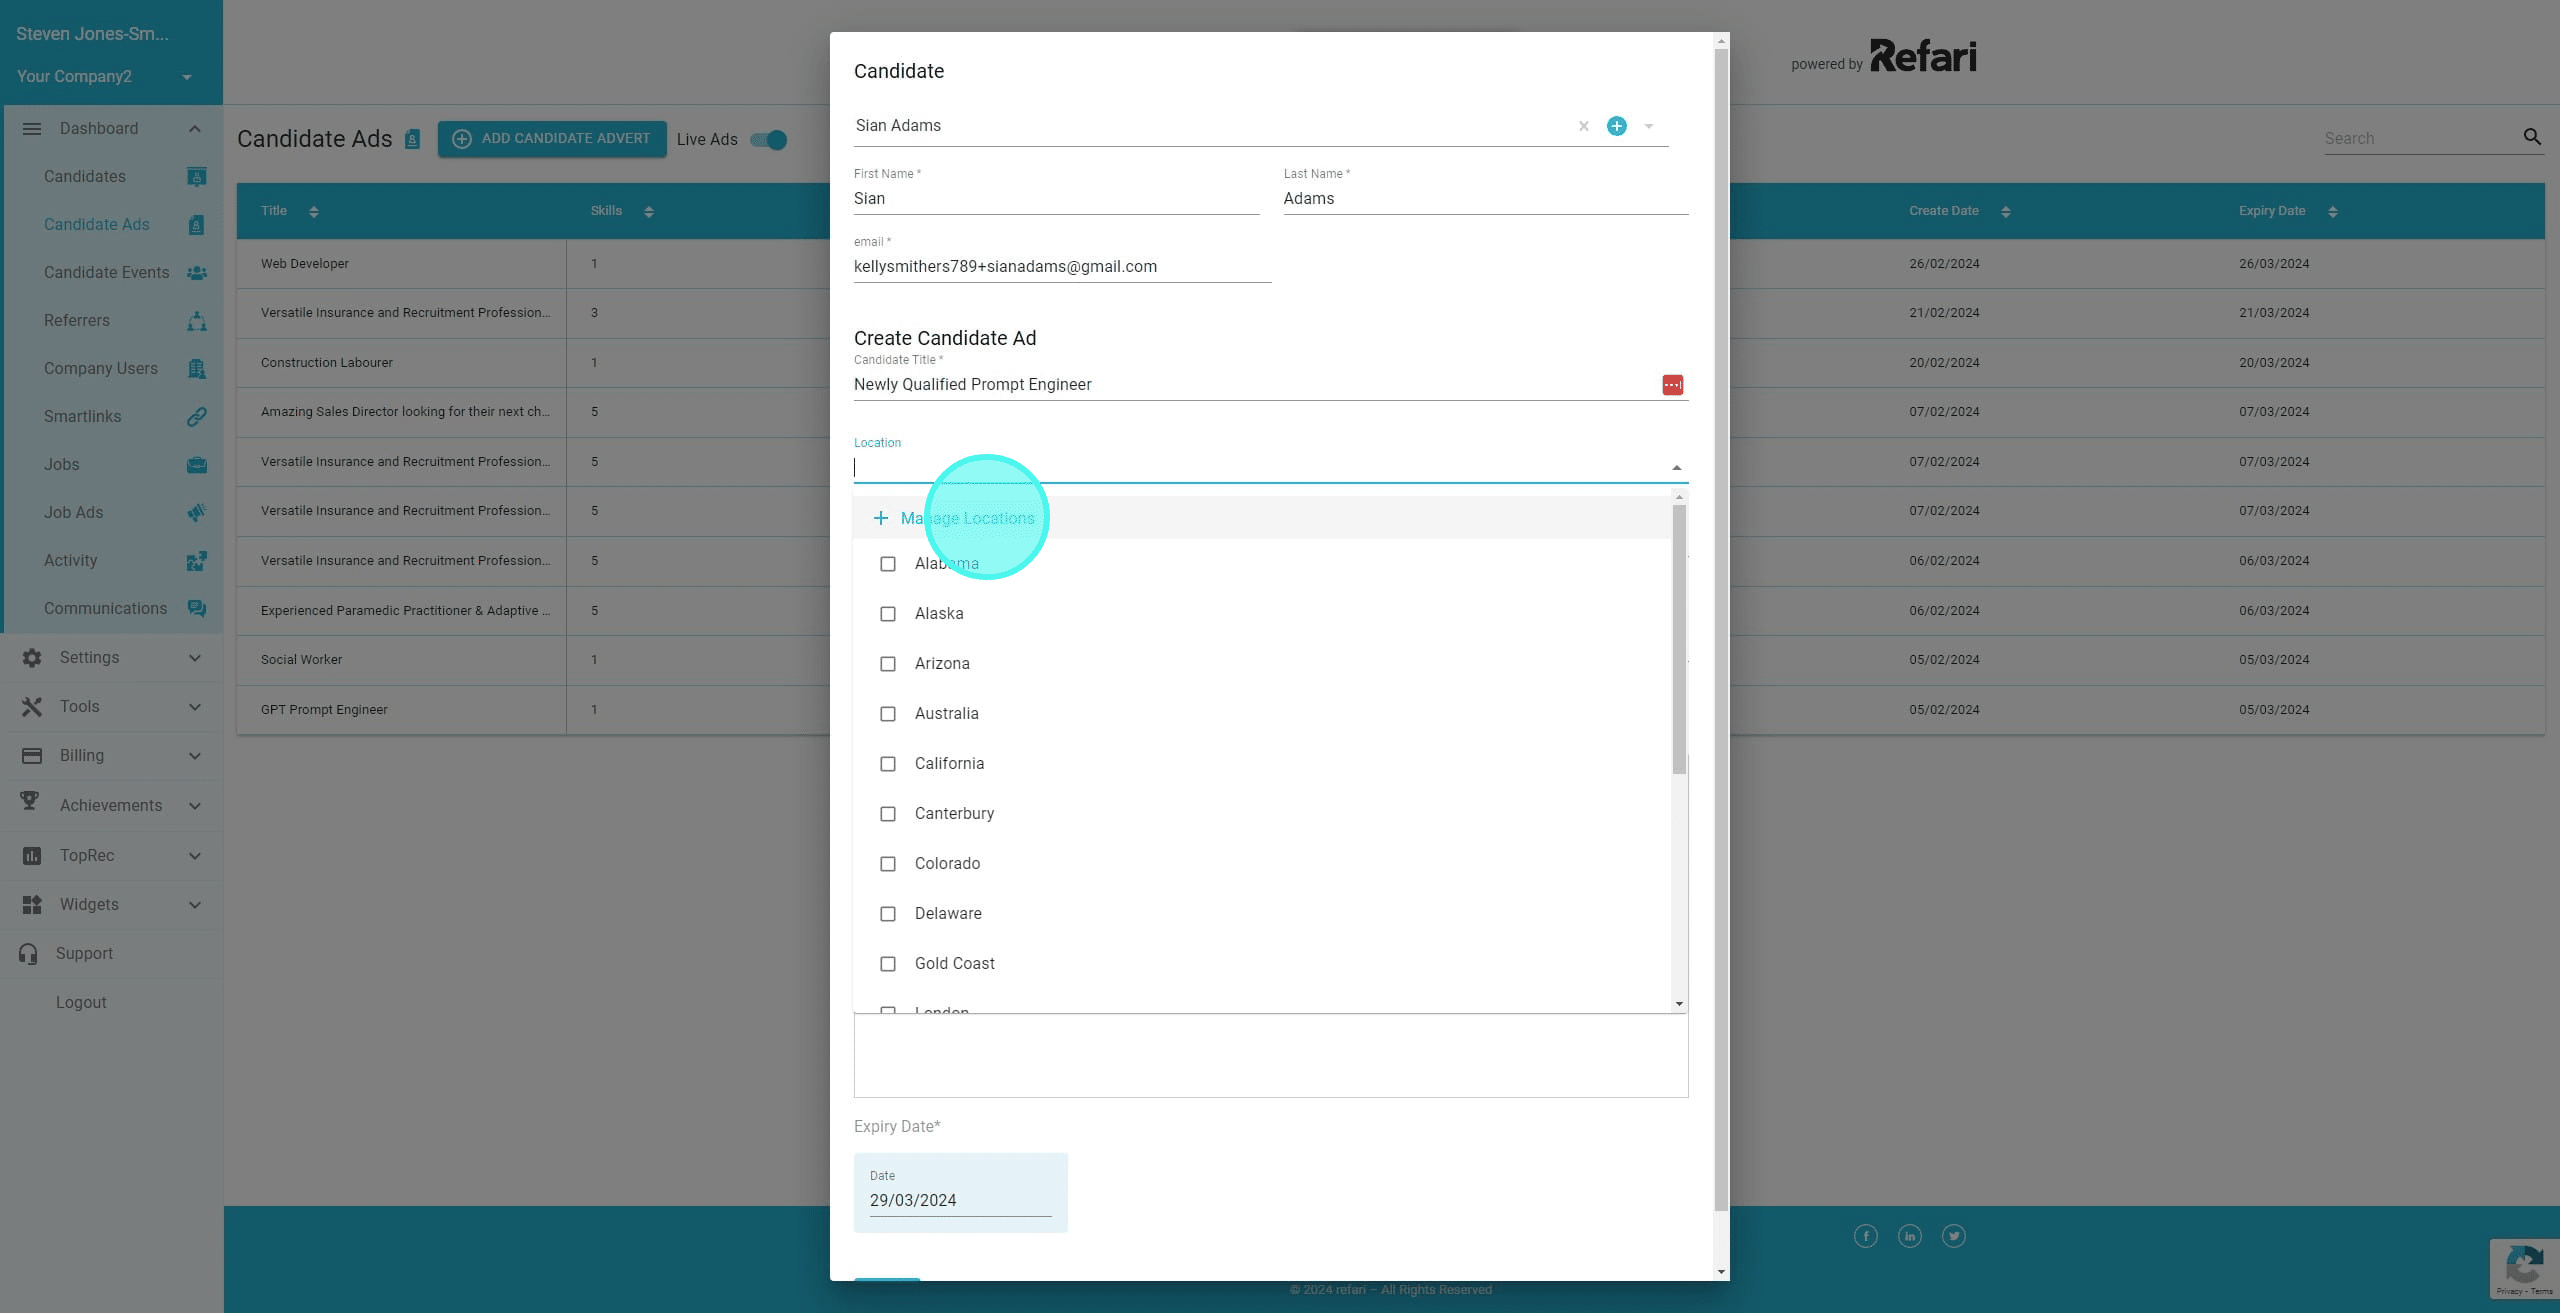
9. Click here and enter the new location.
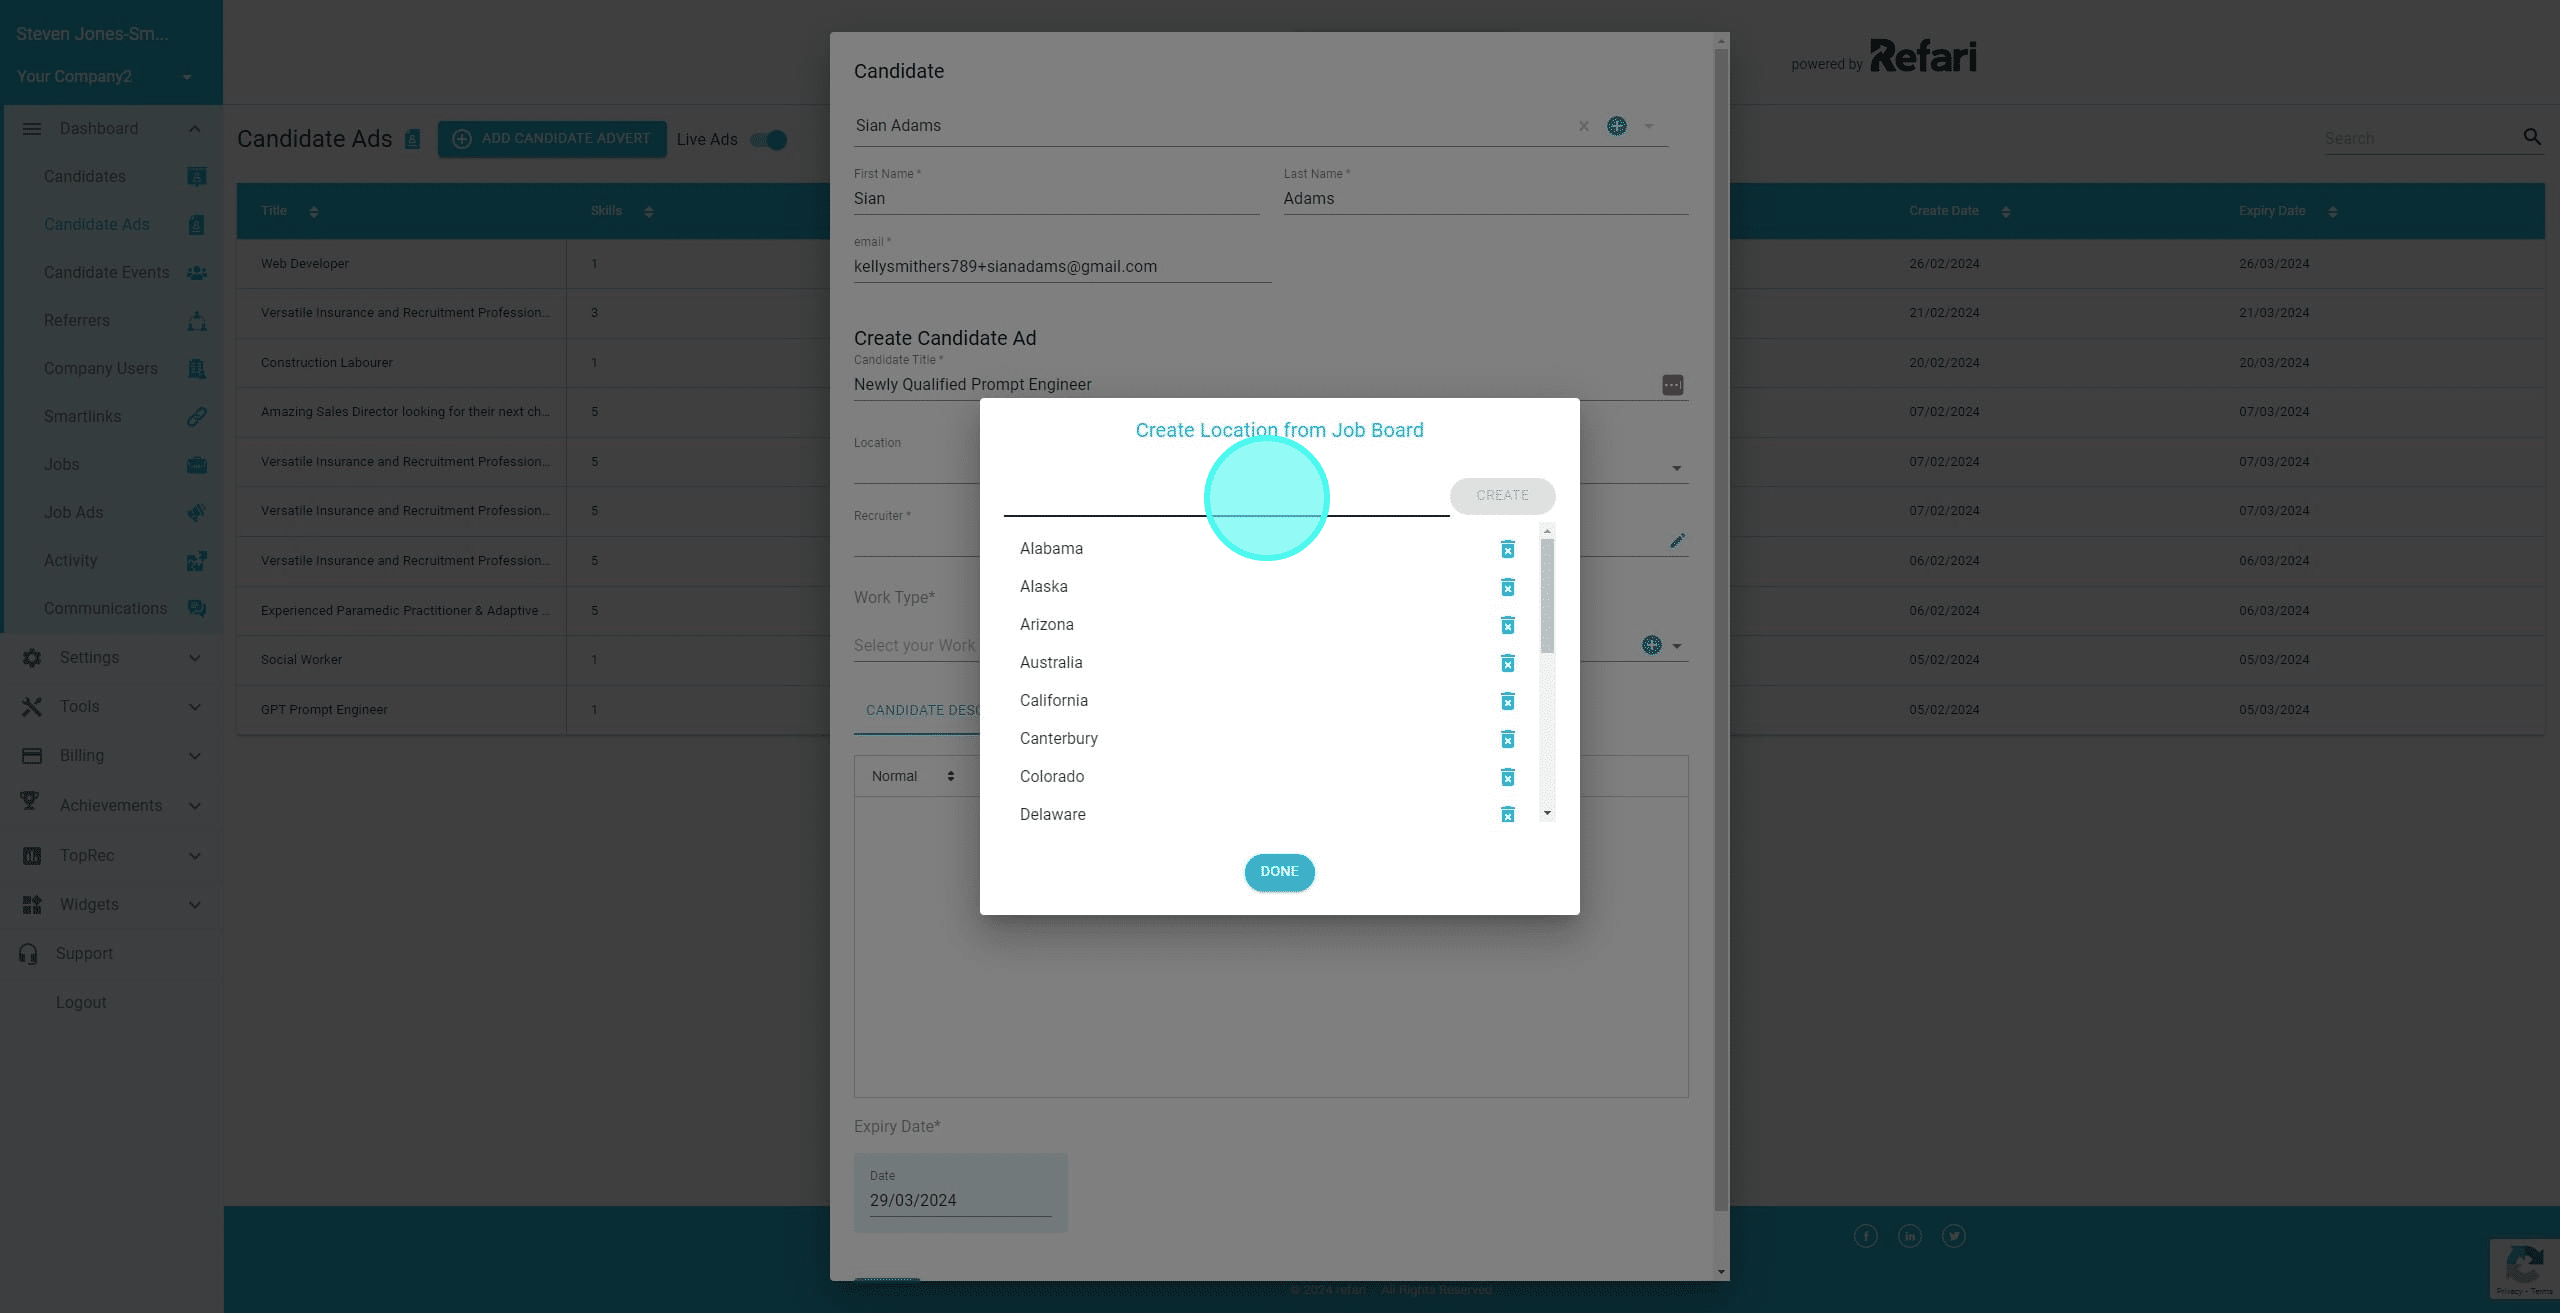
10. Click on "Create" to add that new location.
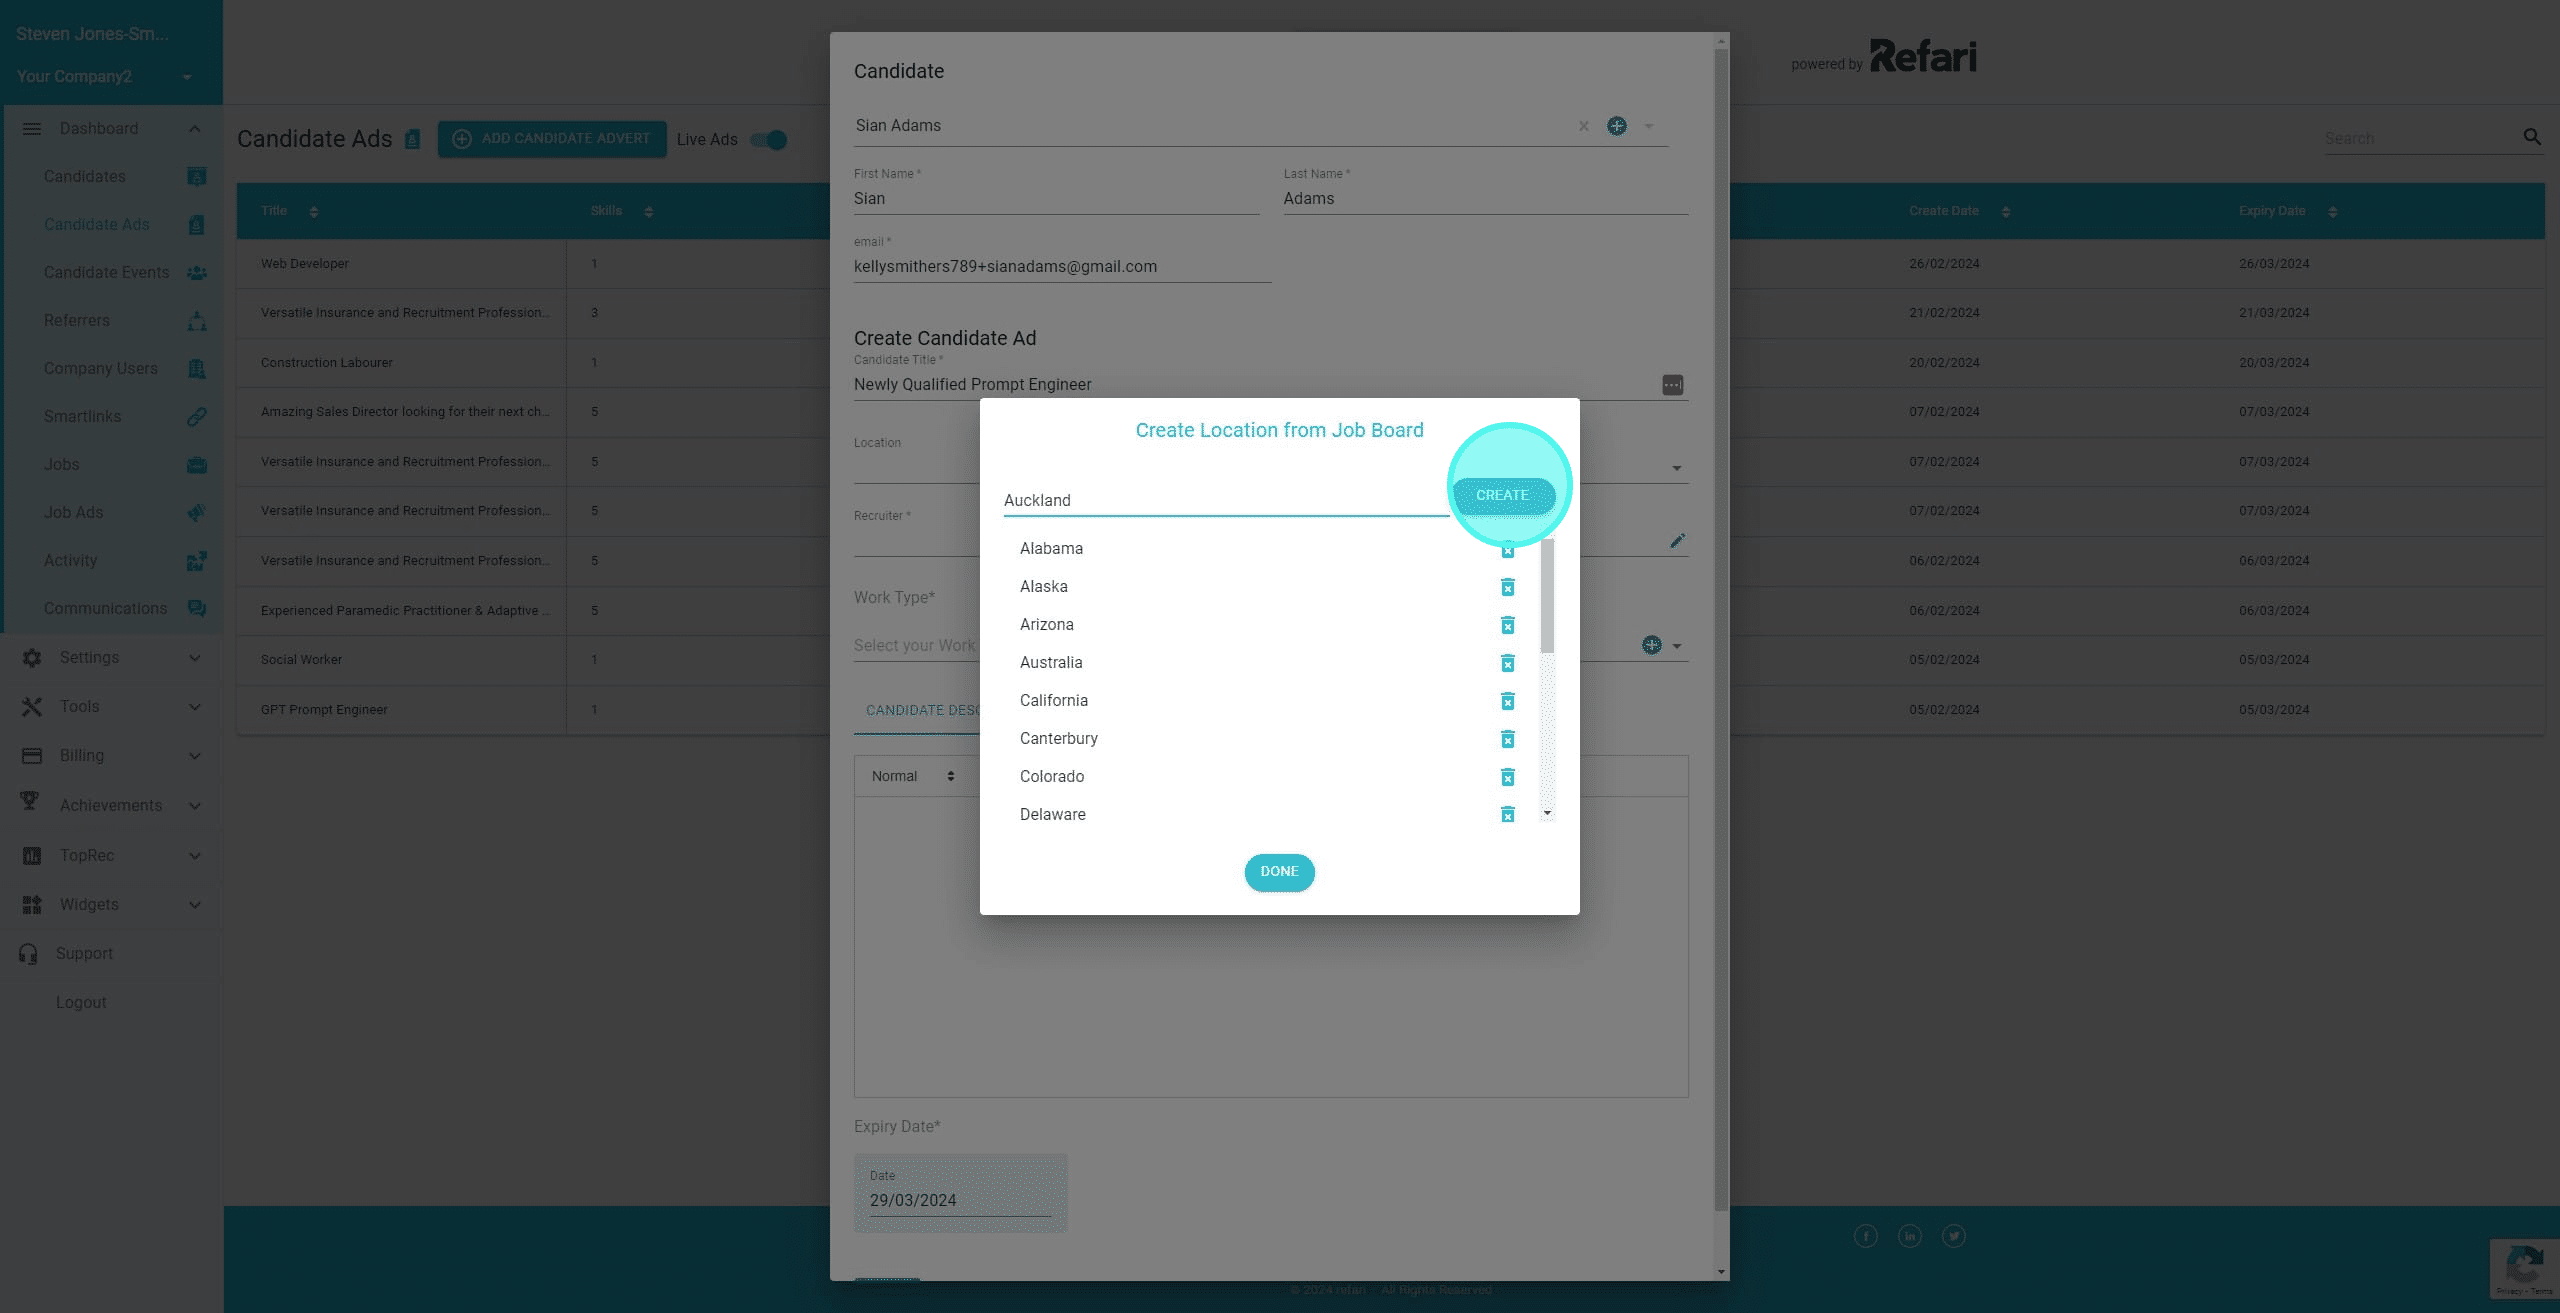
11. Click on "Done"
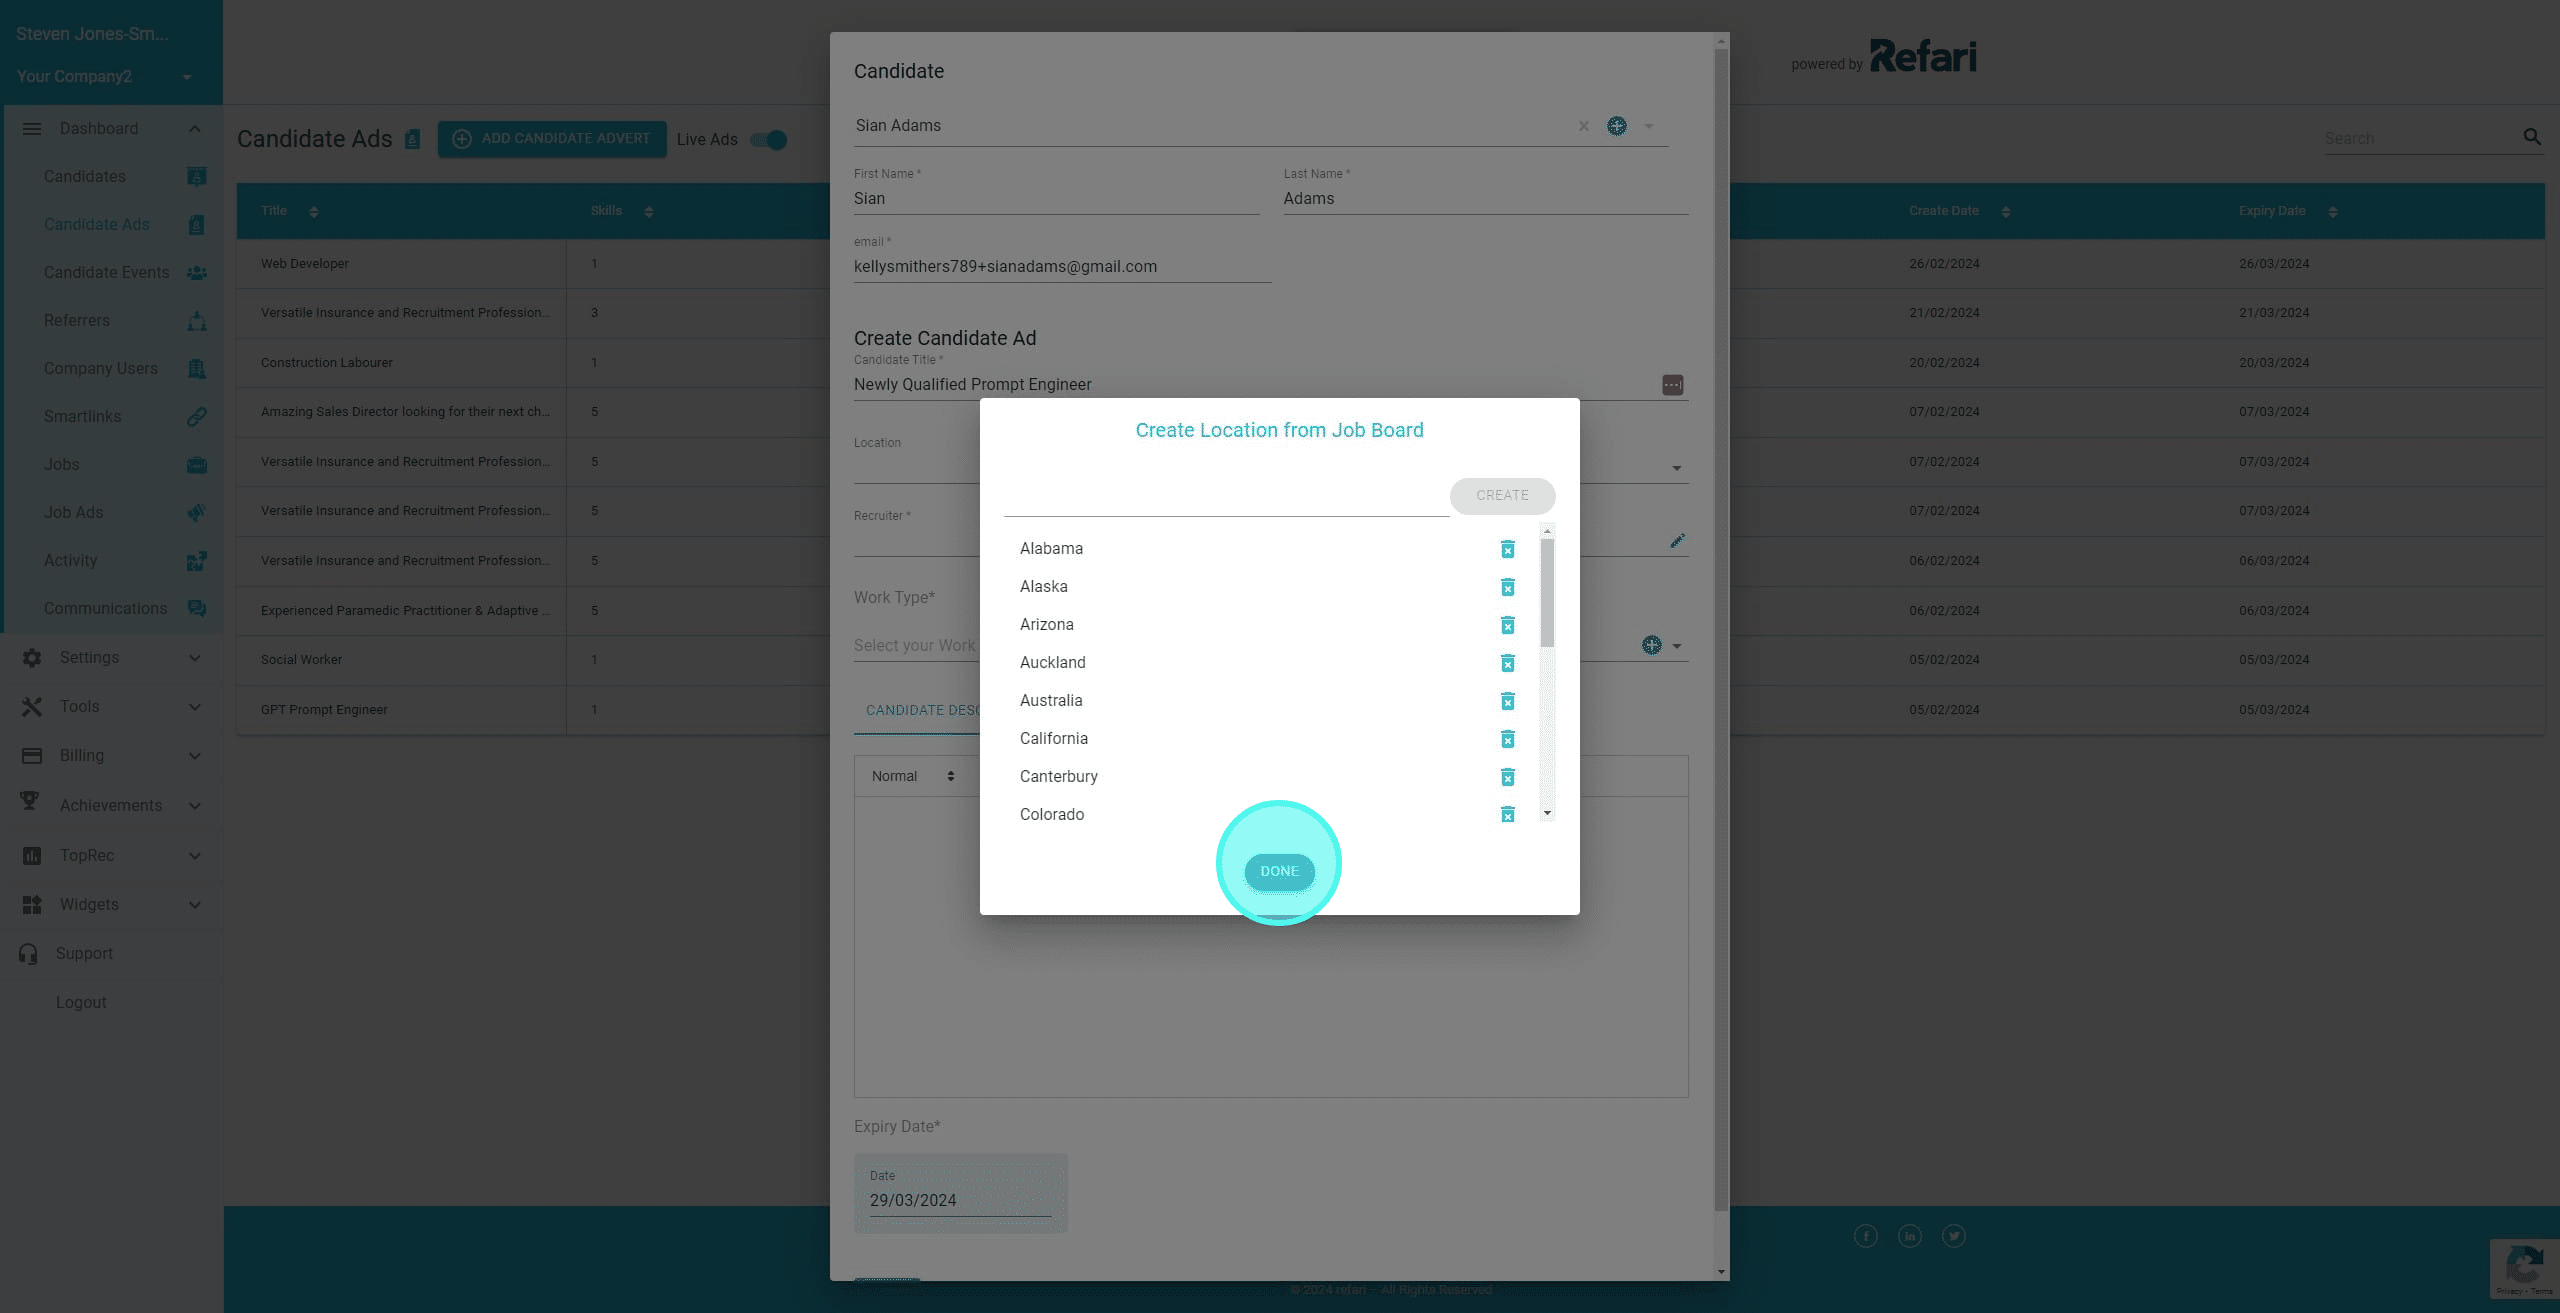
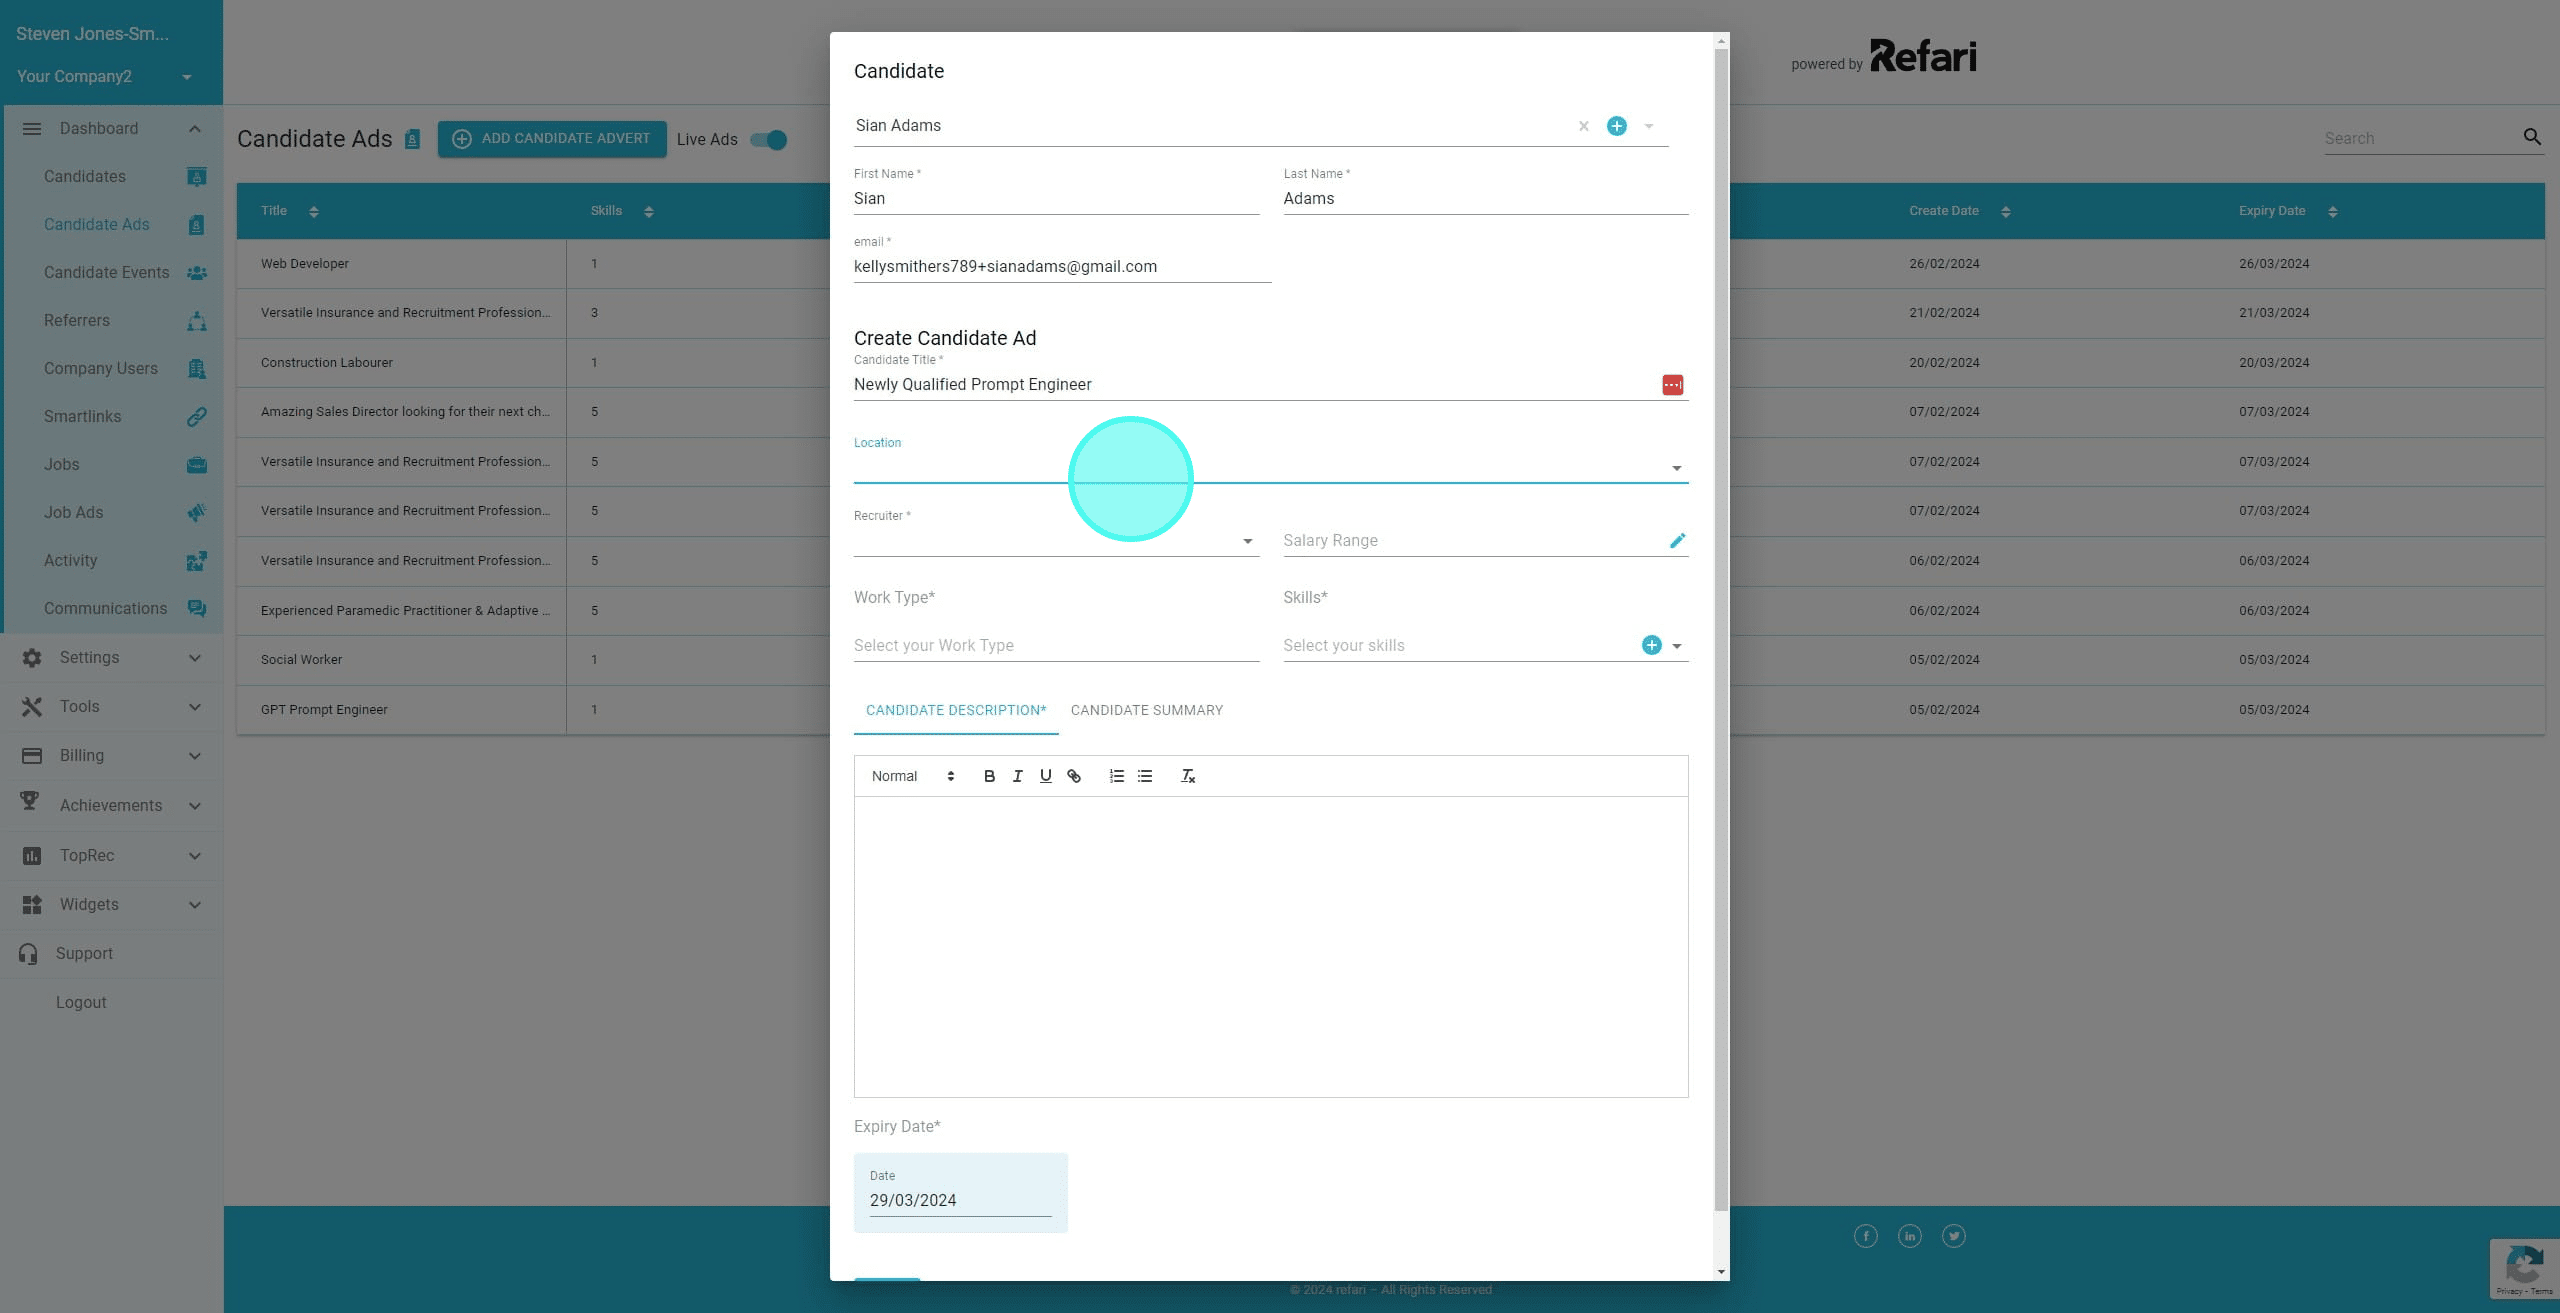
12. The new location is added, so let's now select it from the dropdown
13. Click in the checkbox to select the new location.
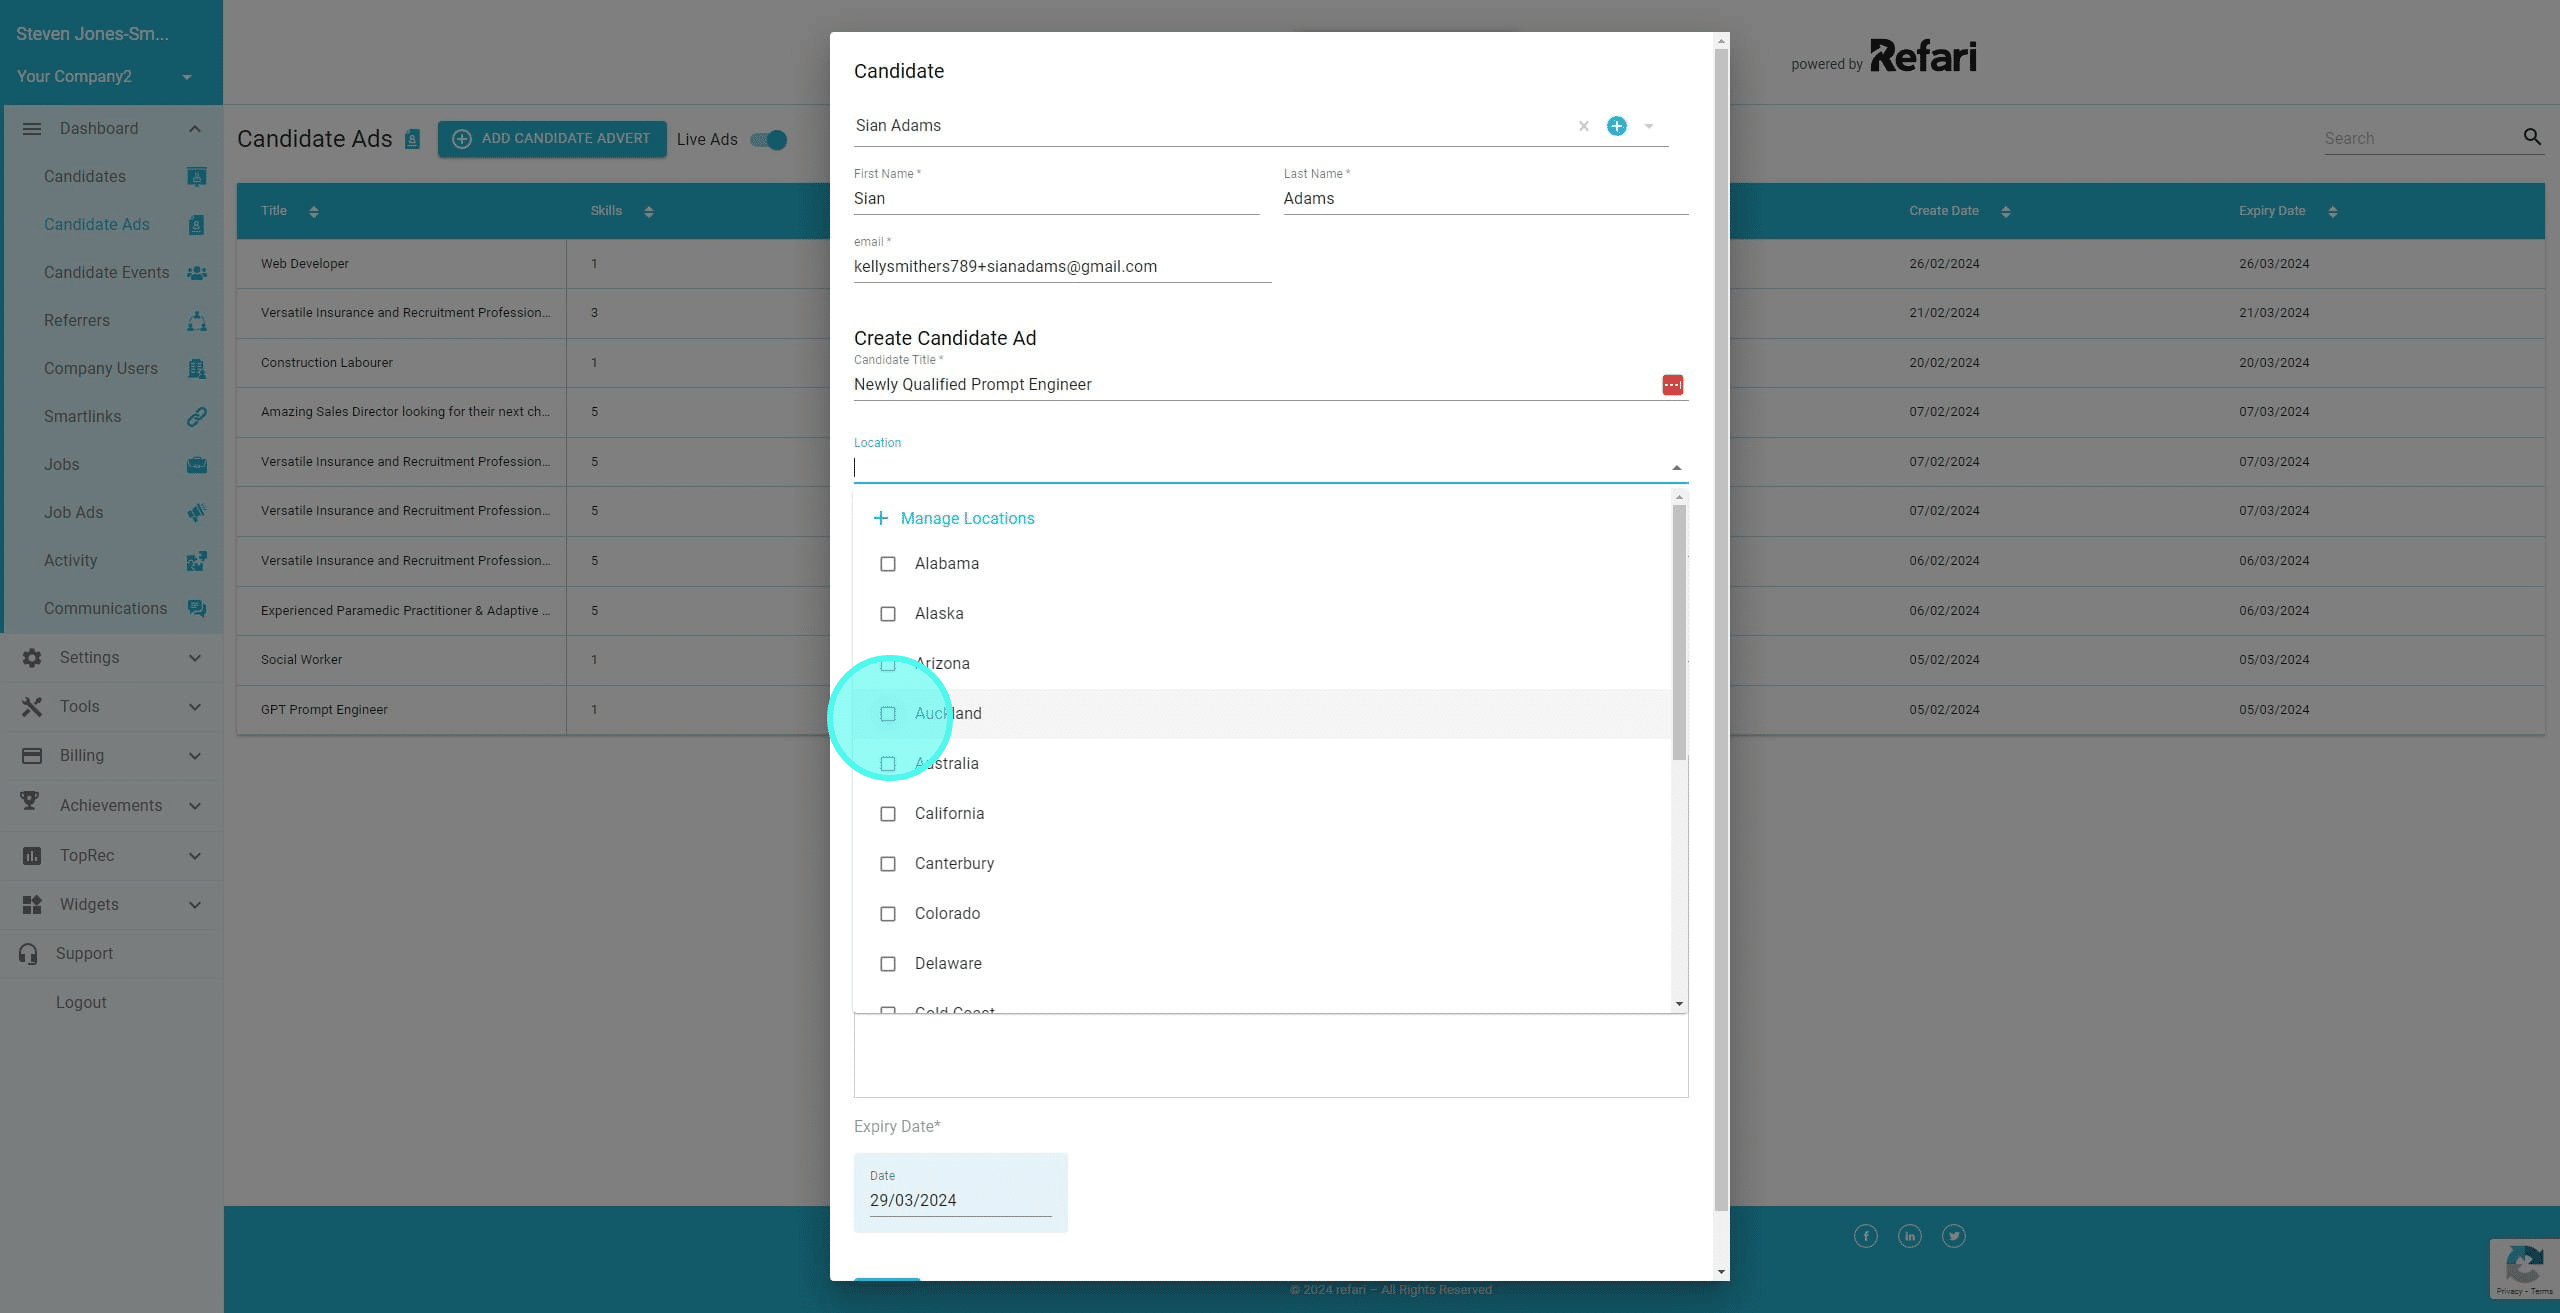
14. We could select multiple locations if we wanted. In this instance, we are just going to select 'Auckland'
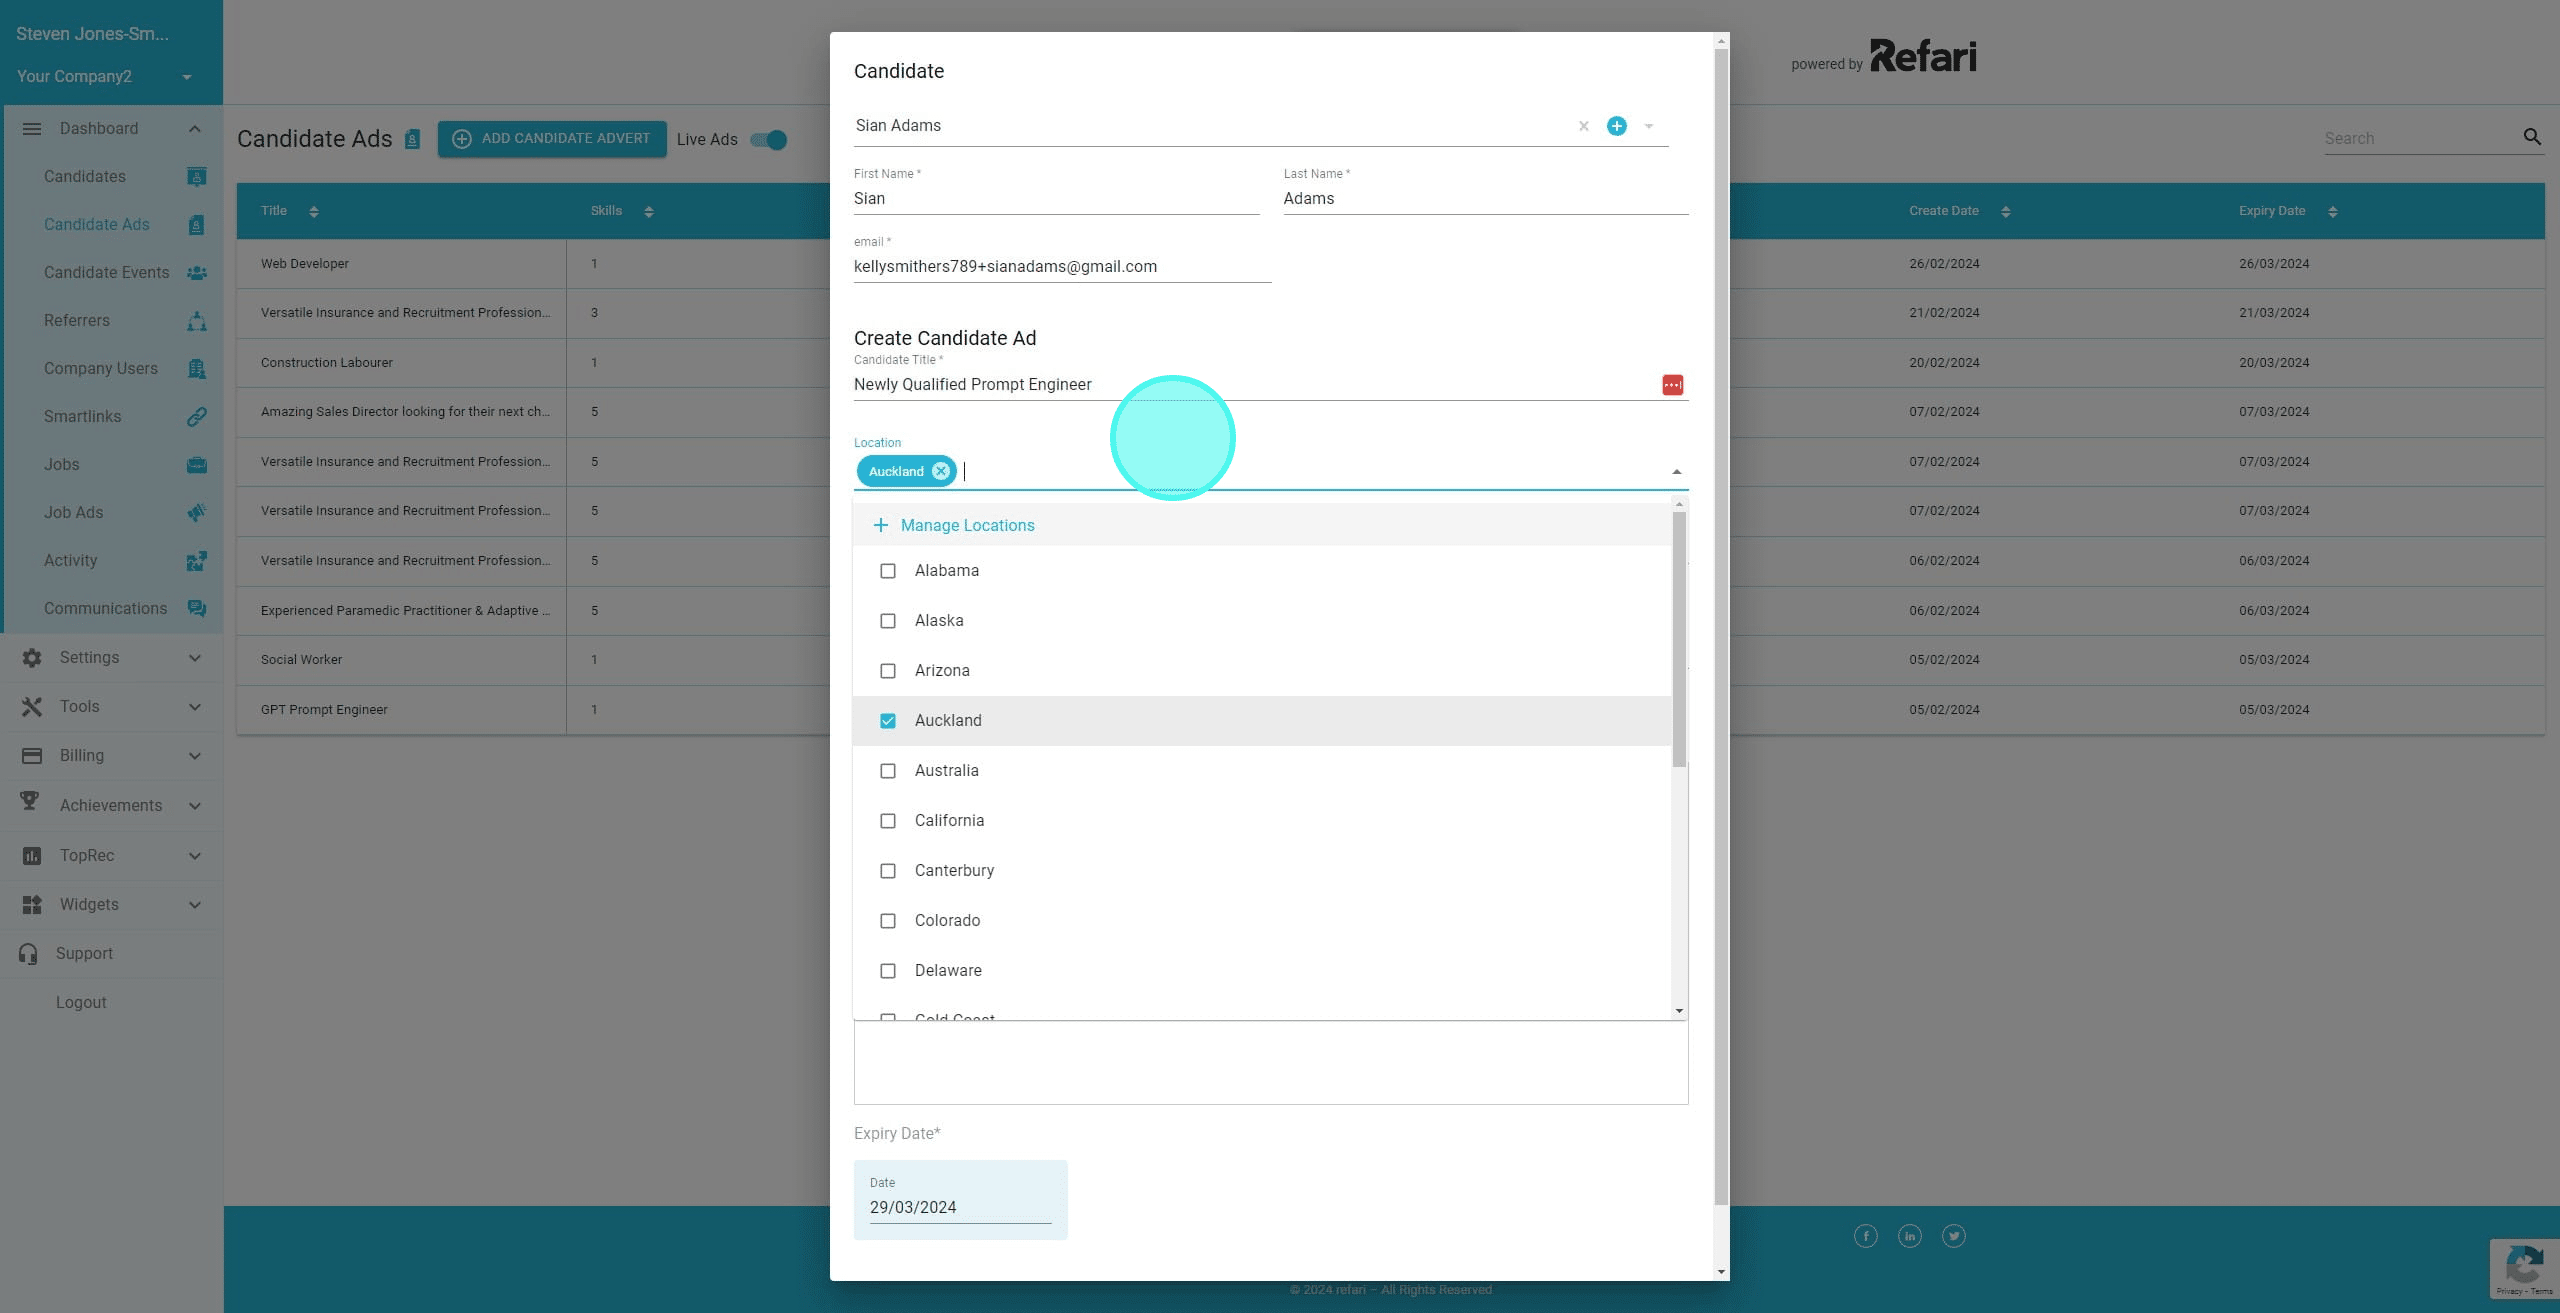
15. We can now choose the Recruiter this candidate will be 'owned by'
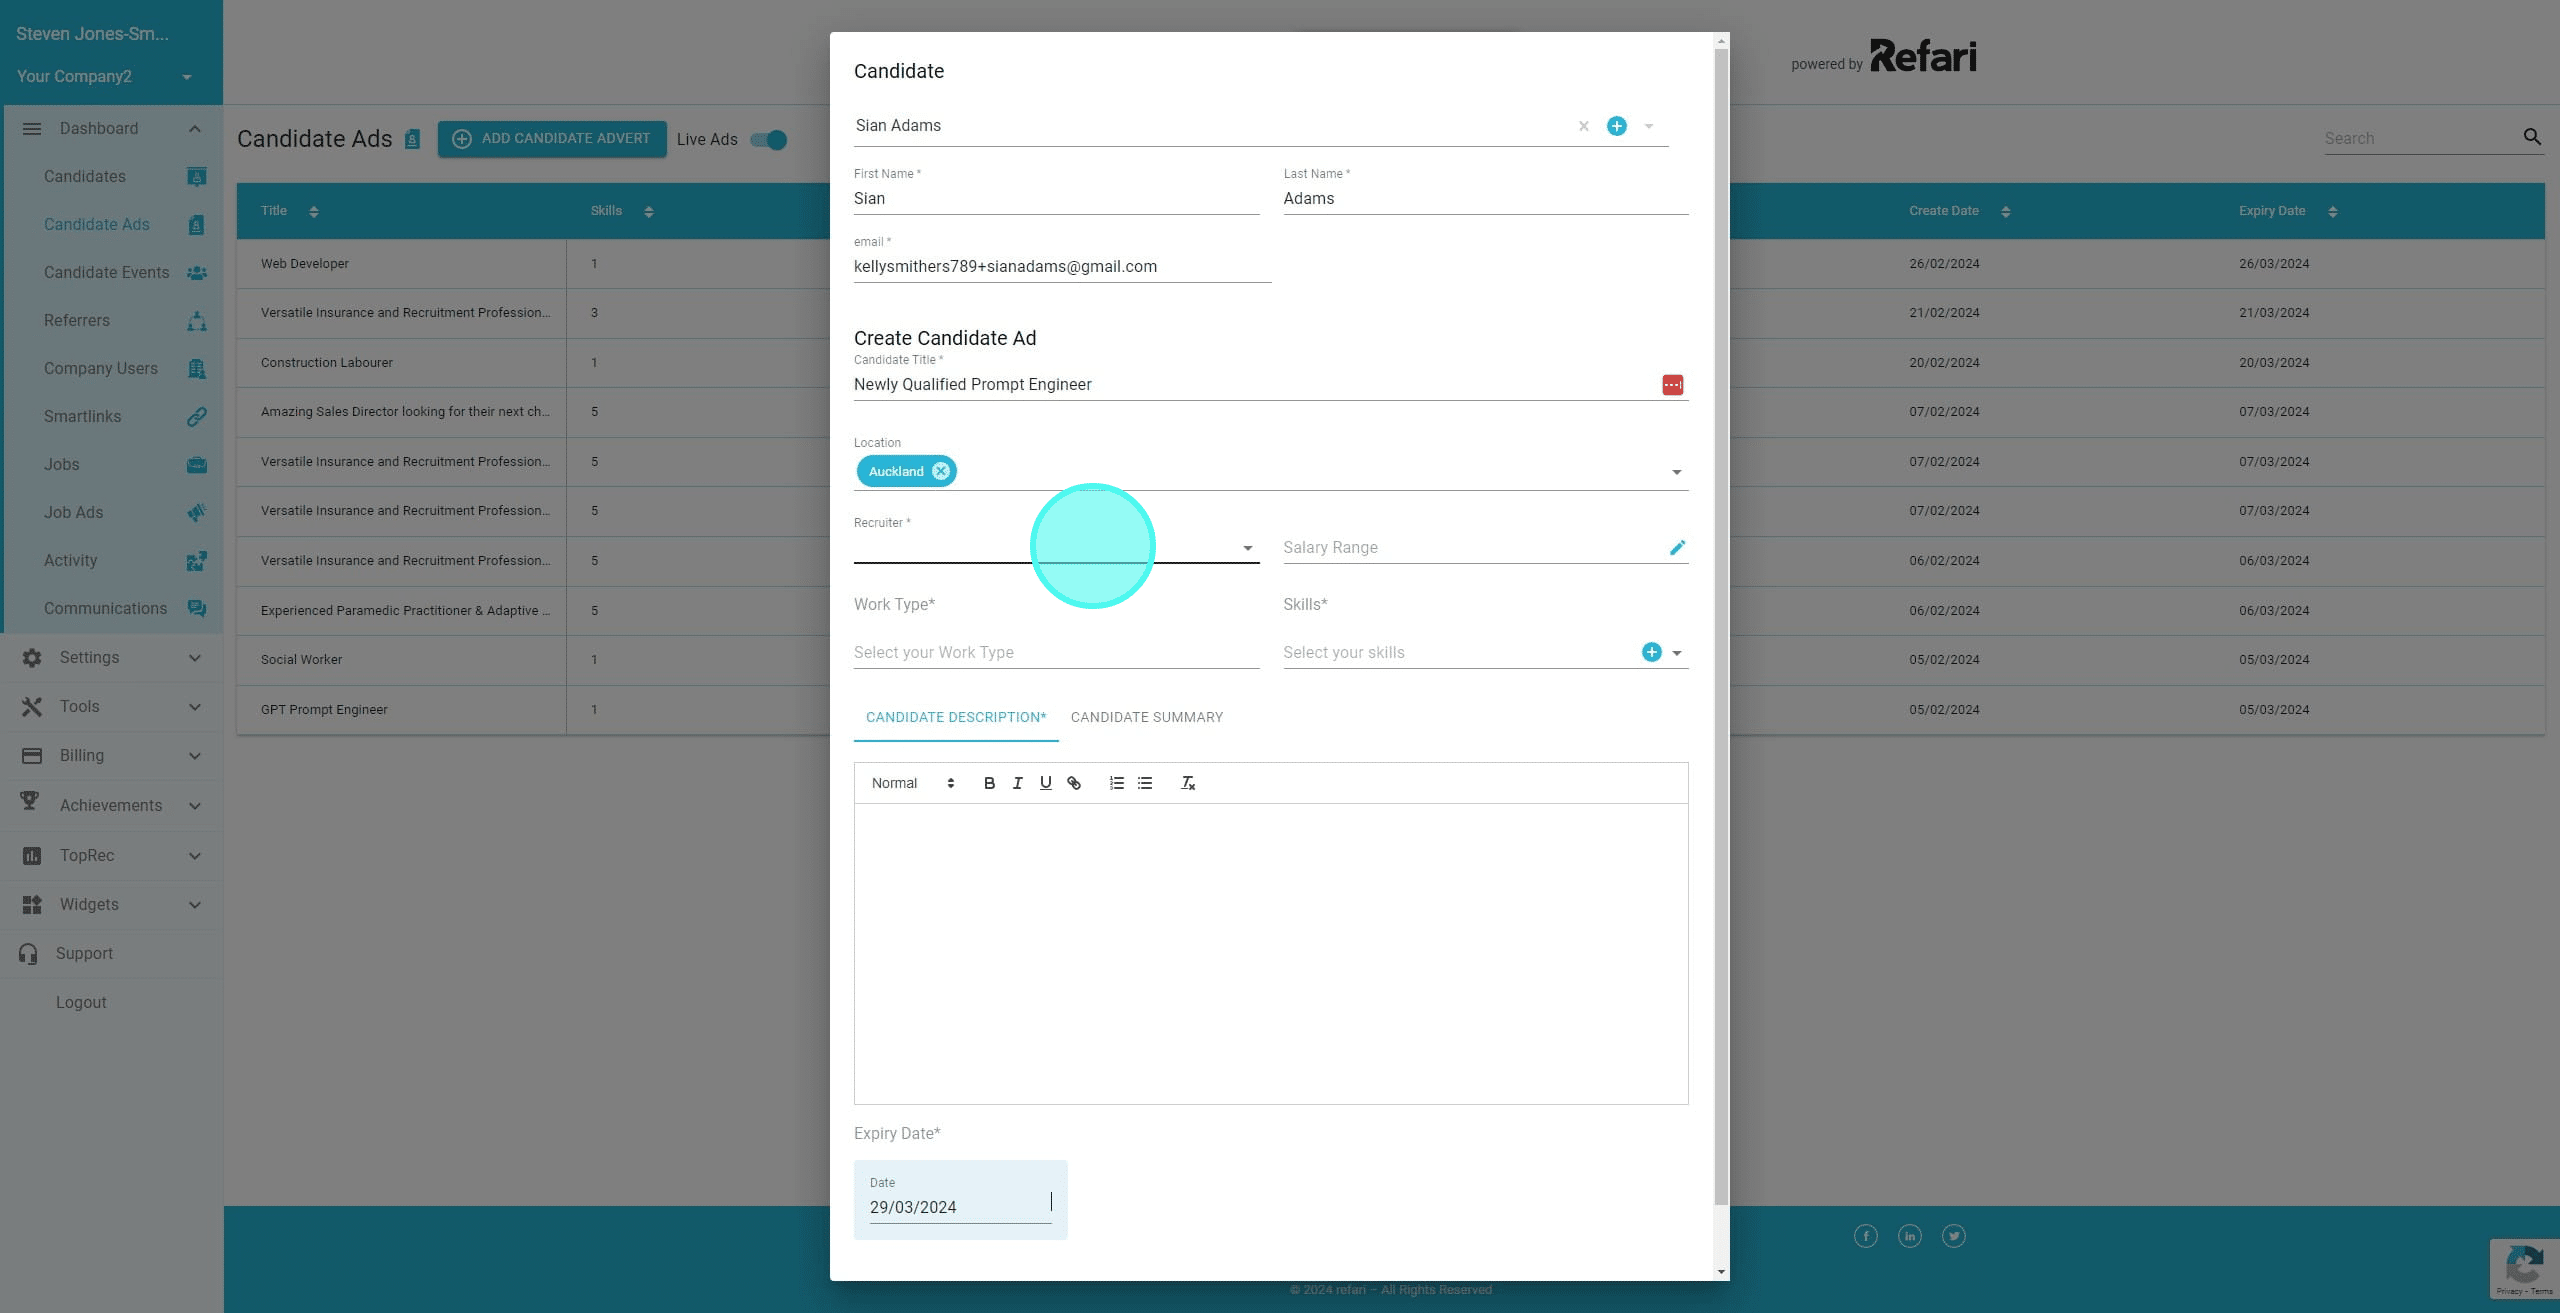
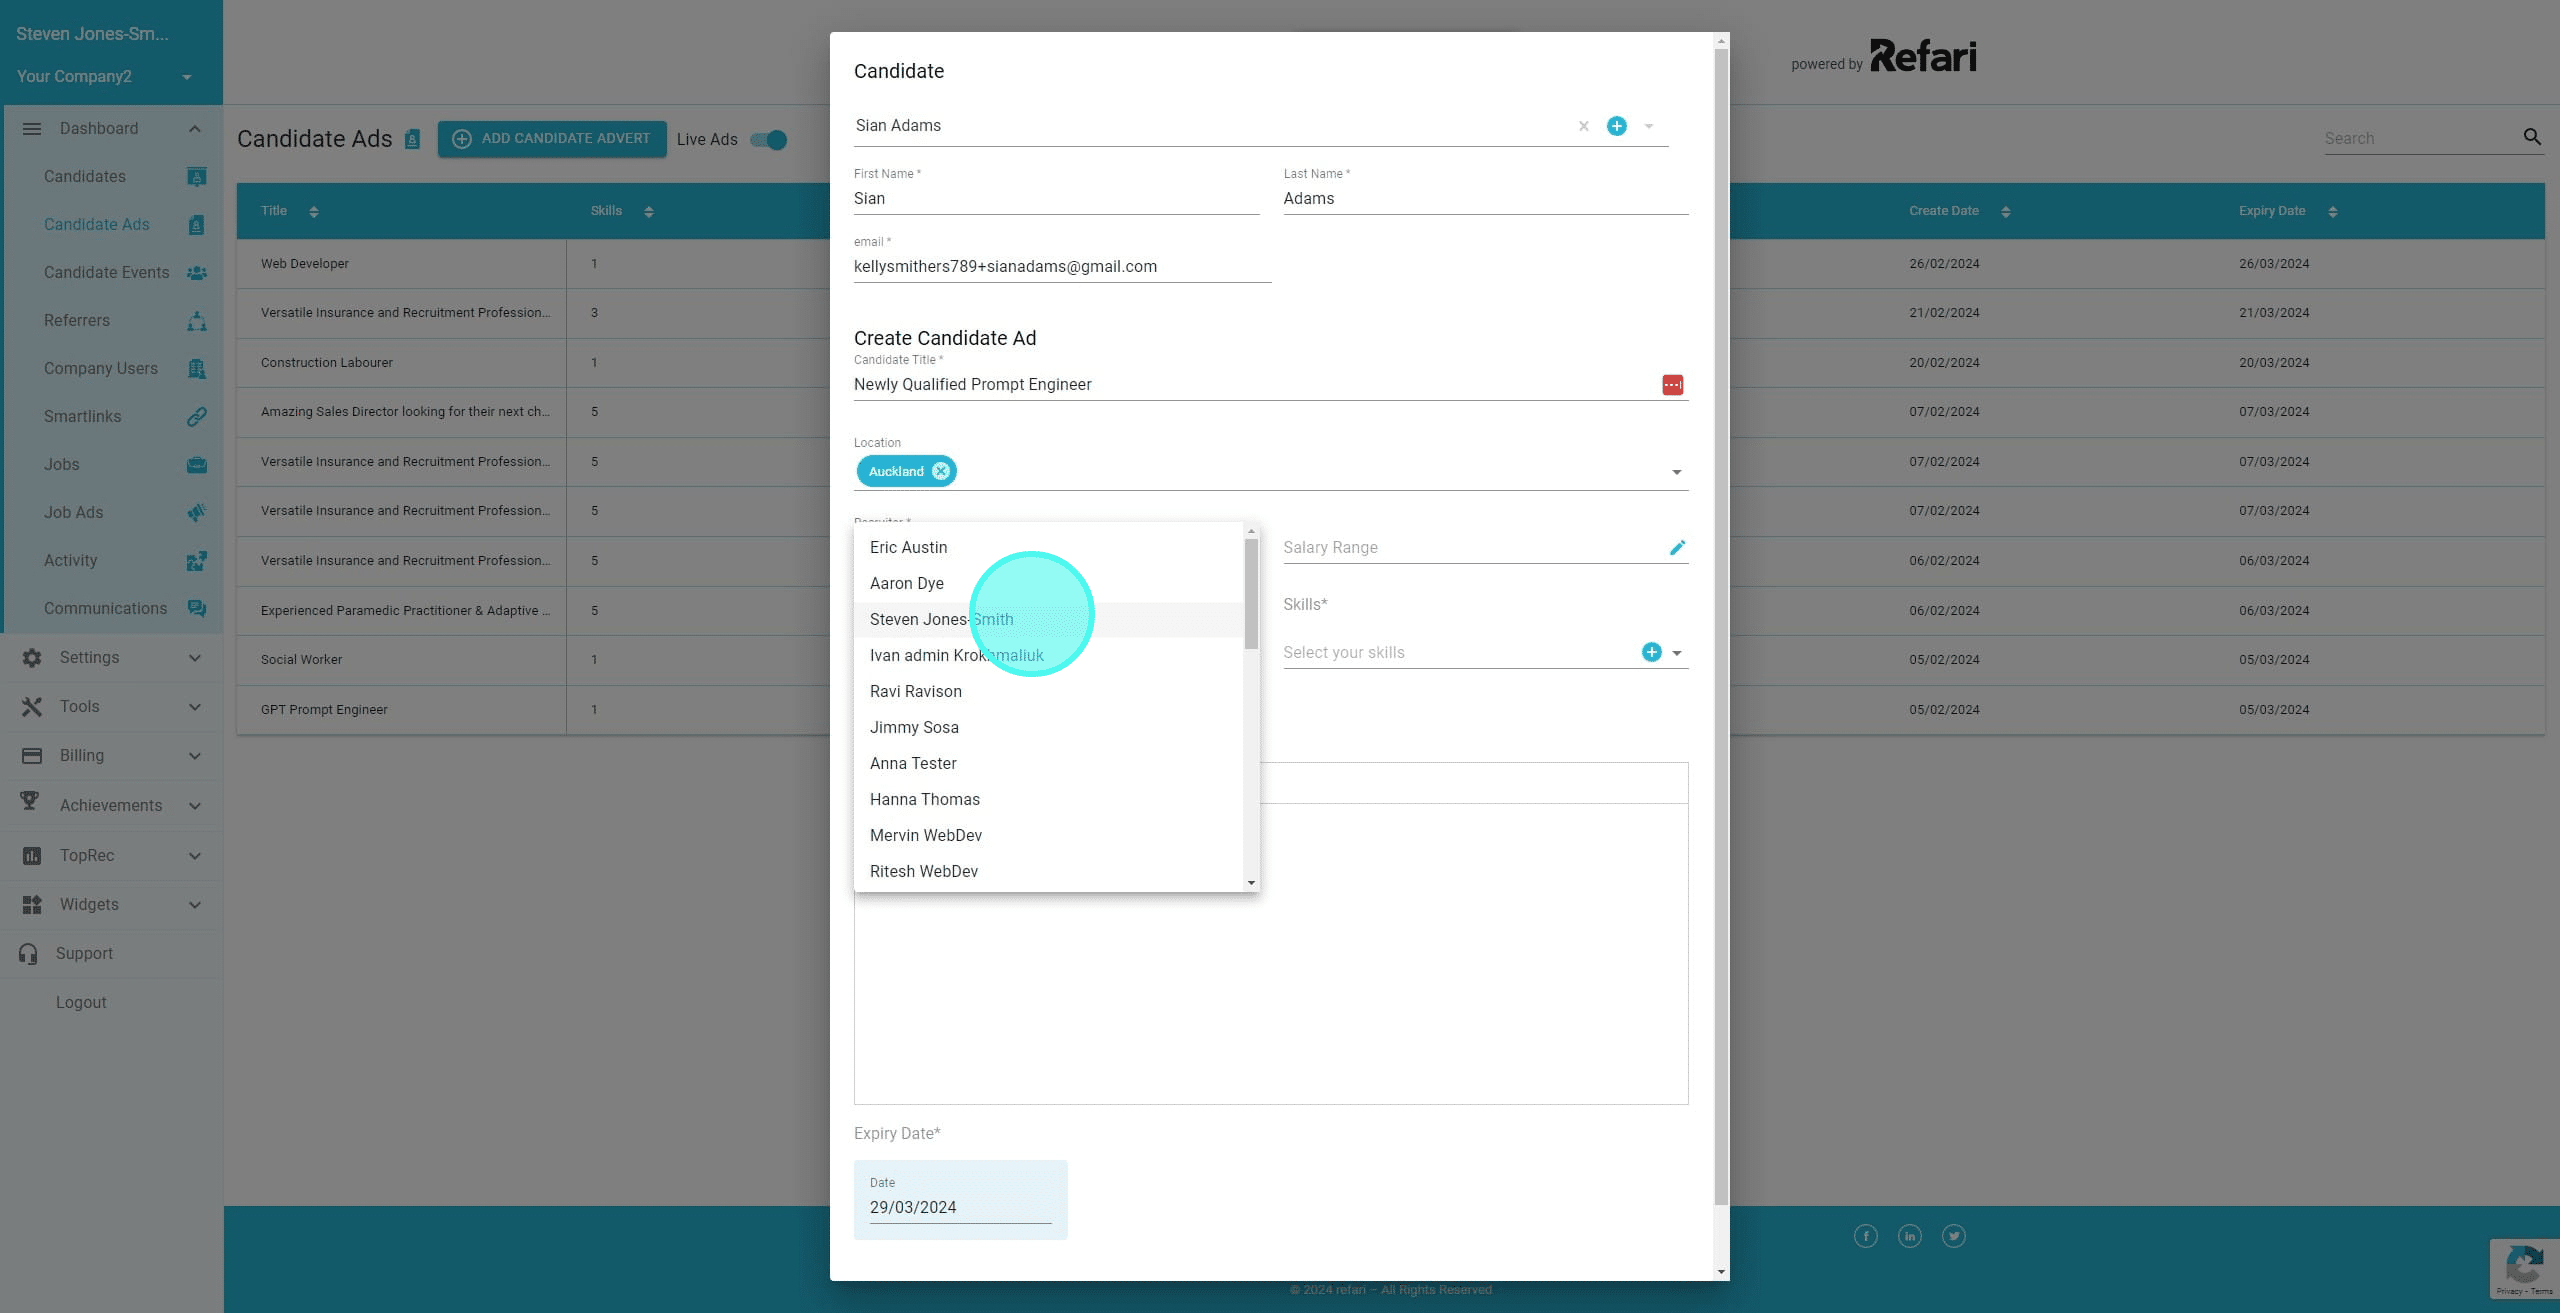
16. Click on the Recruiter name
17. Click here to add some relevant skills.
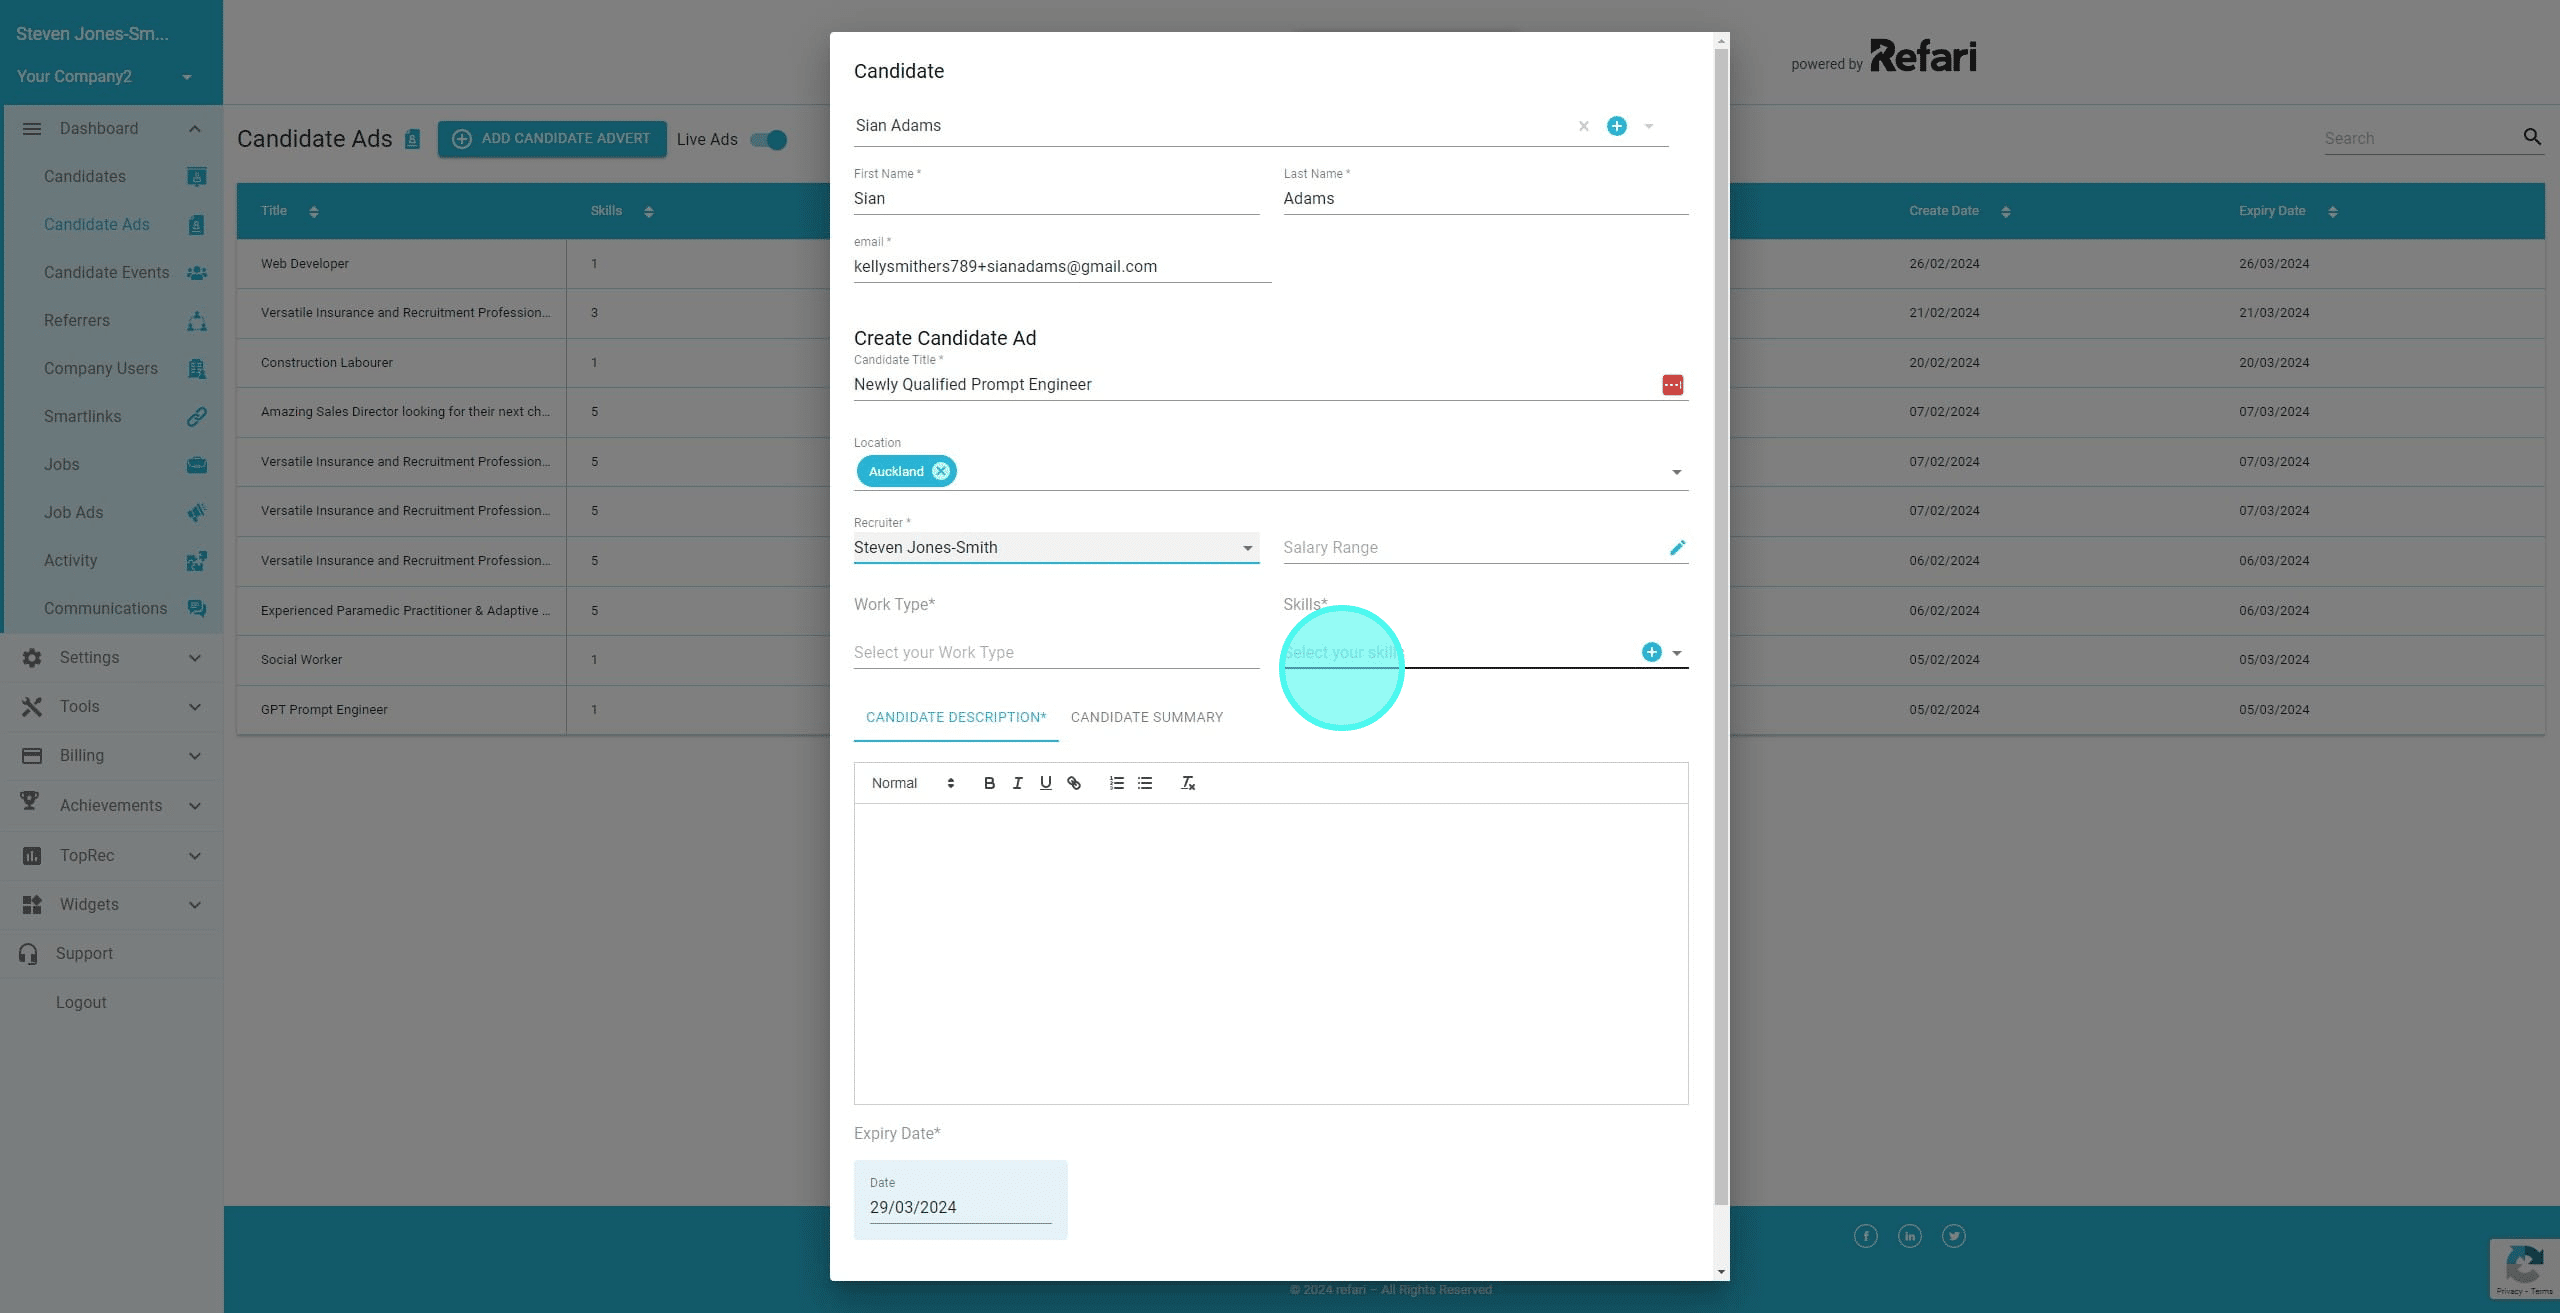
18. You can select multiple skills
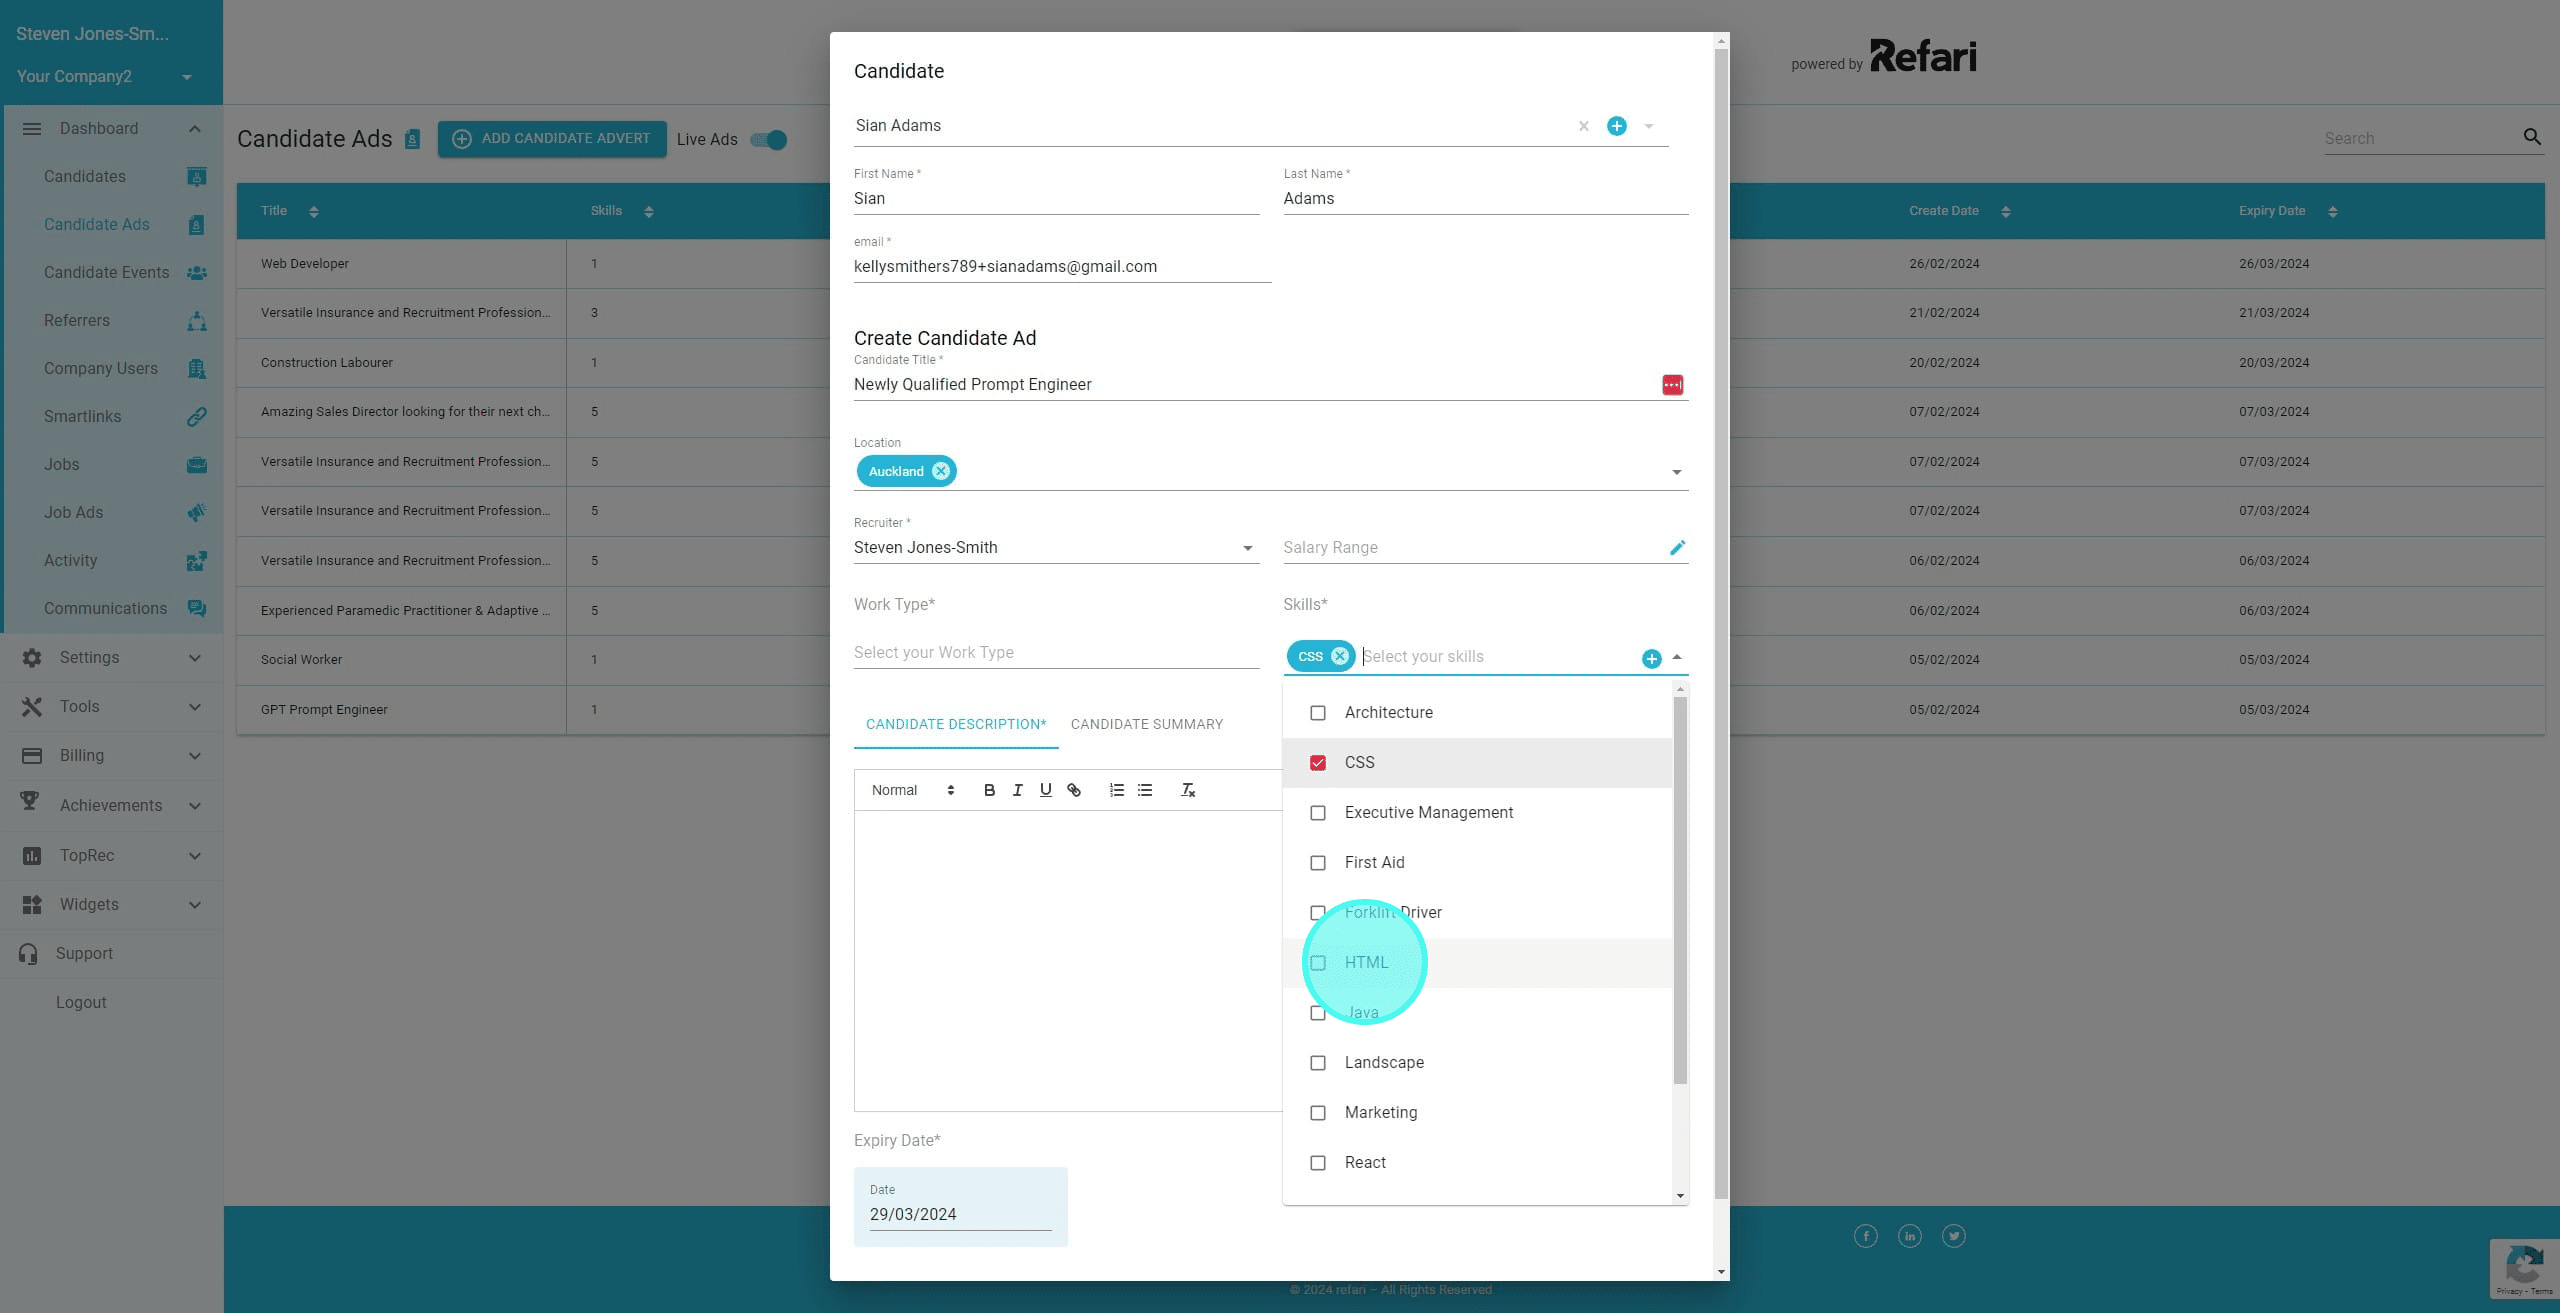
19. Click here to select the Work Type for the candidate.
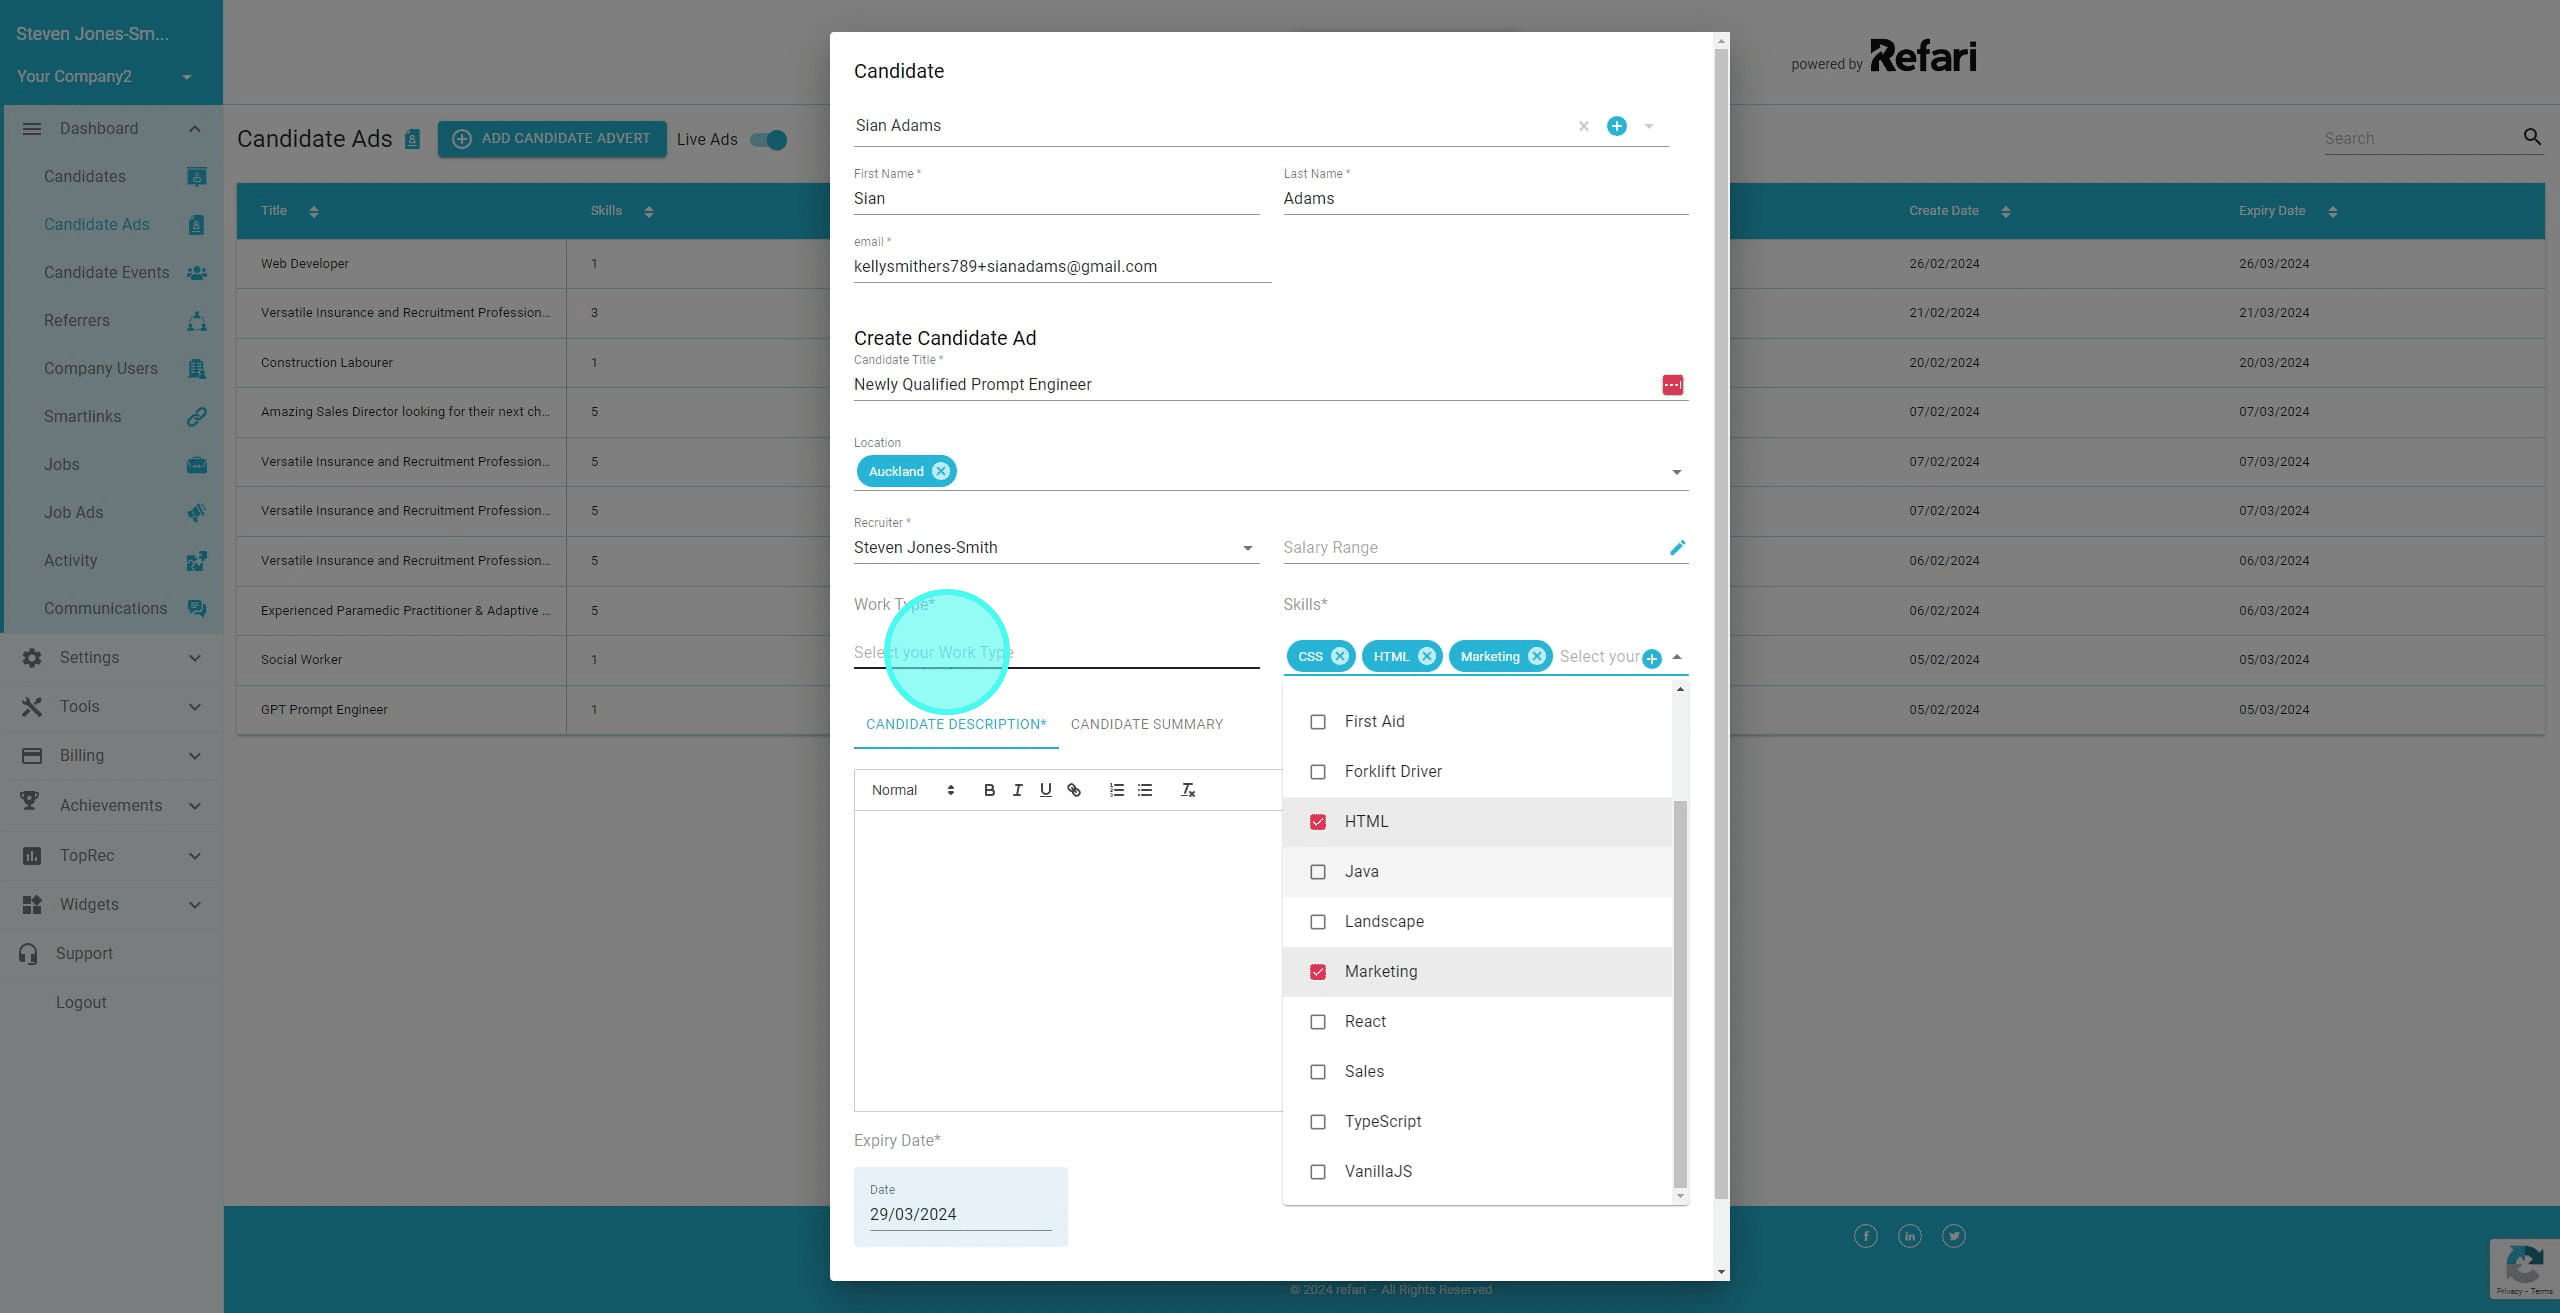
20. Select the Work Type(s). You can select multiple Work Types
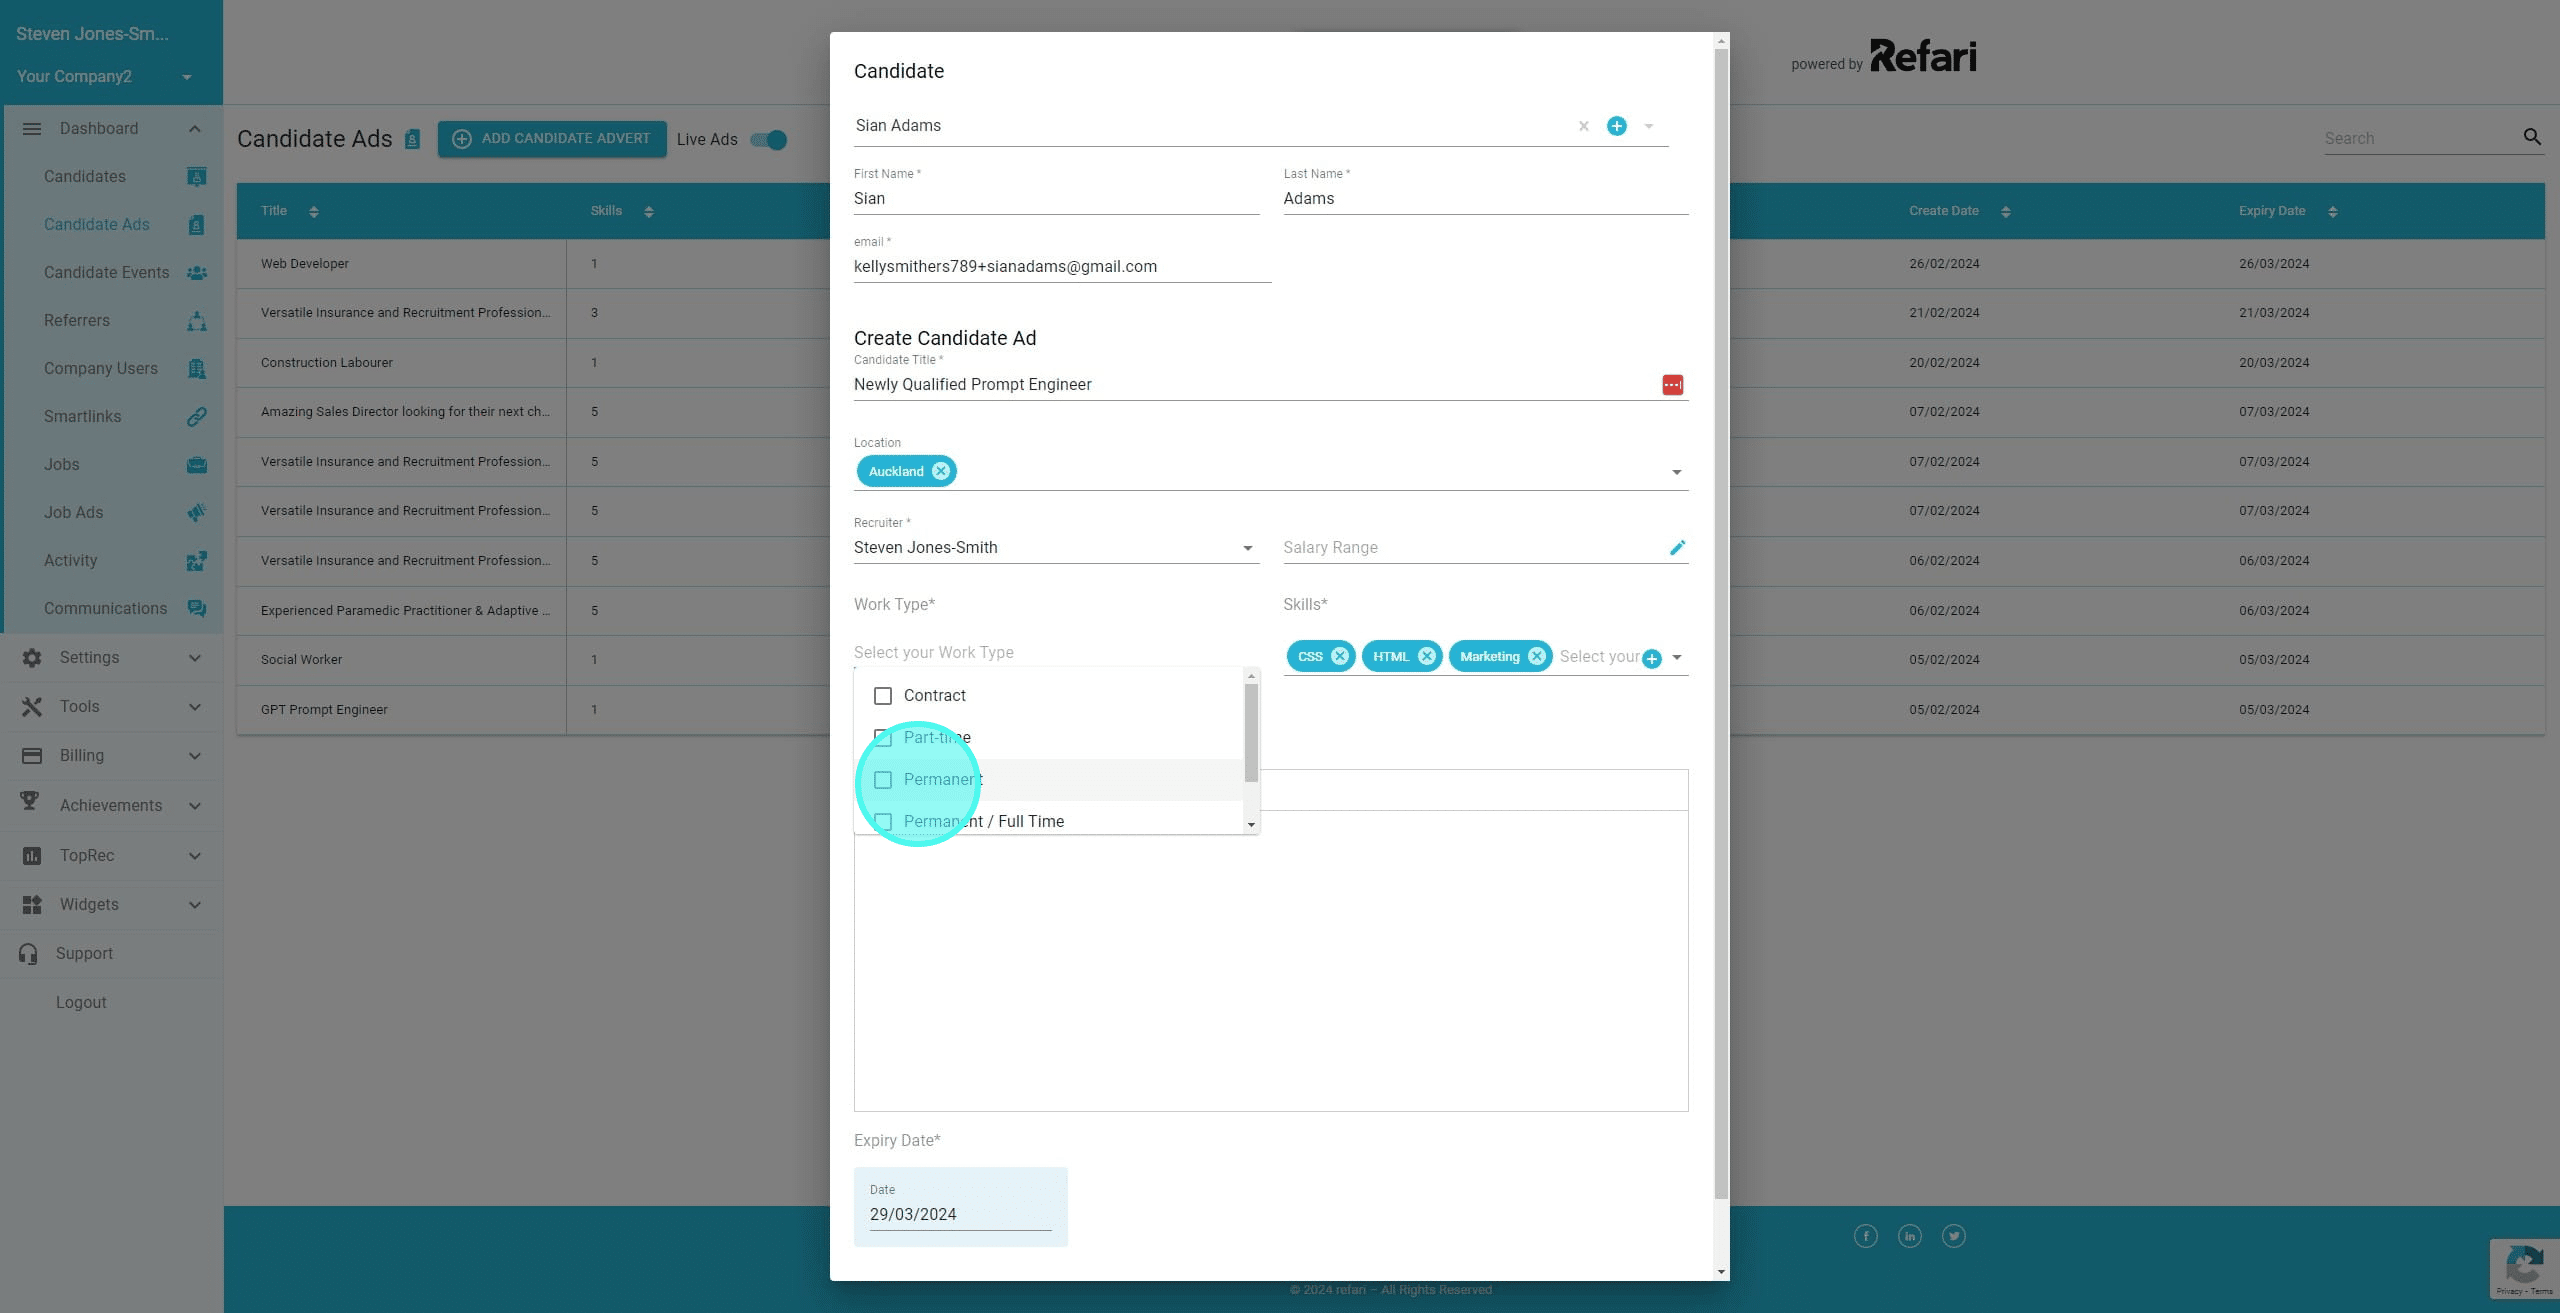
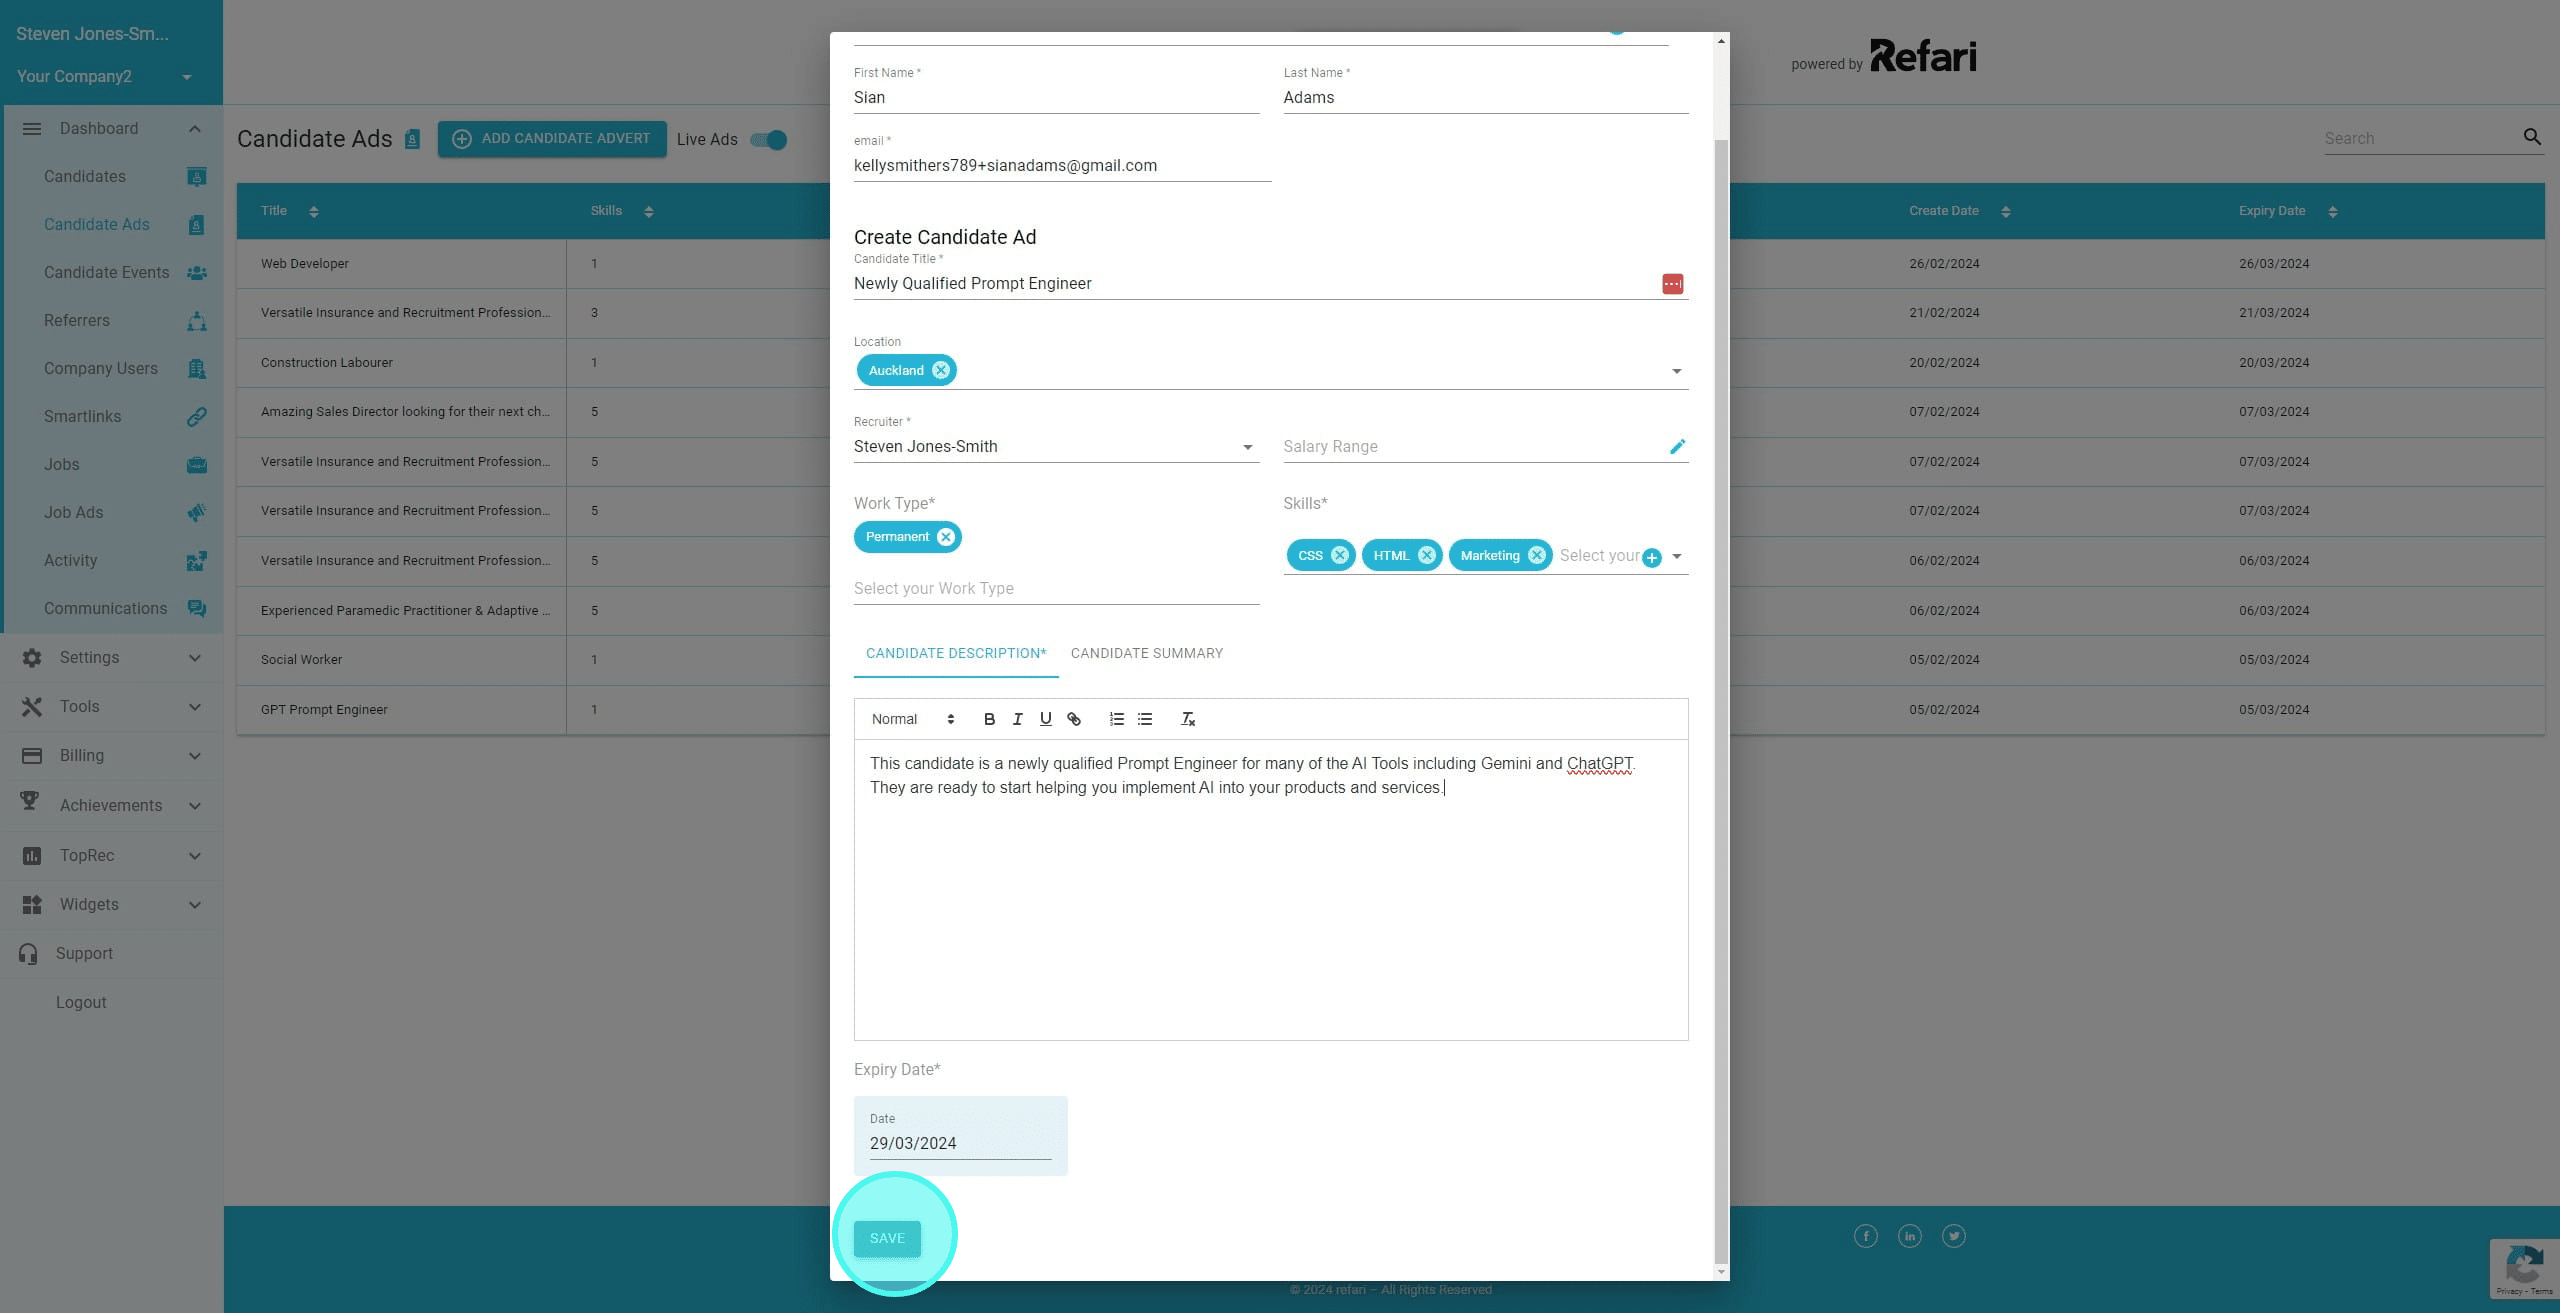
21. We are now going to enter the candidate description. Remember to refrain from including any personal candidate information.
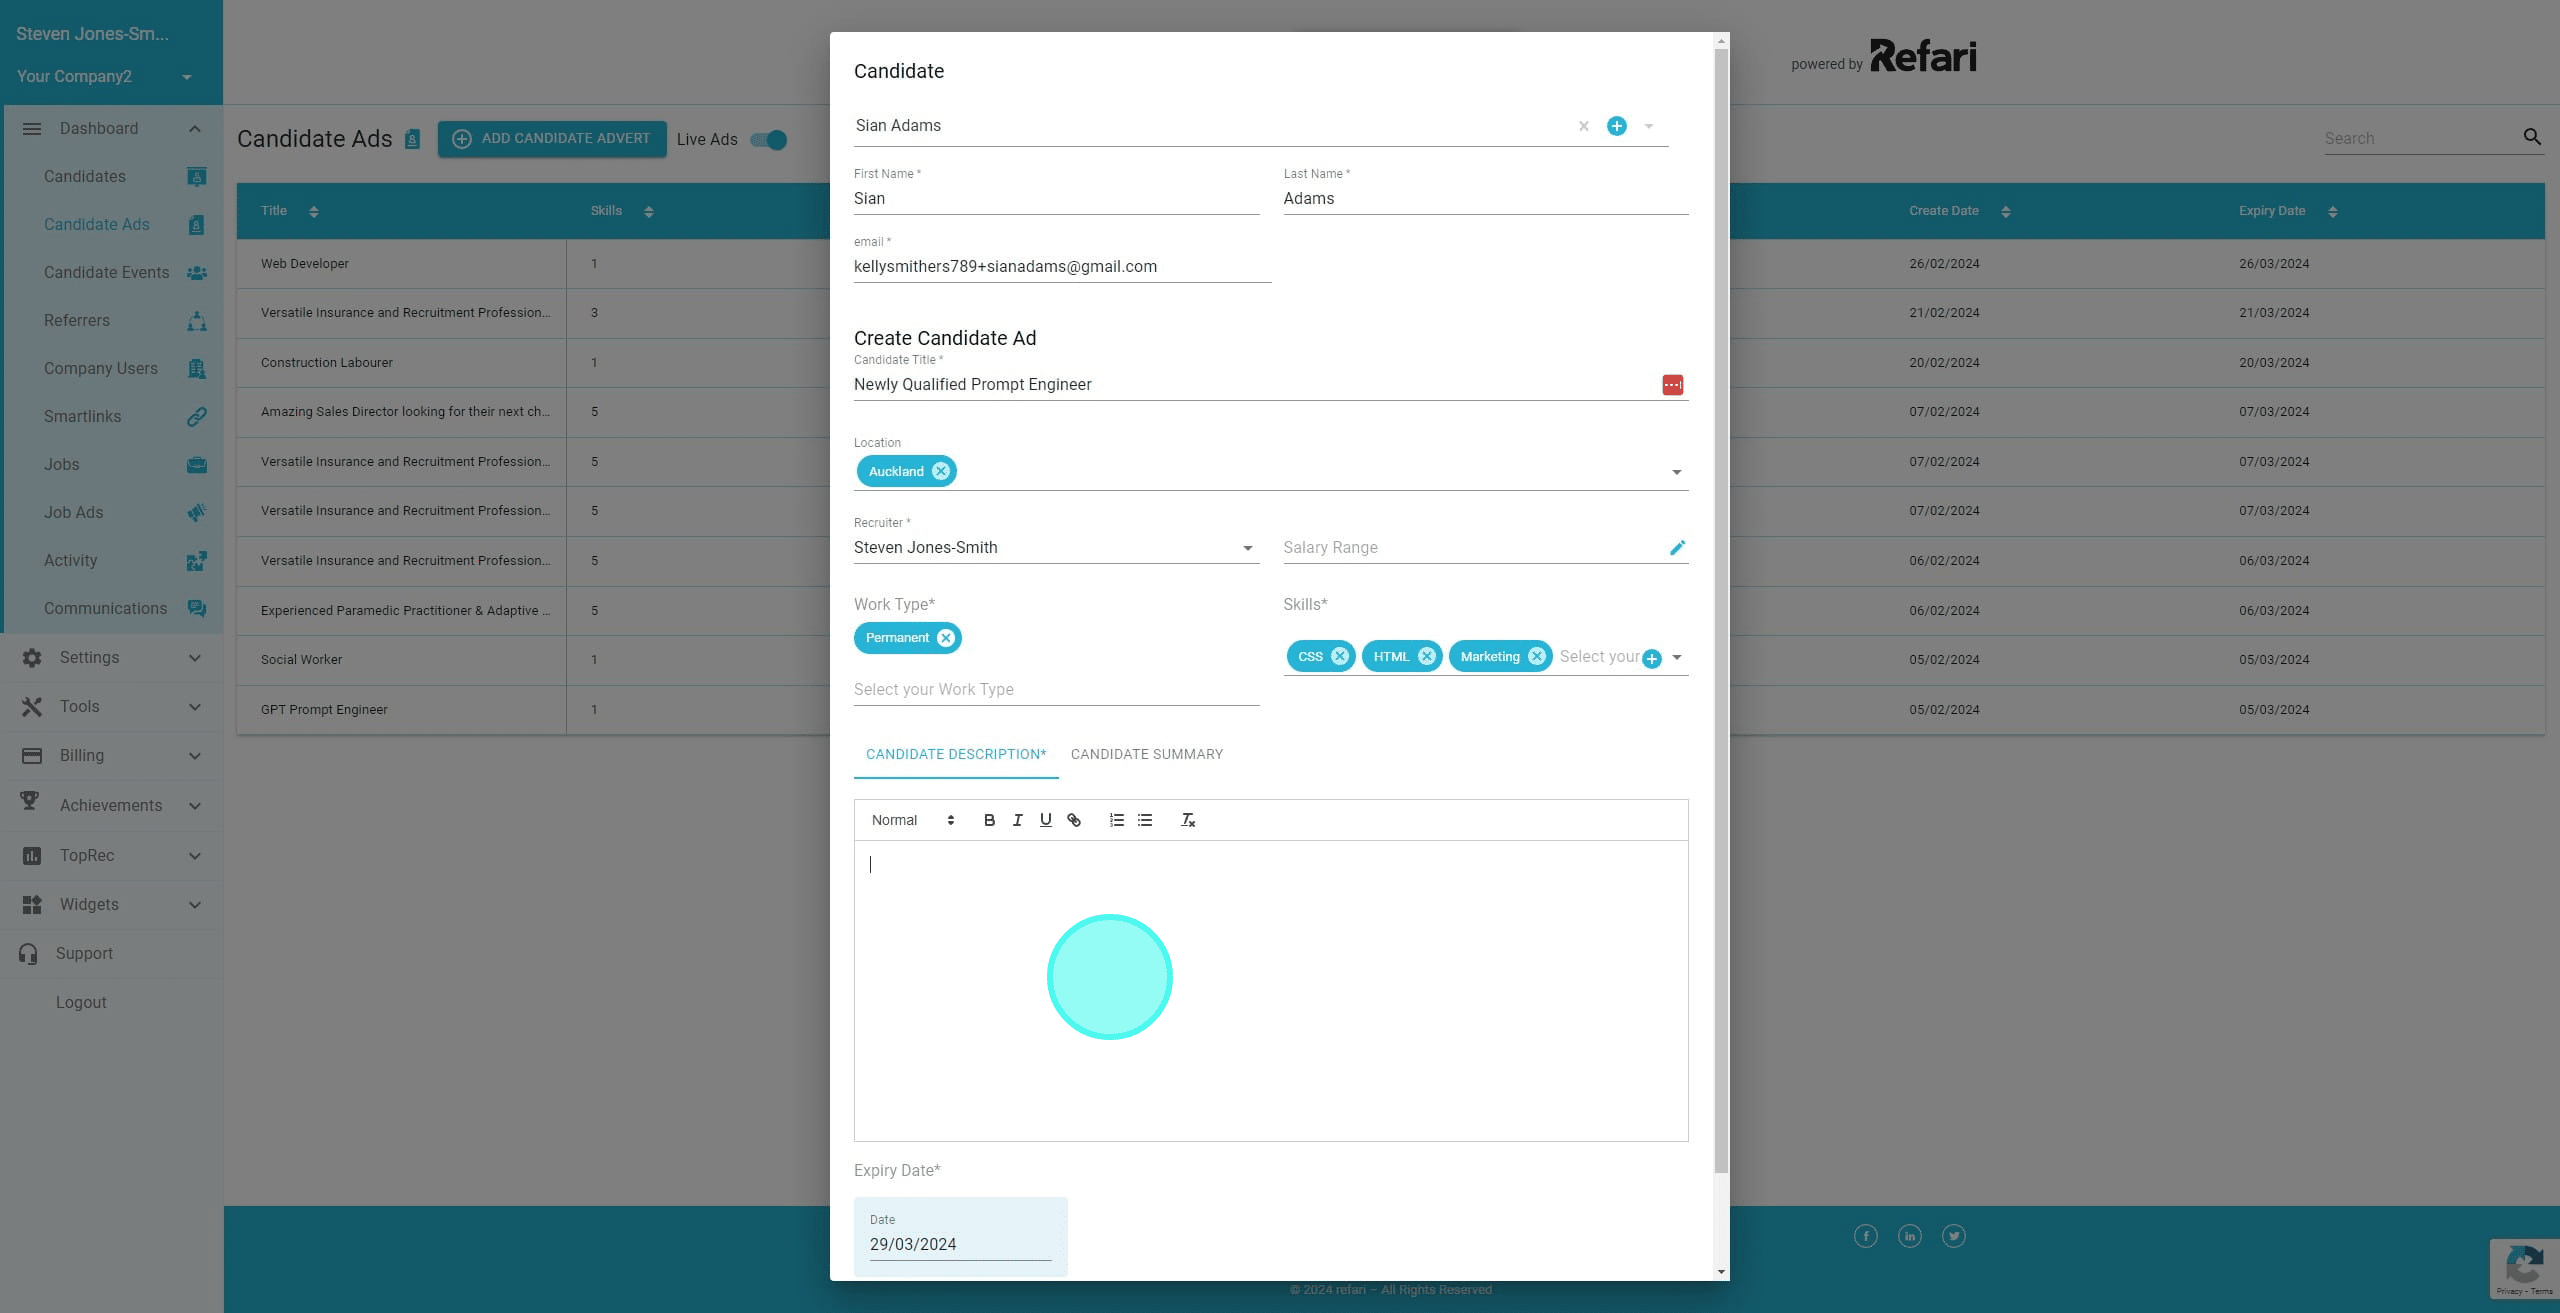
22. Once added, click on 'Save'
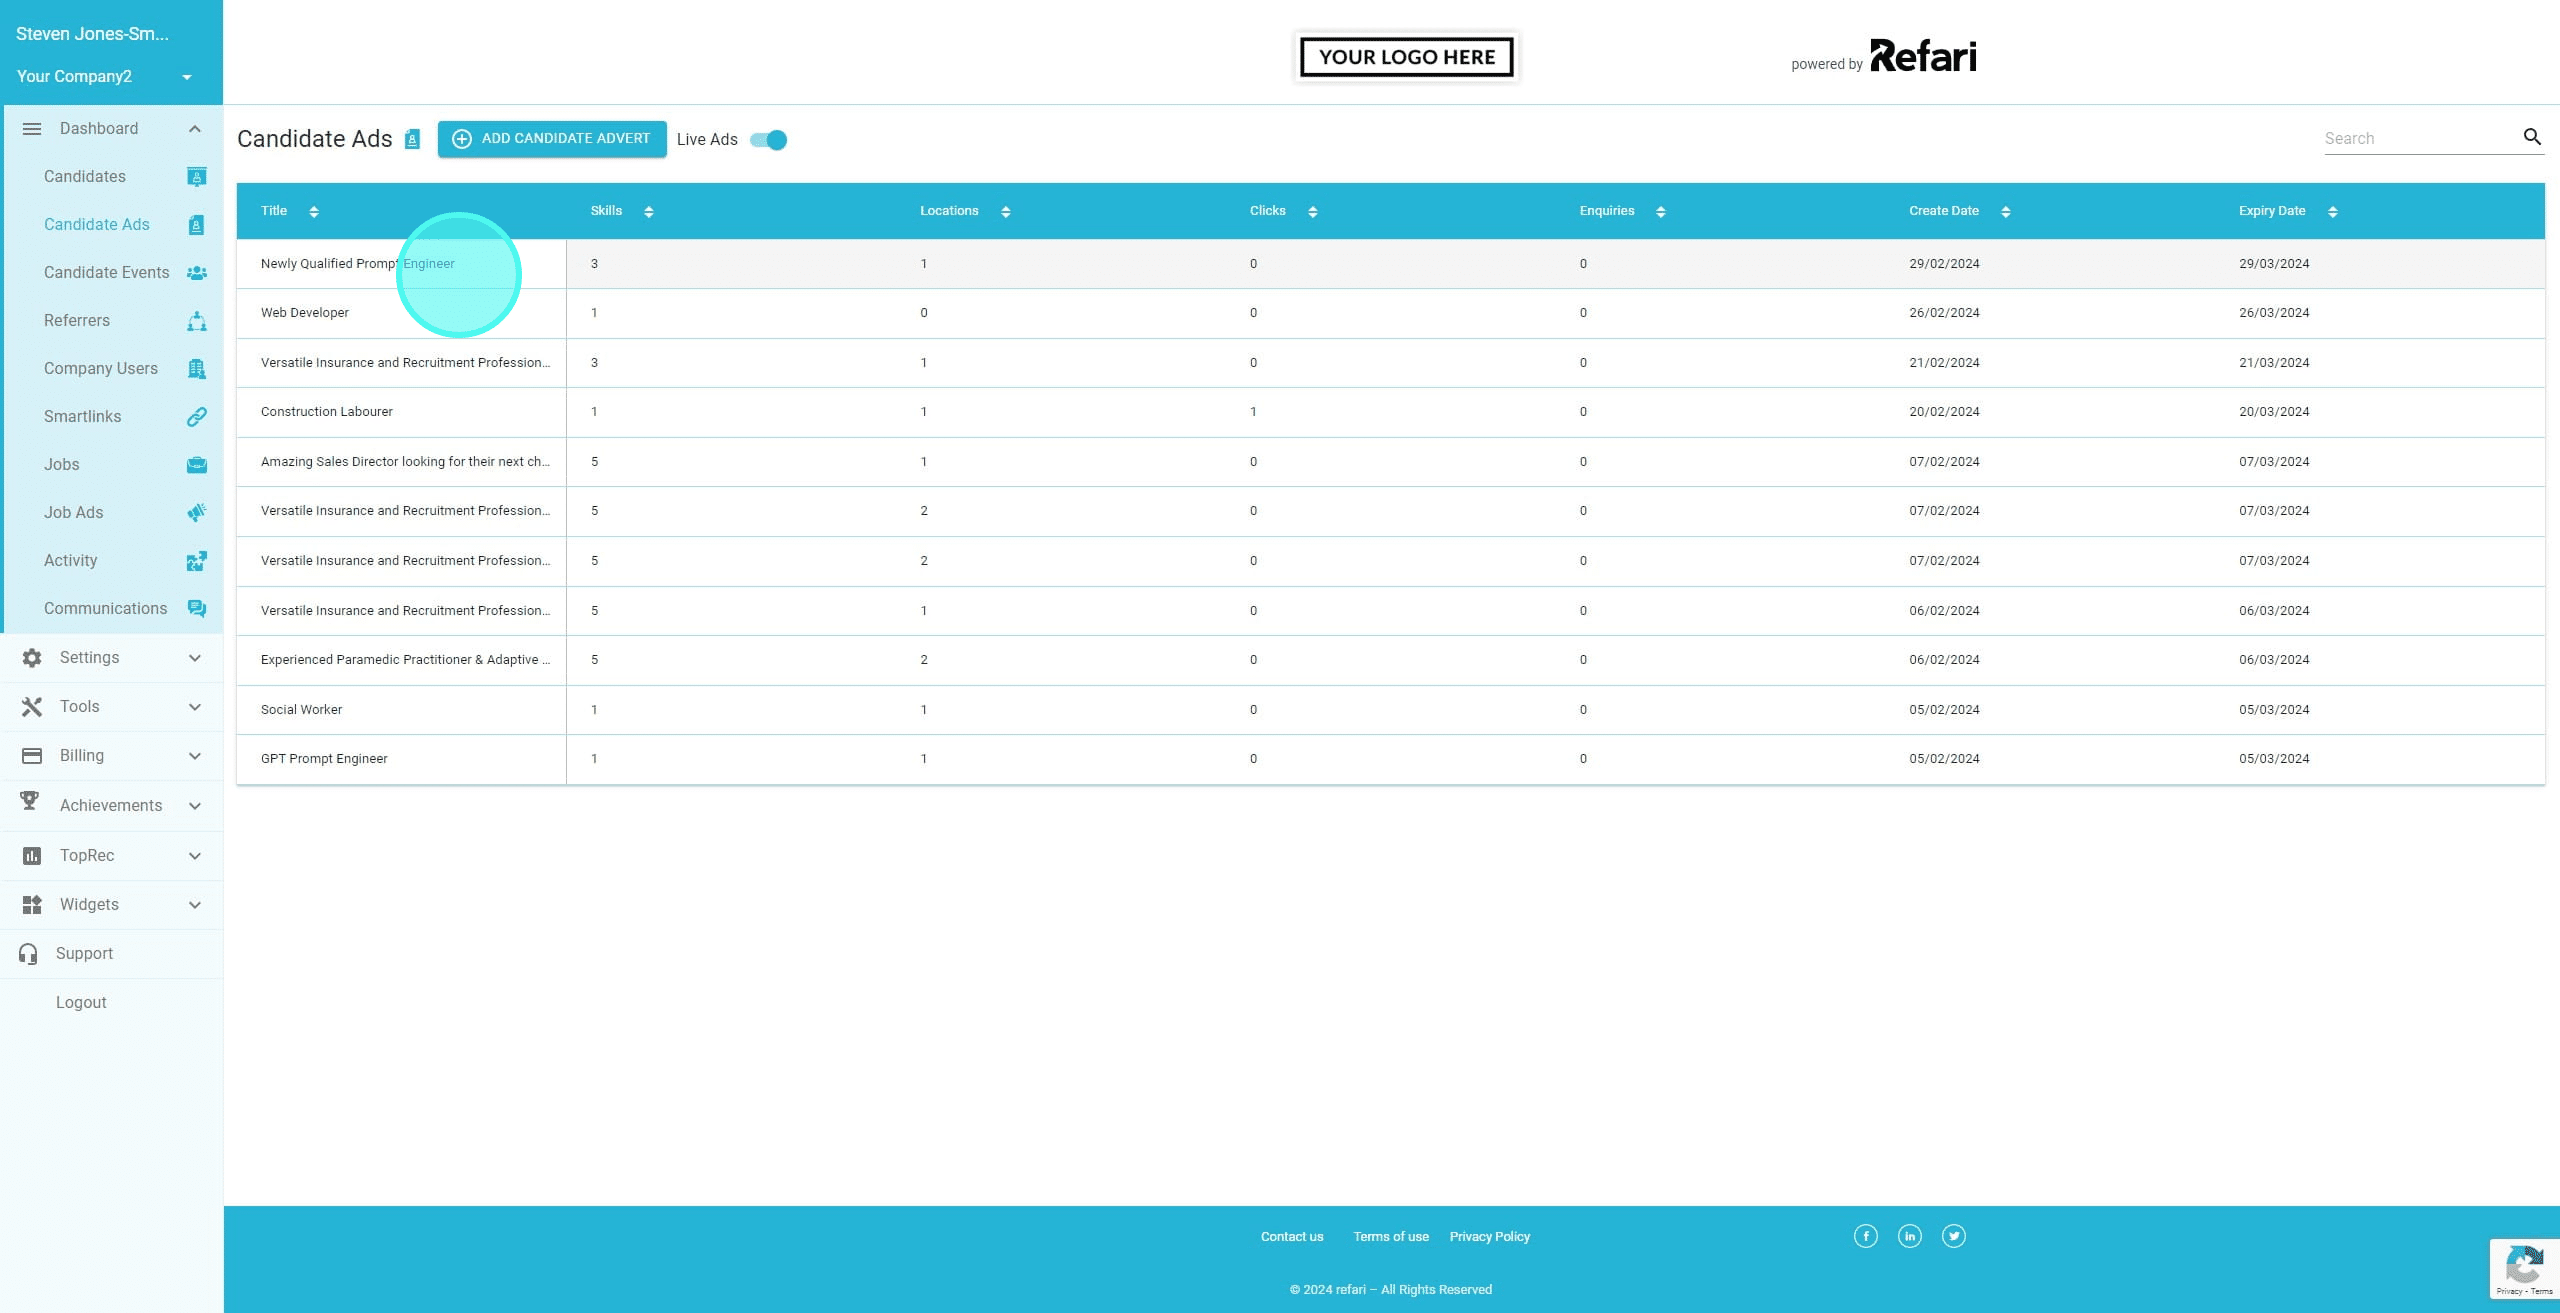
23. Your candidate advert has now been created. To view it we can either navigate to our Talent Board page directly or via the dashboard. Click on the Title of the Candidate advert you wish to navigate to.
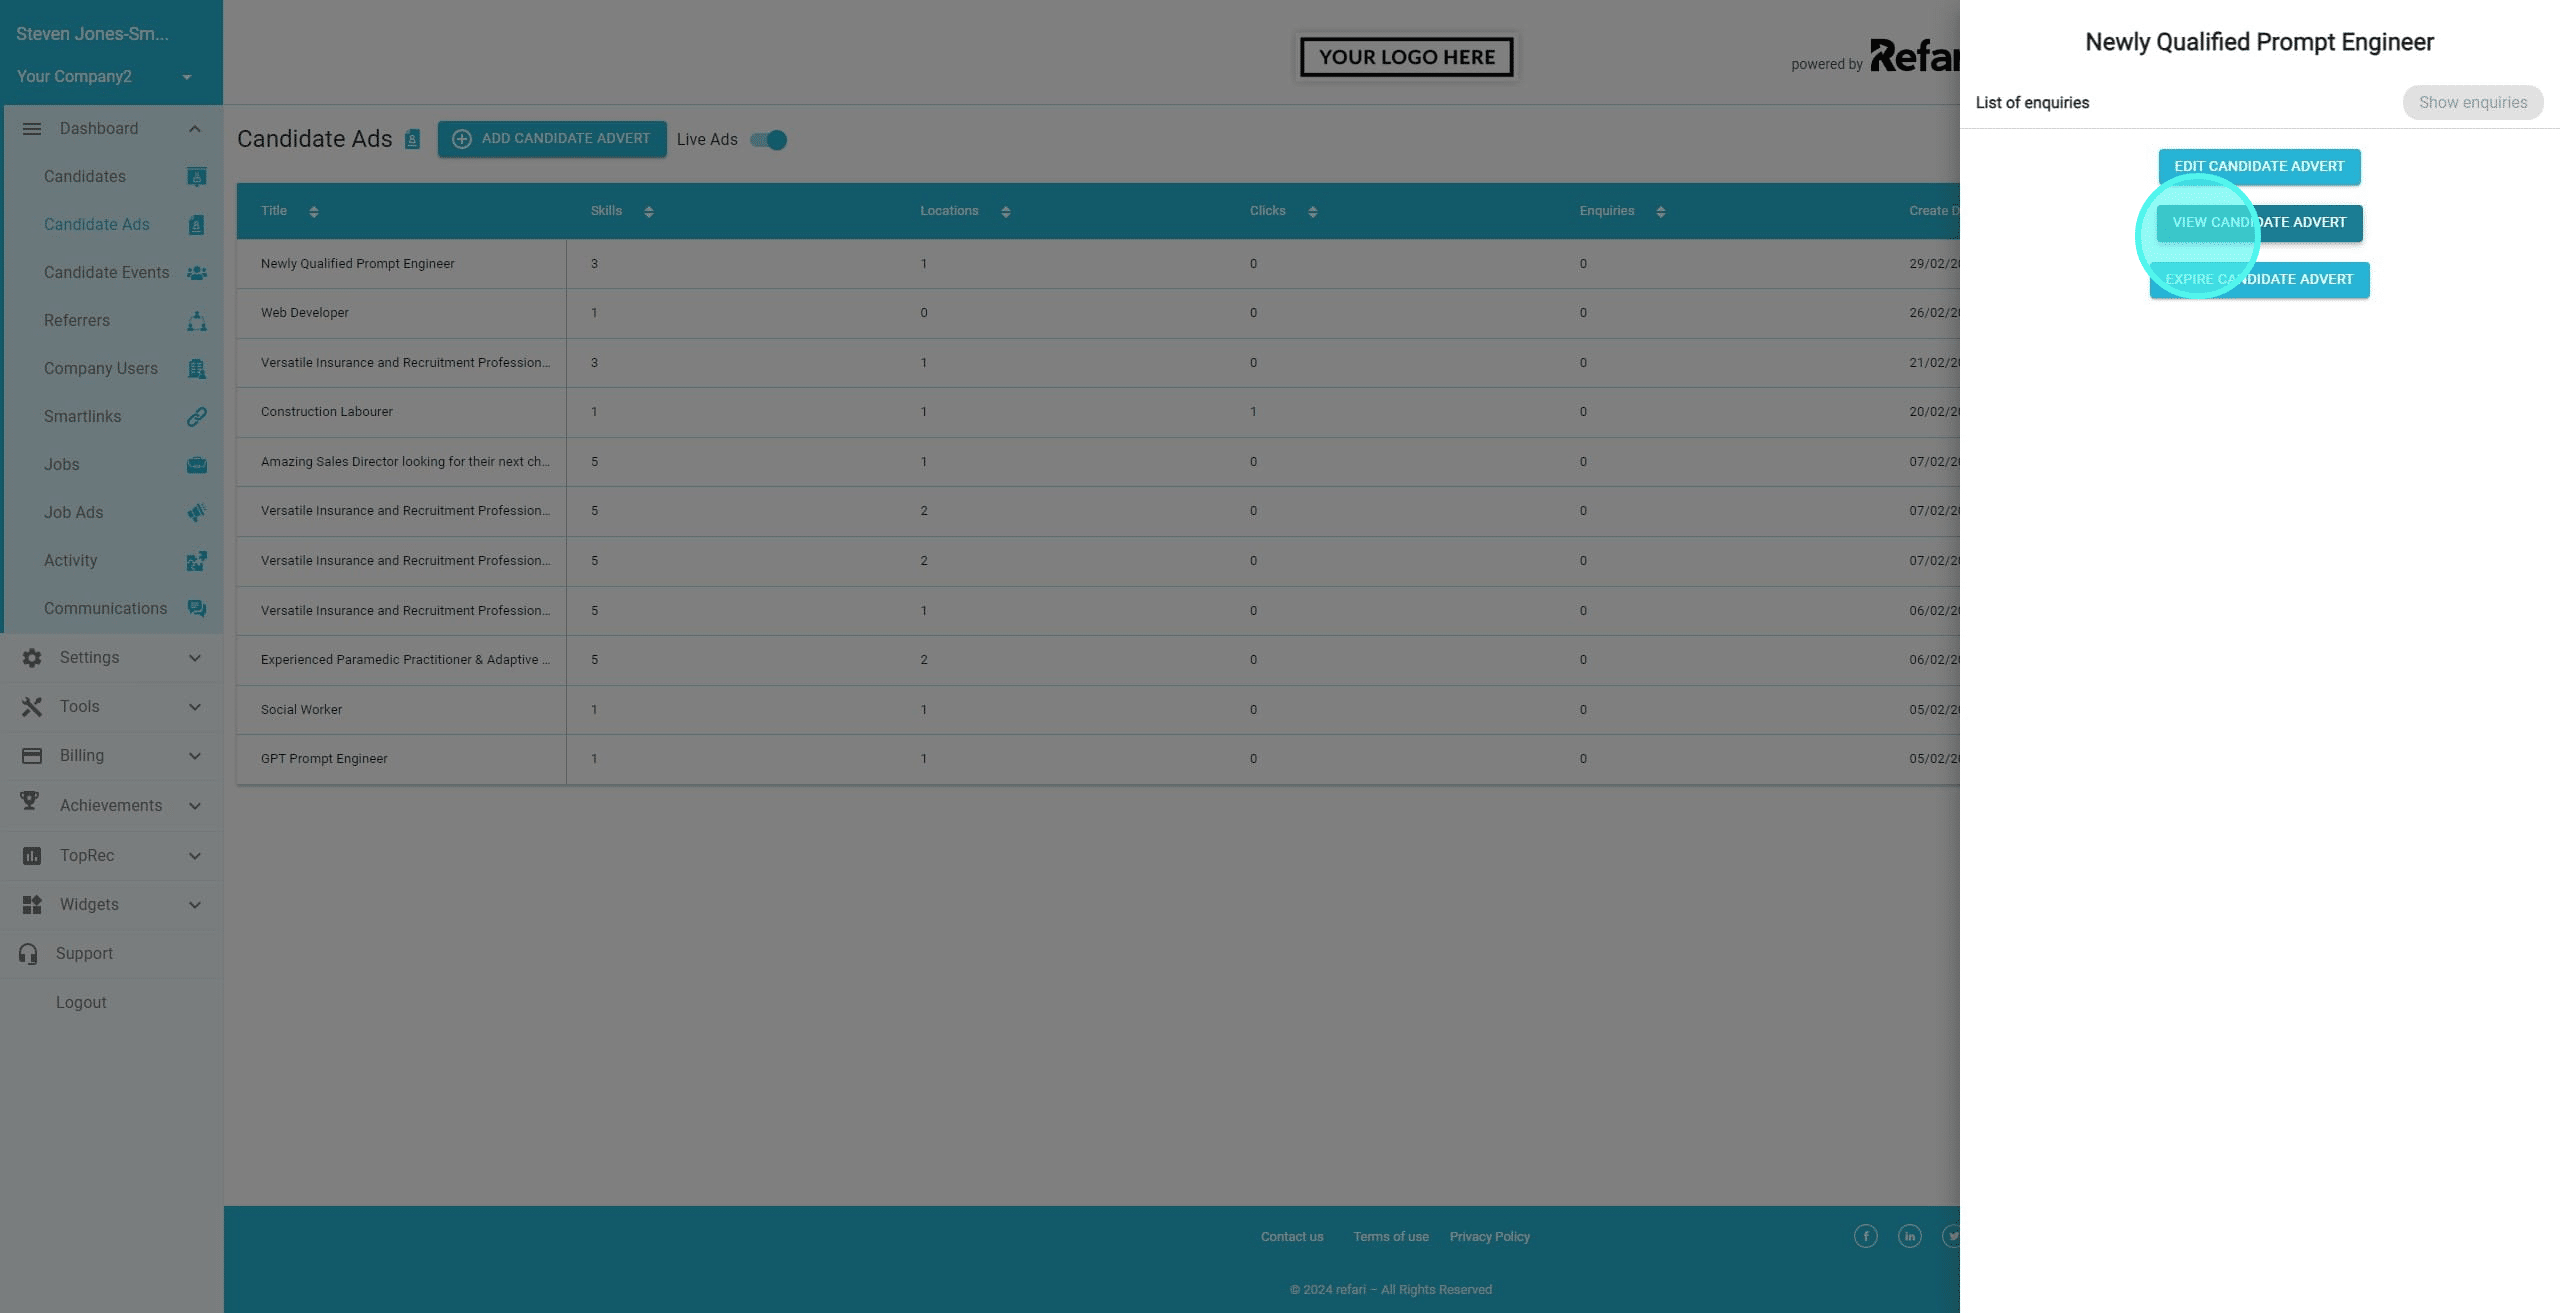
24. From the drawer that pops out Click on "View Candidate Advert"
25. You are then taken to that Candidate Advert.
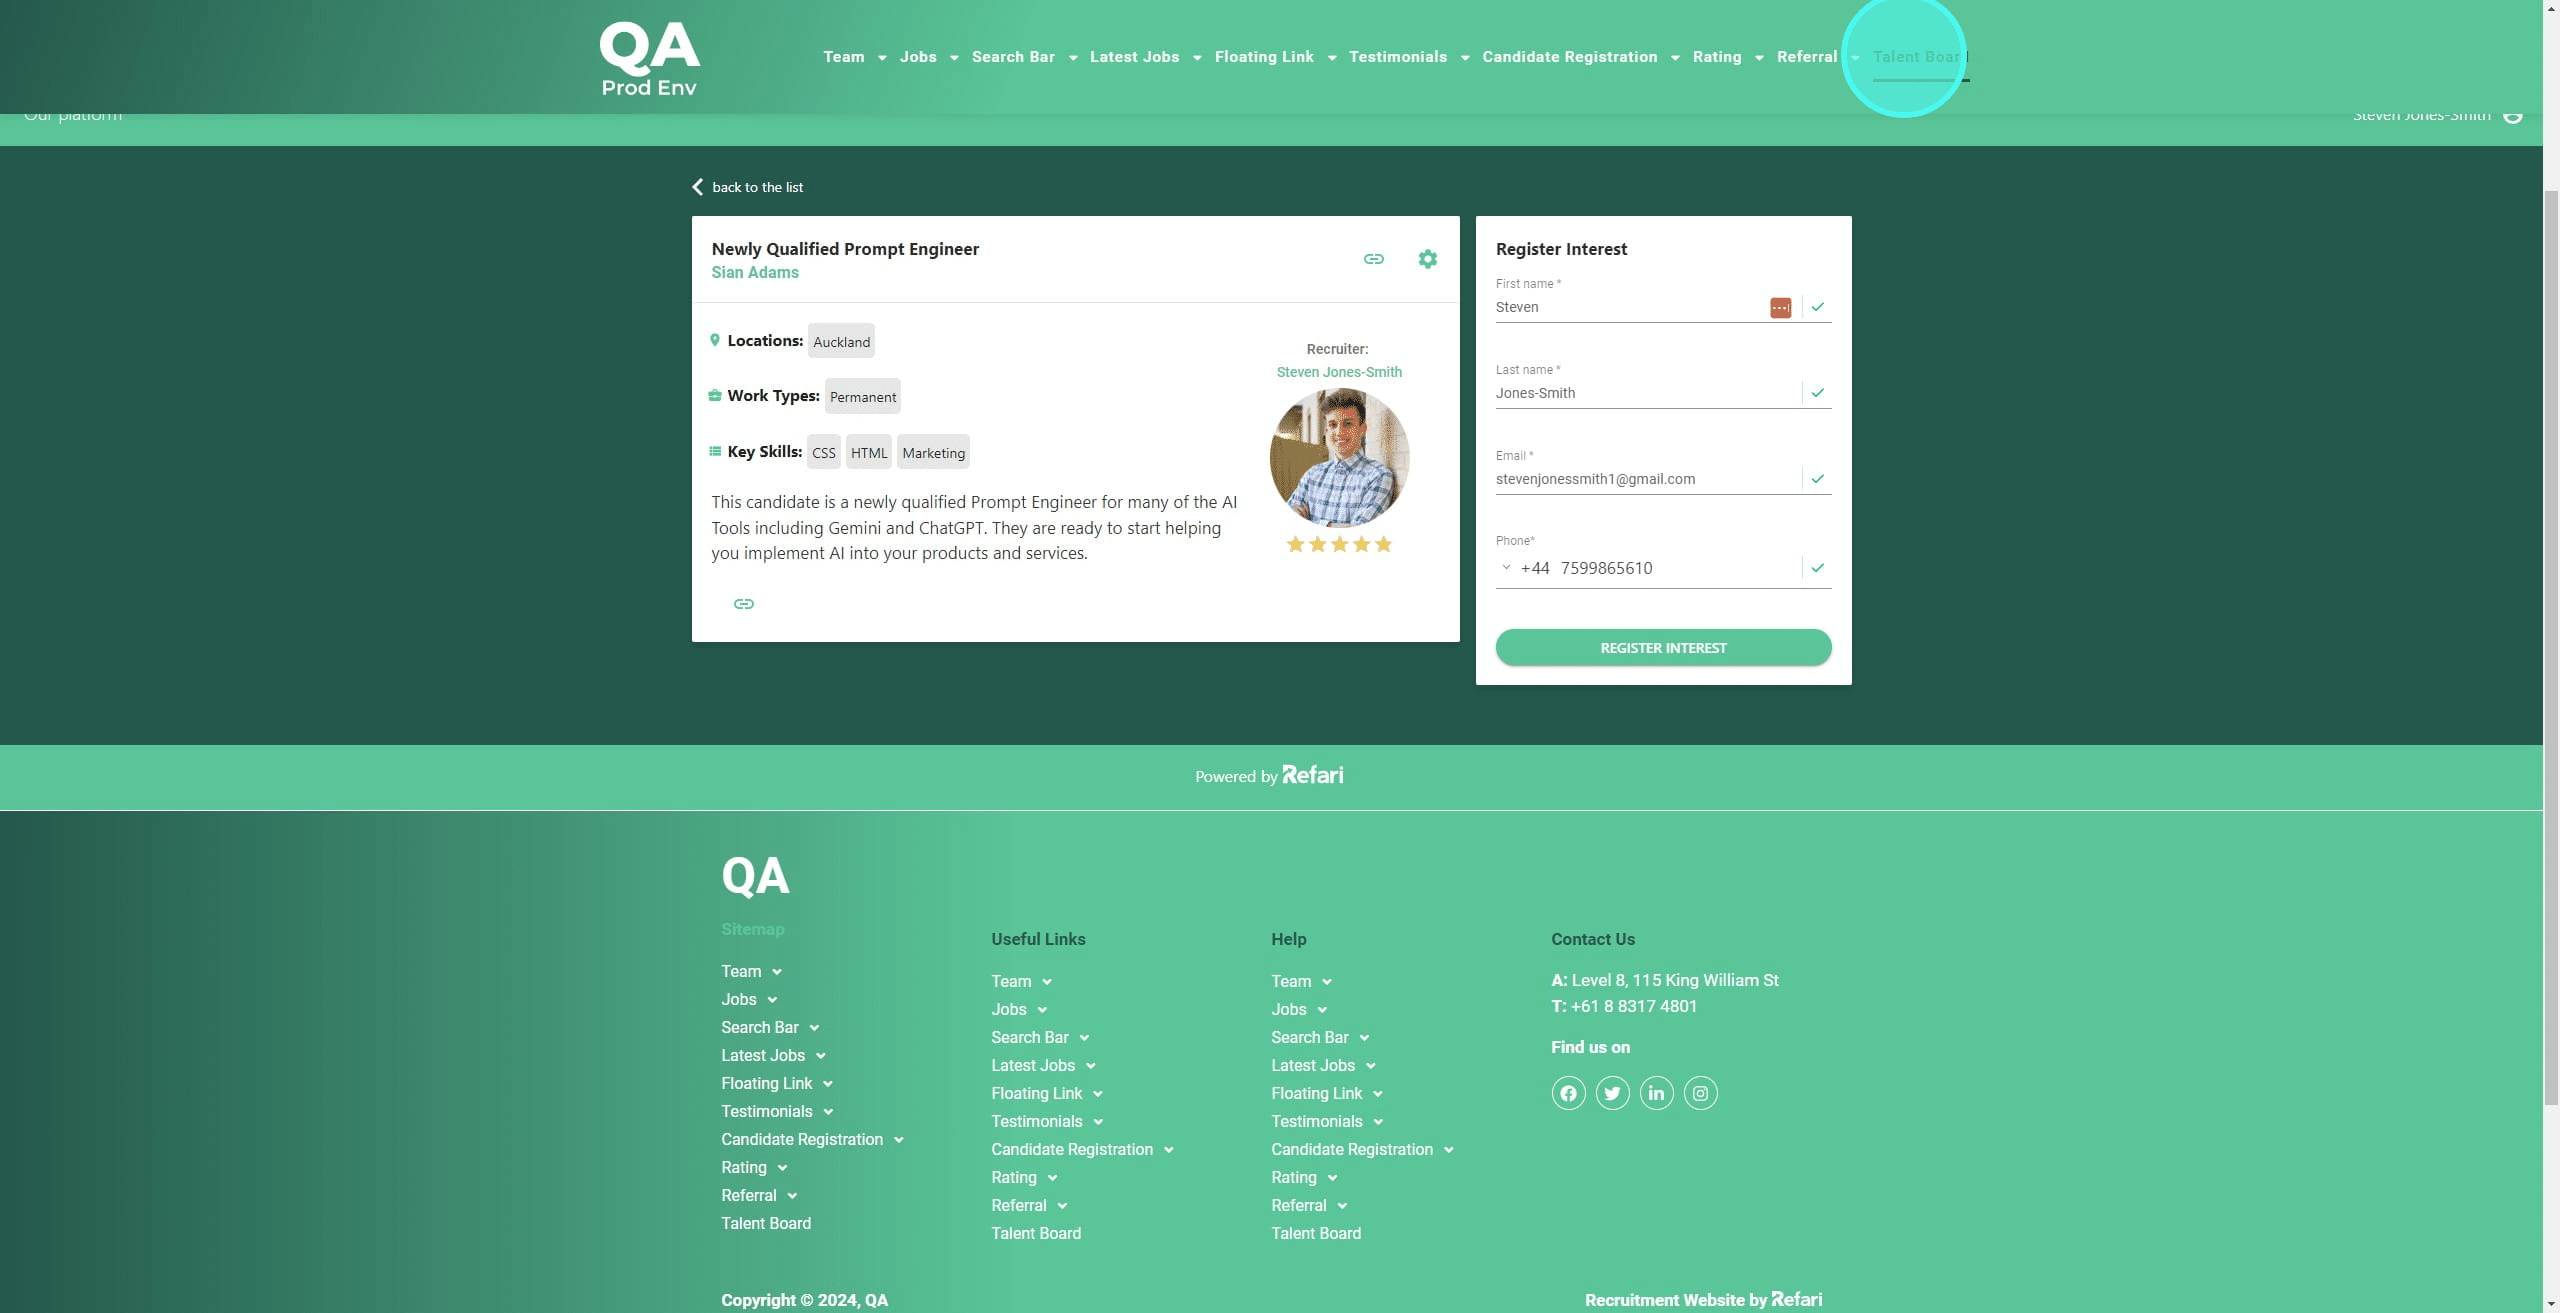
26. It's important to note, we can currently see the Candidate Names as well, but that is because we are logged in as a recruiter.
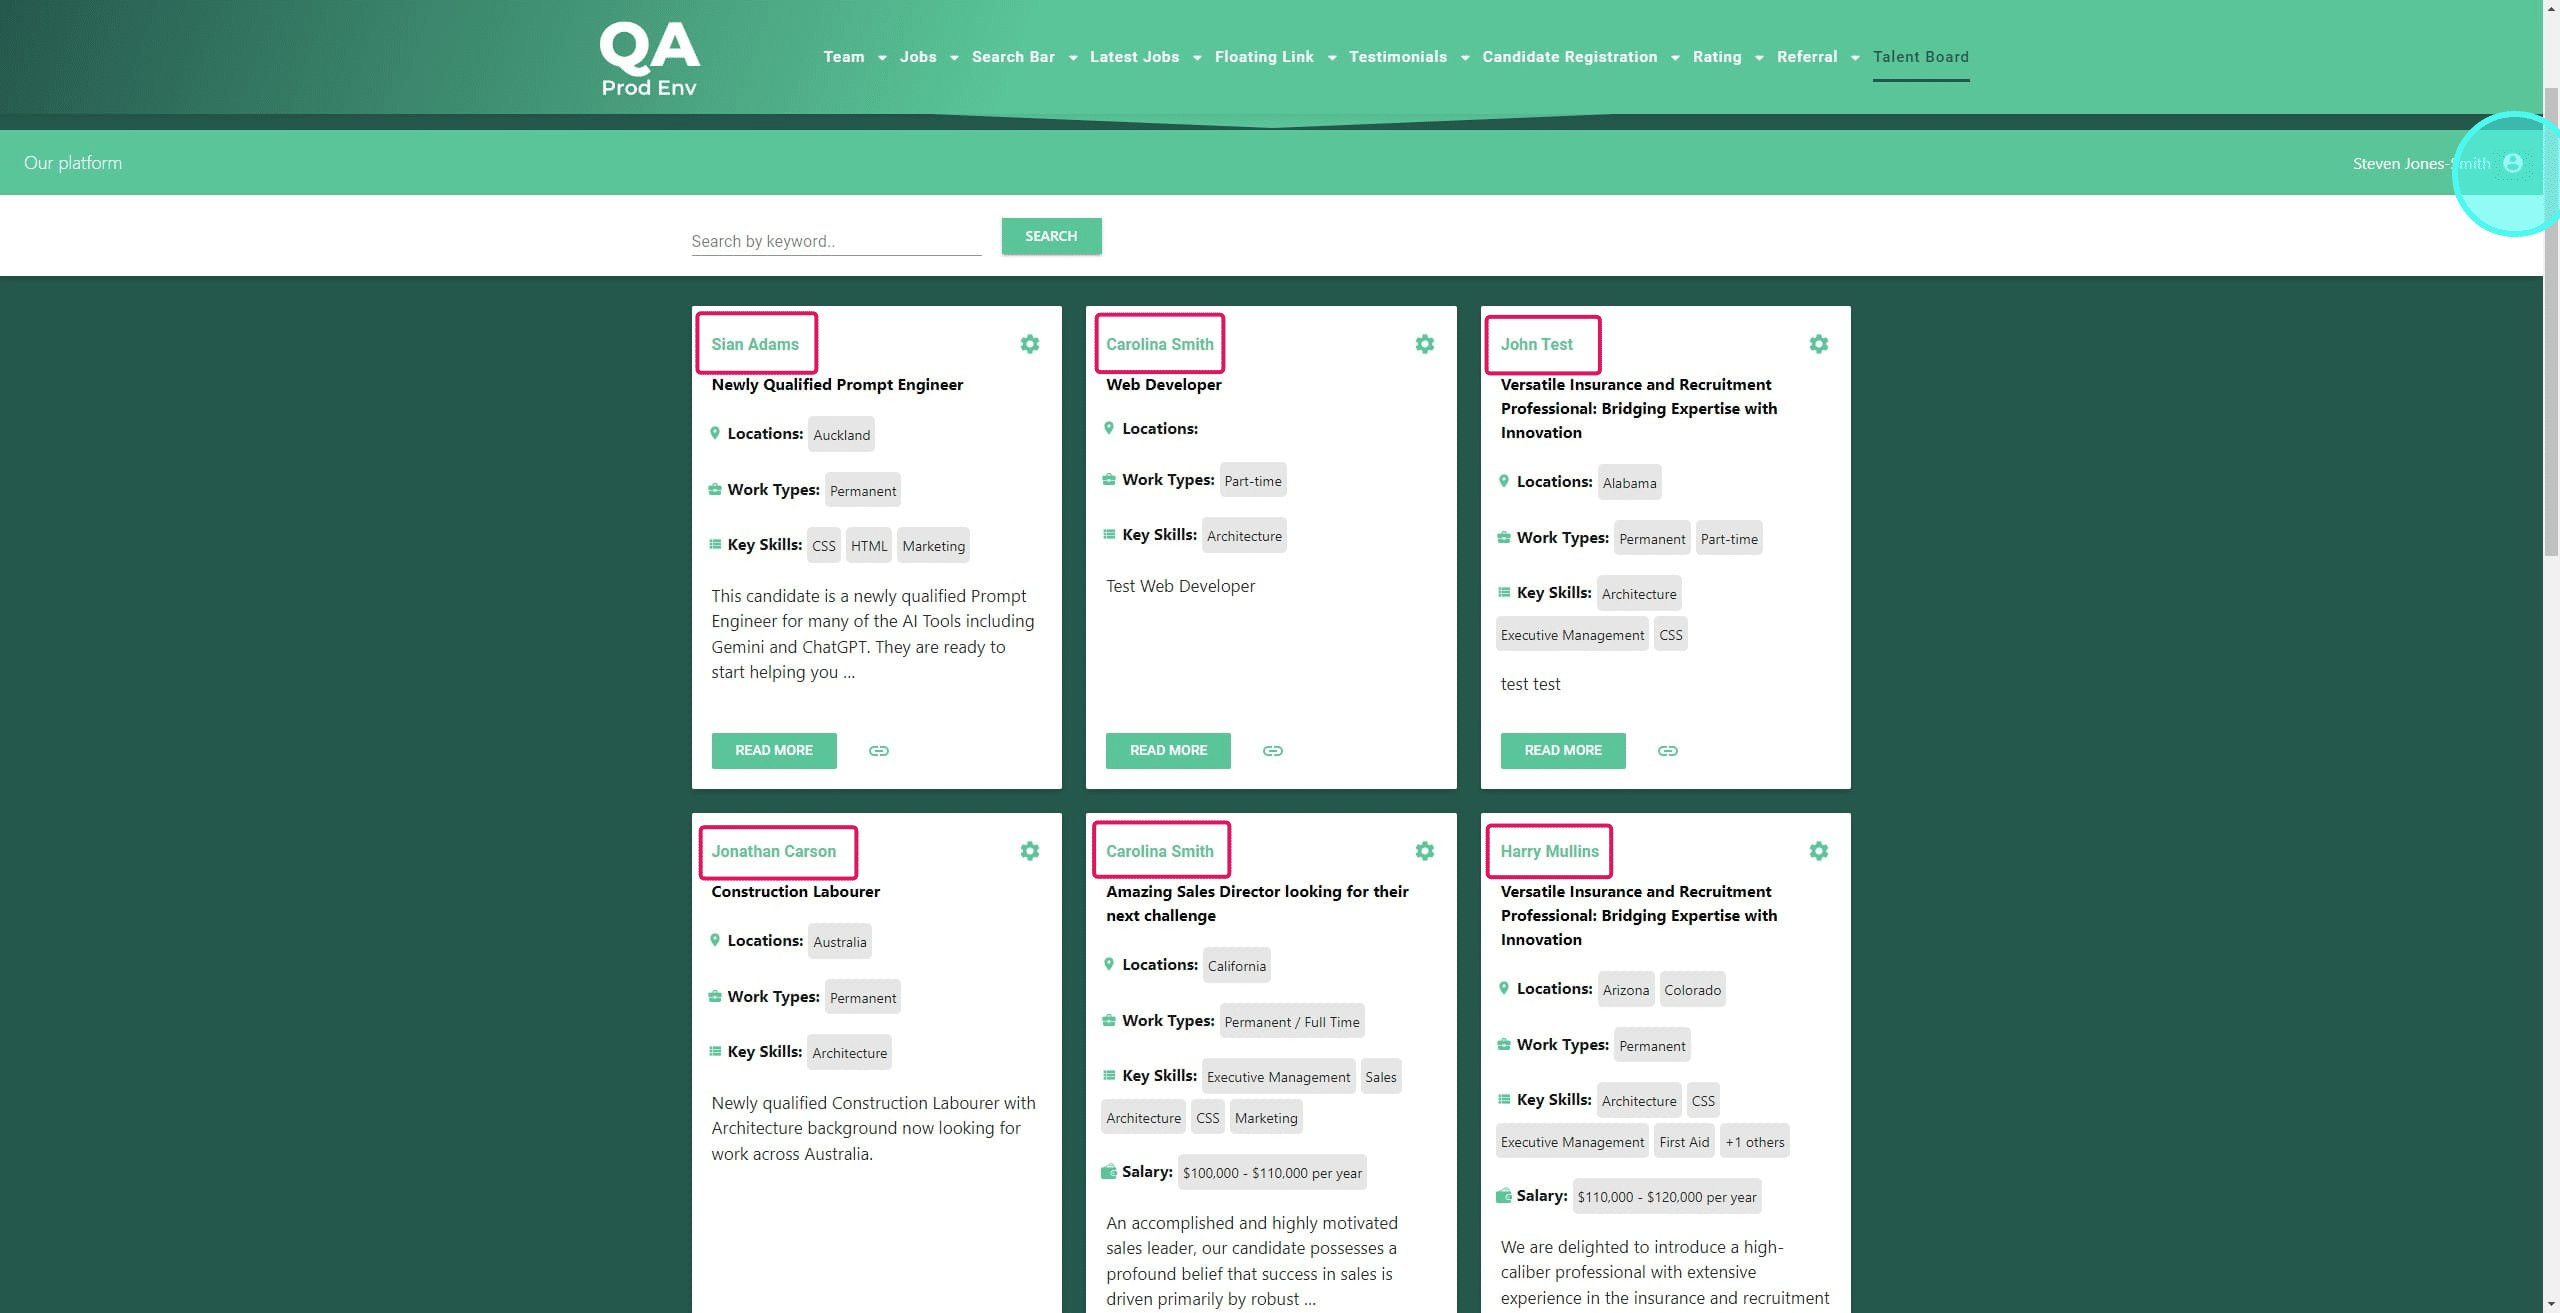
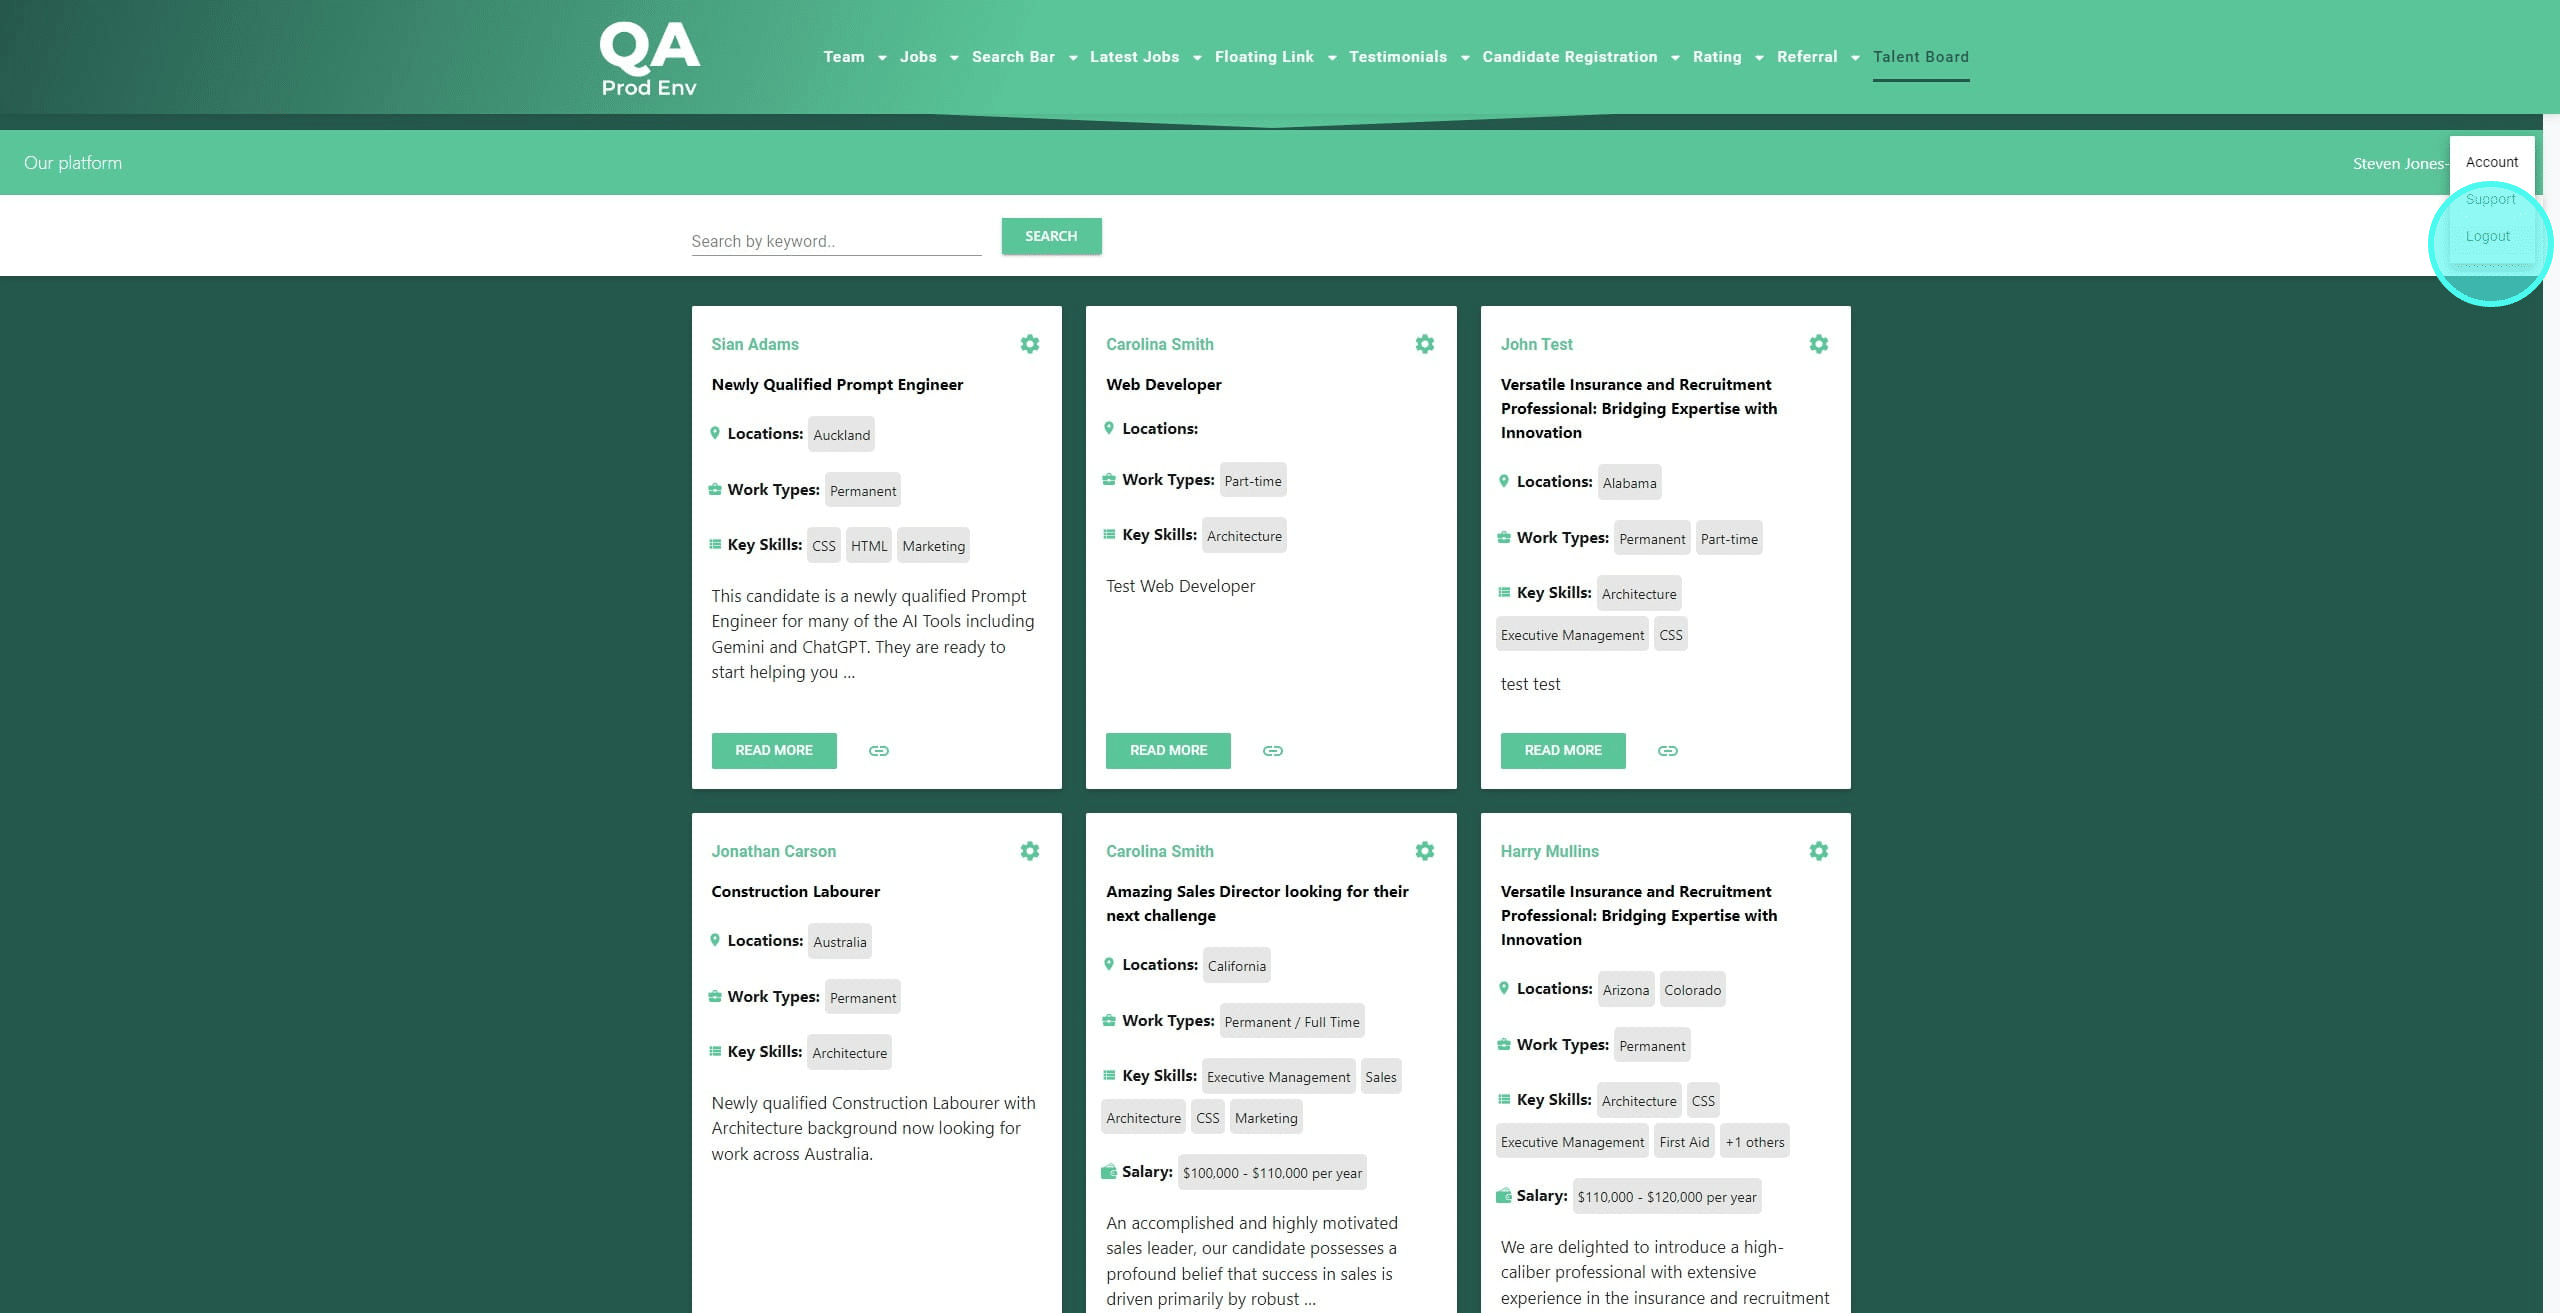
27. Let's logout to see the regular view
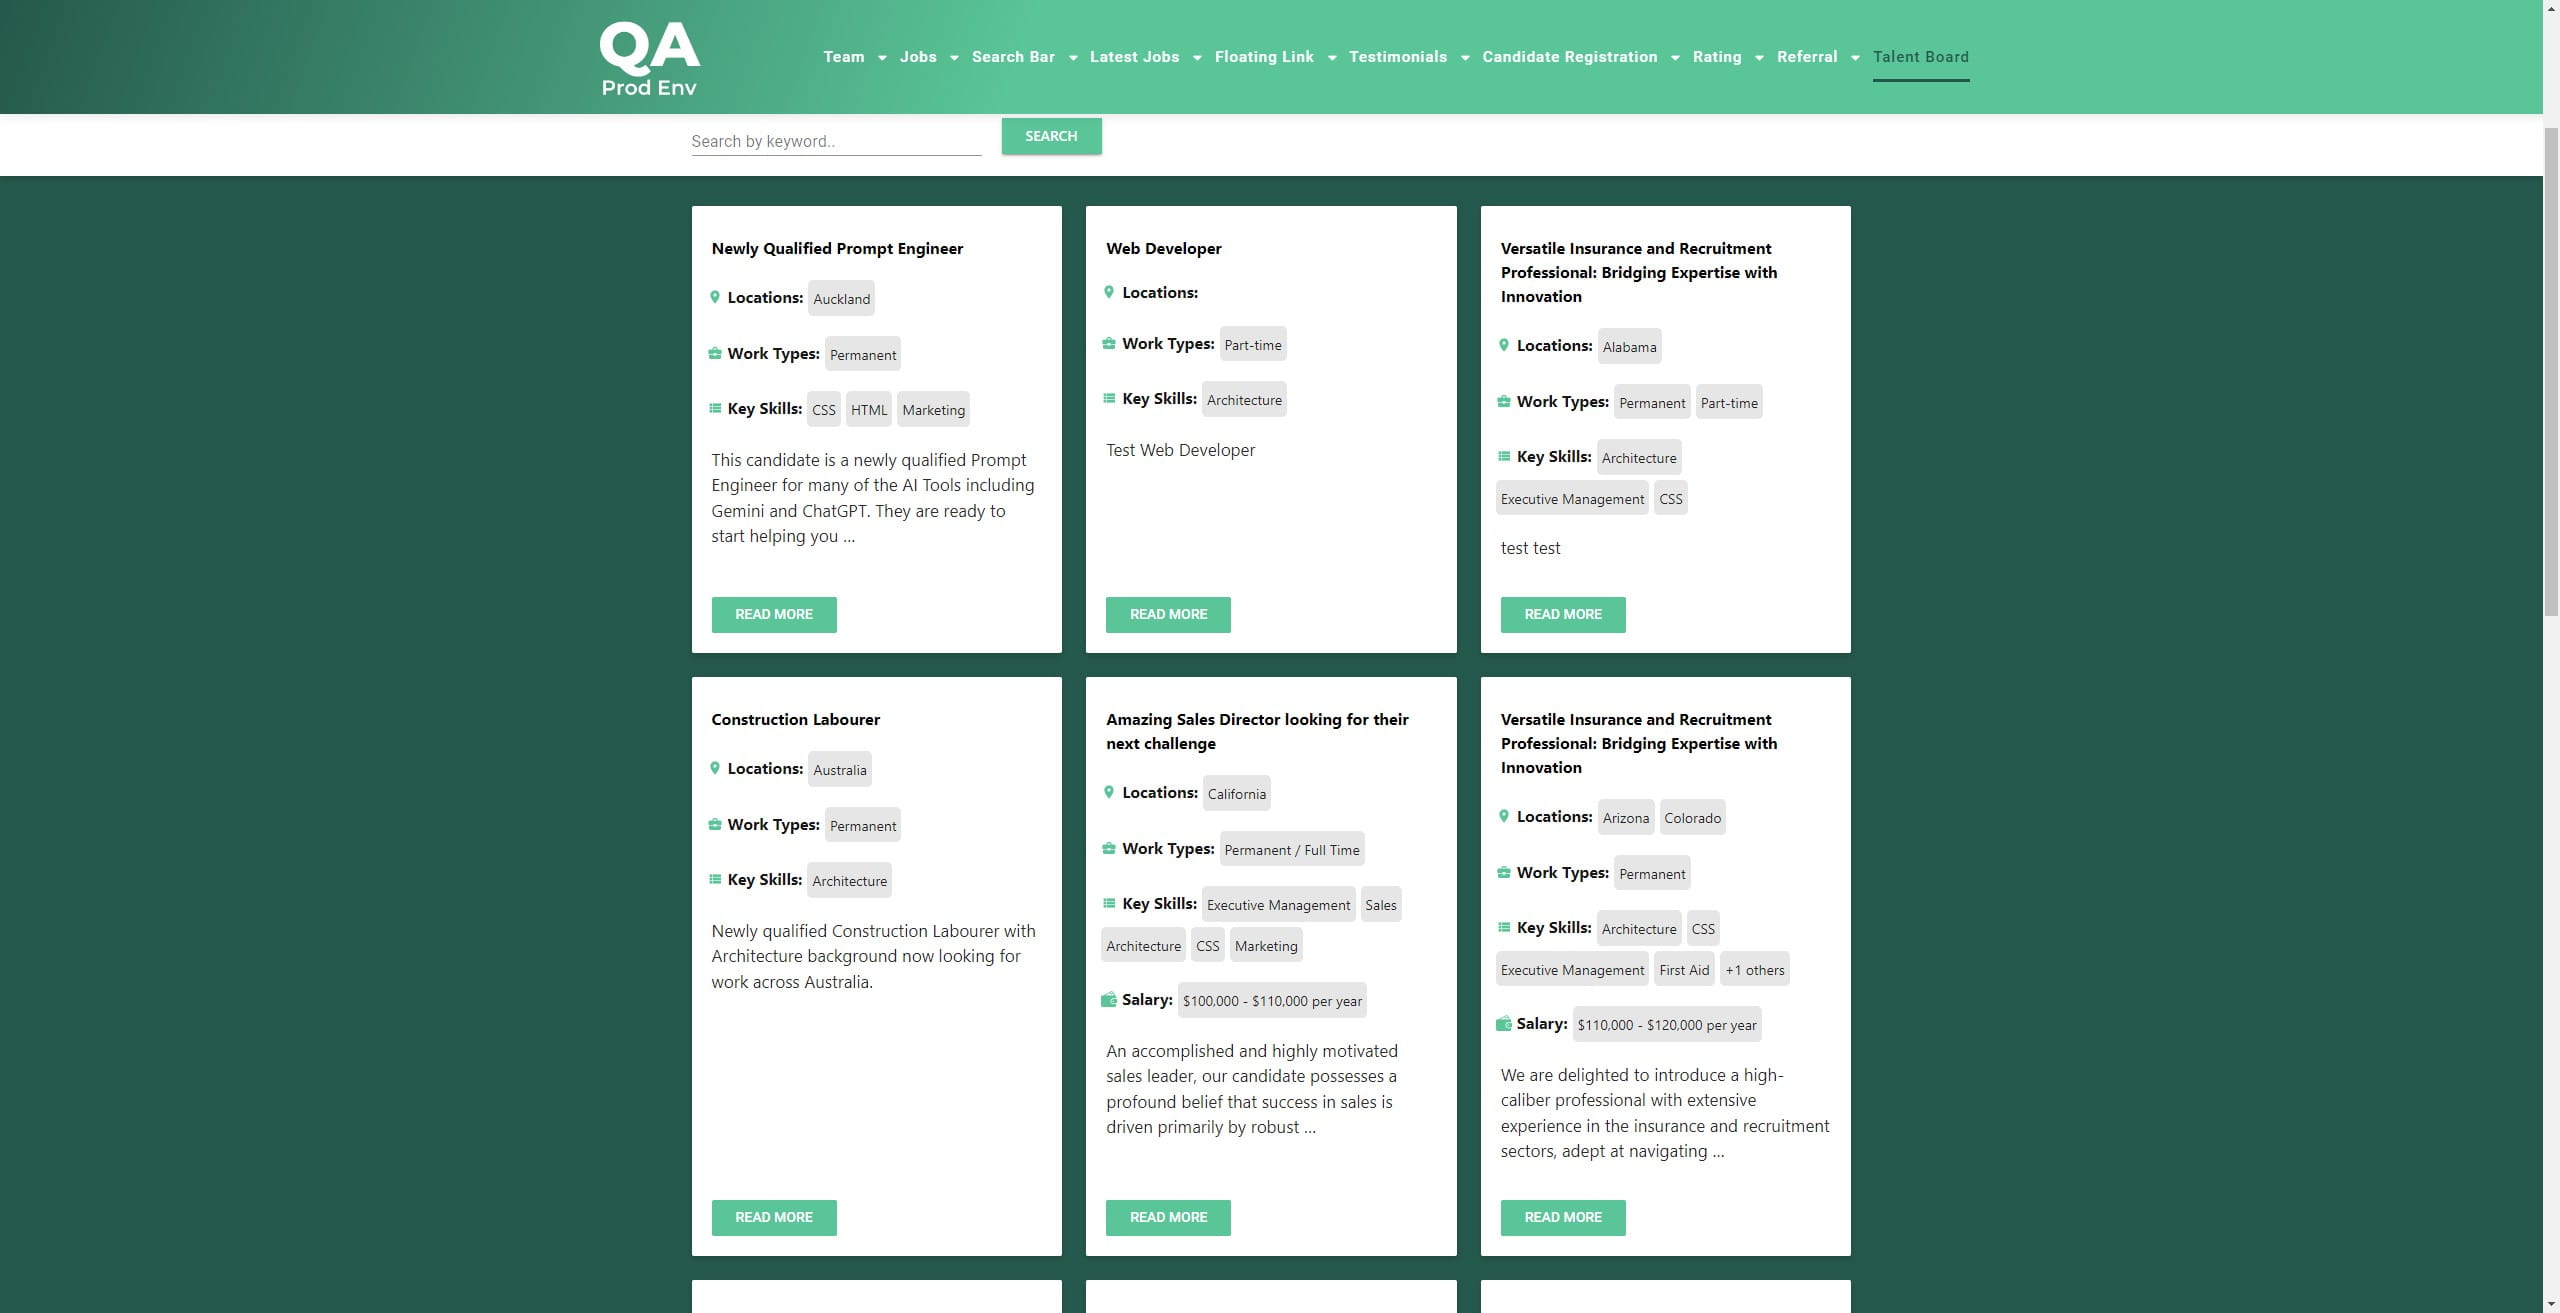
28. Here is the Talent Board for those not logged in. You will notice the Candidate name is no longer visible.
Was this article helpful?
That’s Great!
Thank you for your feedback
Sorry! We couldn't be helpful
Thank you for your feedback
Feedback sent
We appreciate your effort and will try to fix the article