Introduction
In the digital age, the efficiency of online forms and email marketing campaigns is pivotal for the success of any recruitment strategy. Integrating your forms with ActiveCampaign not only streamlines the process of capturing leads but also enhances engagement with potential candidates through automated follow-ups and personalized communication. This guide has walked you through the detailed process of linking your existing forms to ActiveCampaign, ensuring that every submission is directly funneled into your contact list for immediate engagement.
Step-by-Step Integration Process
1. Log into the WordPress dashboard of your Refari website to start the integration process.

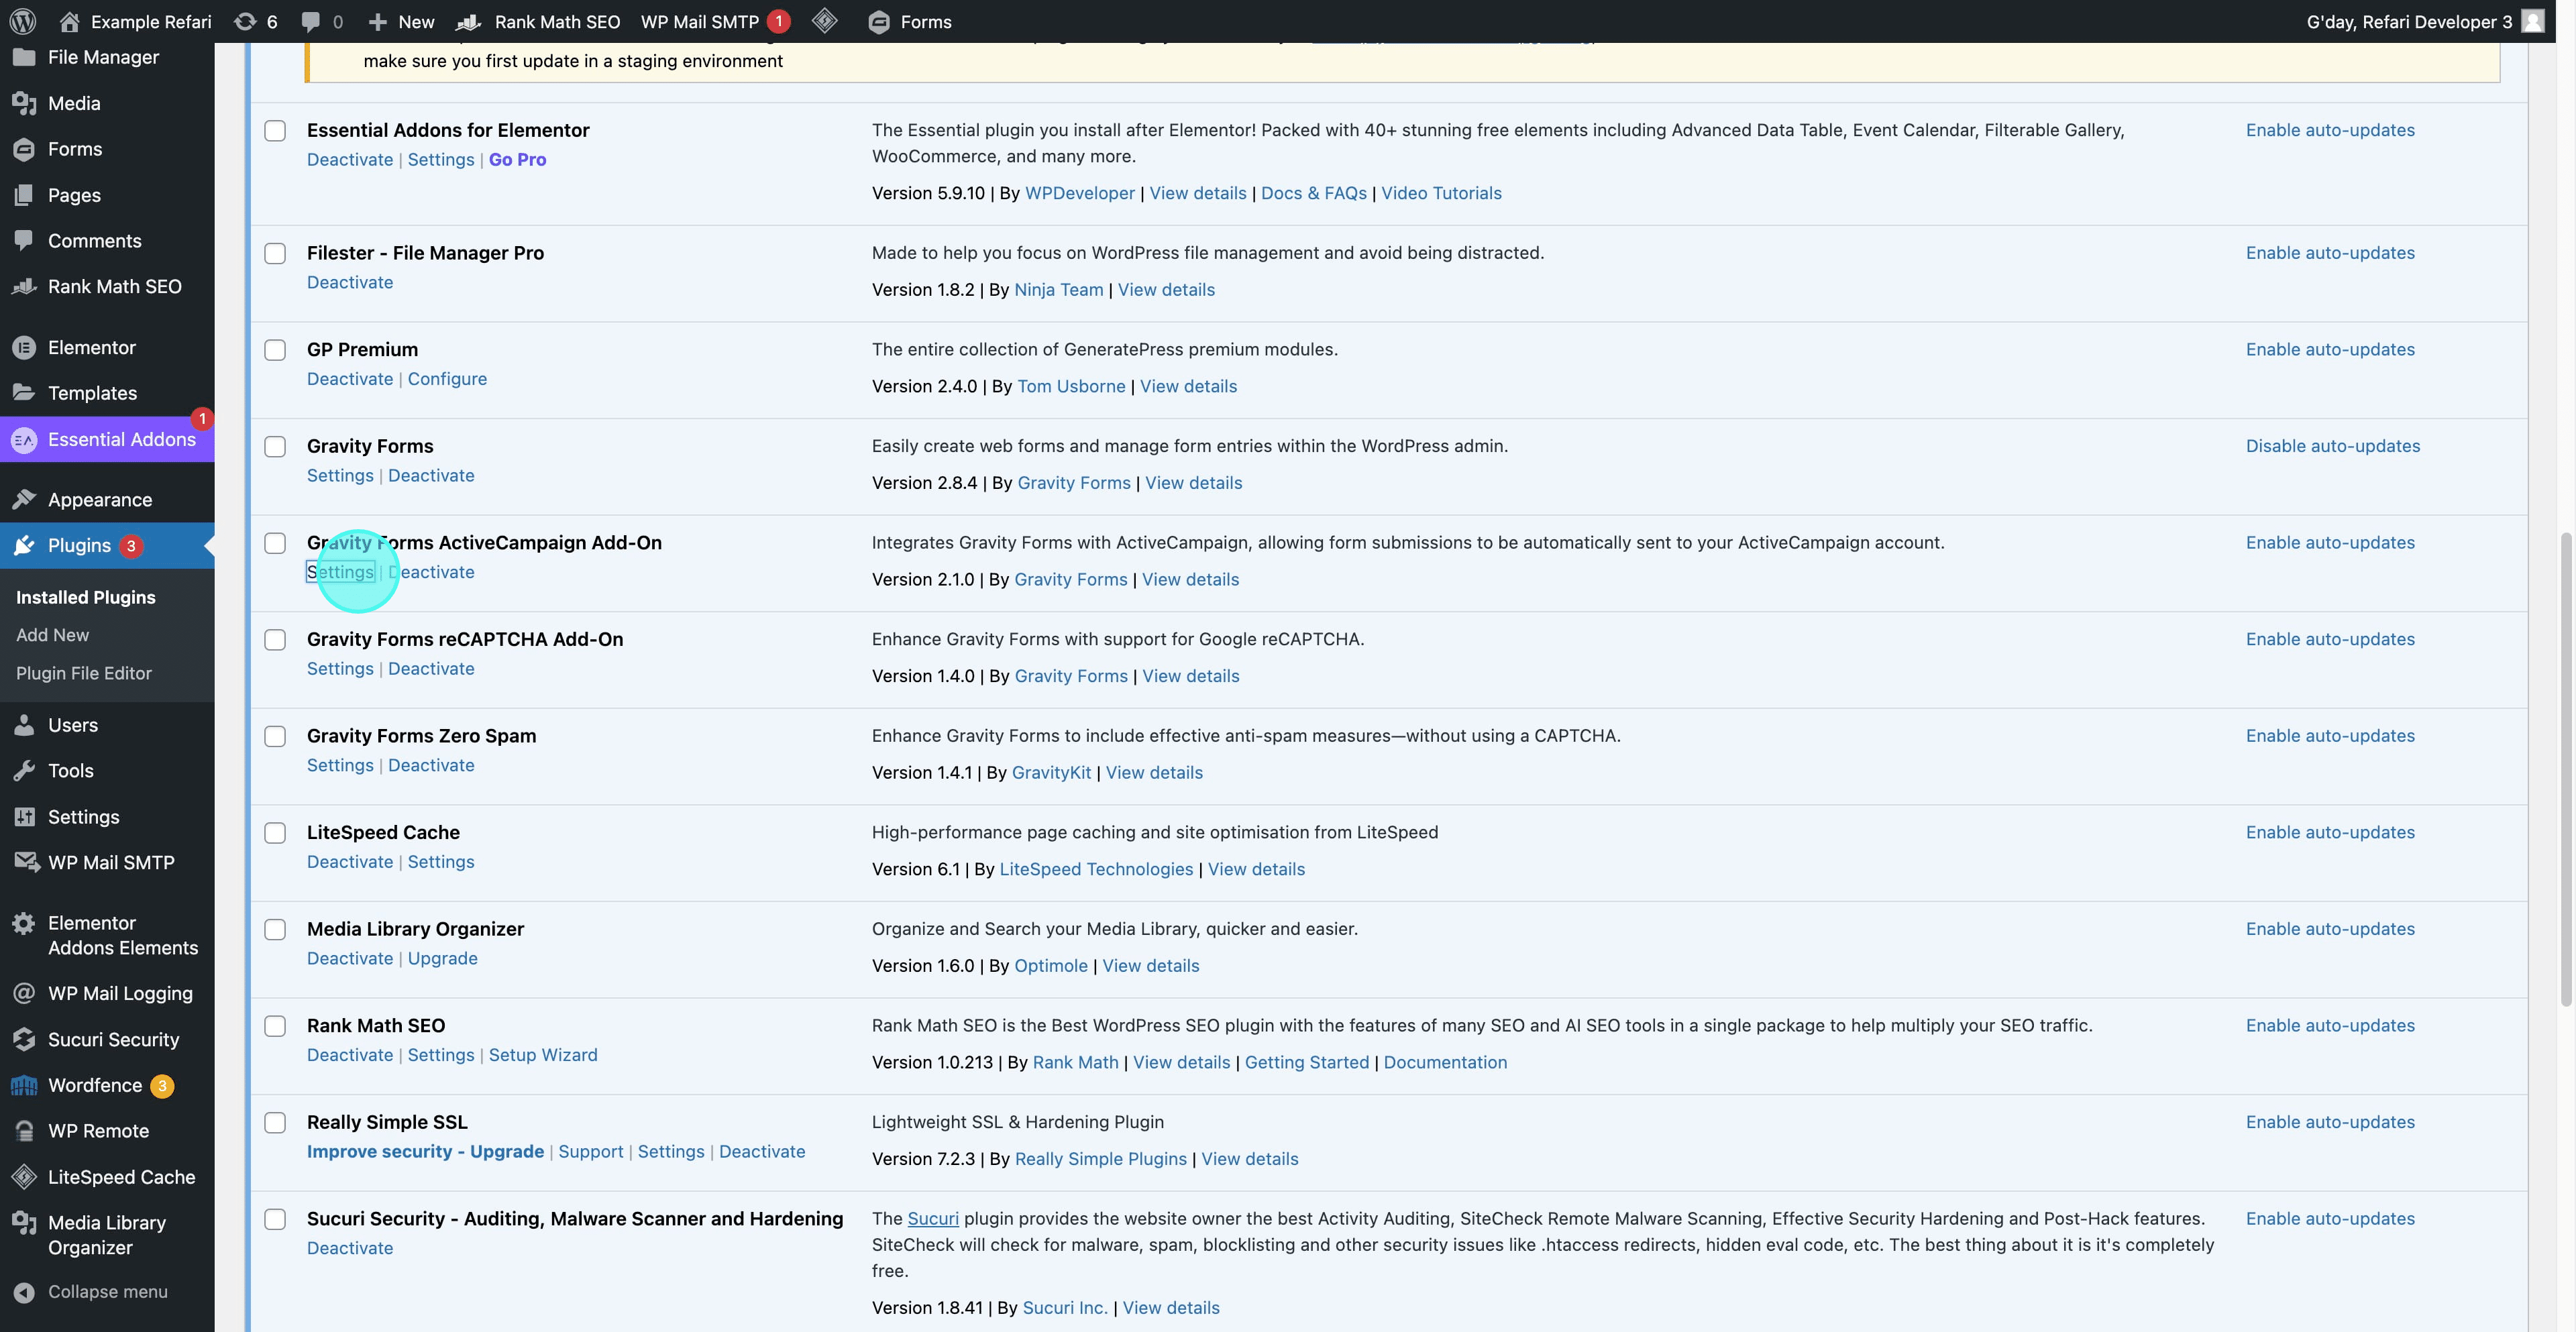
2. Navigate to the "Forms" section and select "Add-Ons" from the menu.

3. Locate the ActiveCampaign Add-On, click "Install," and then proceed to "Activate" it.

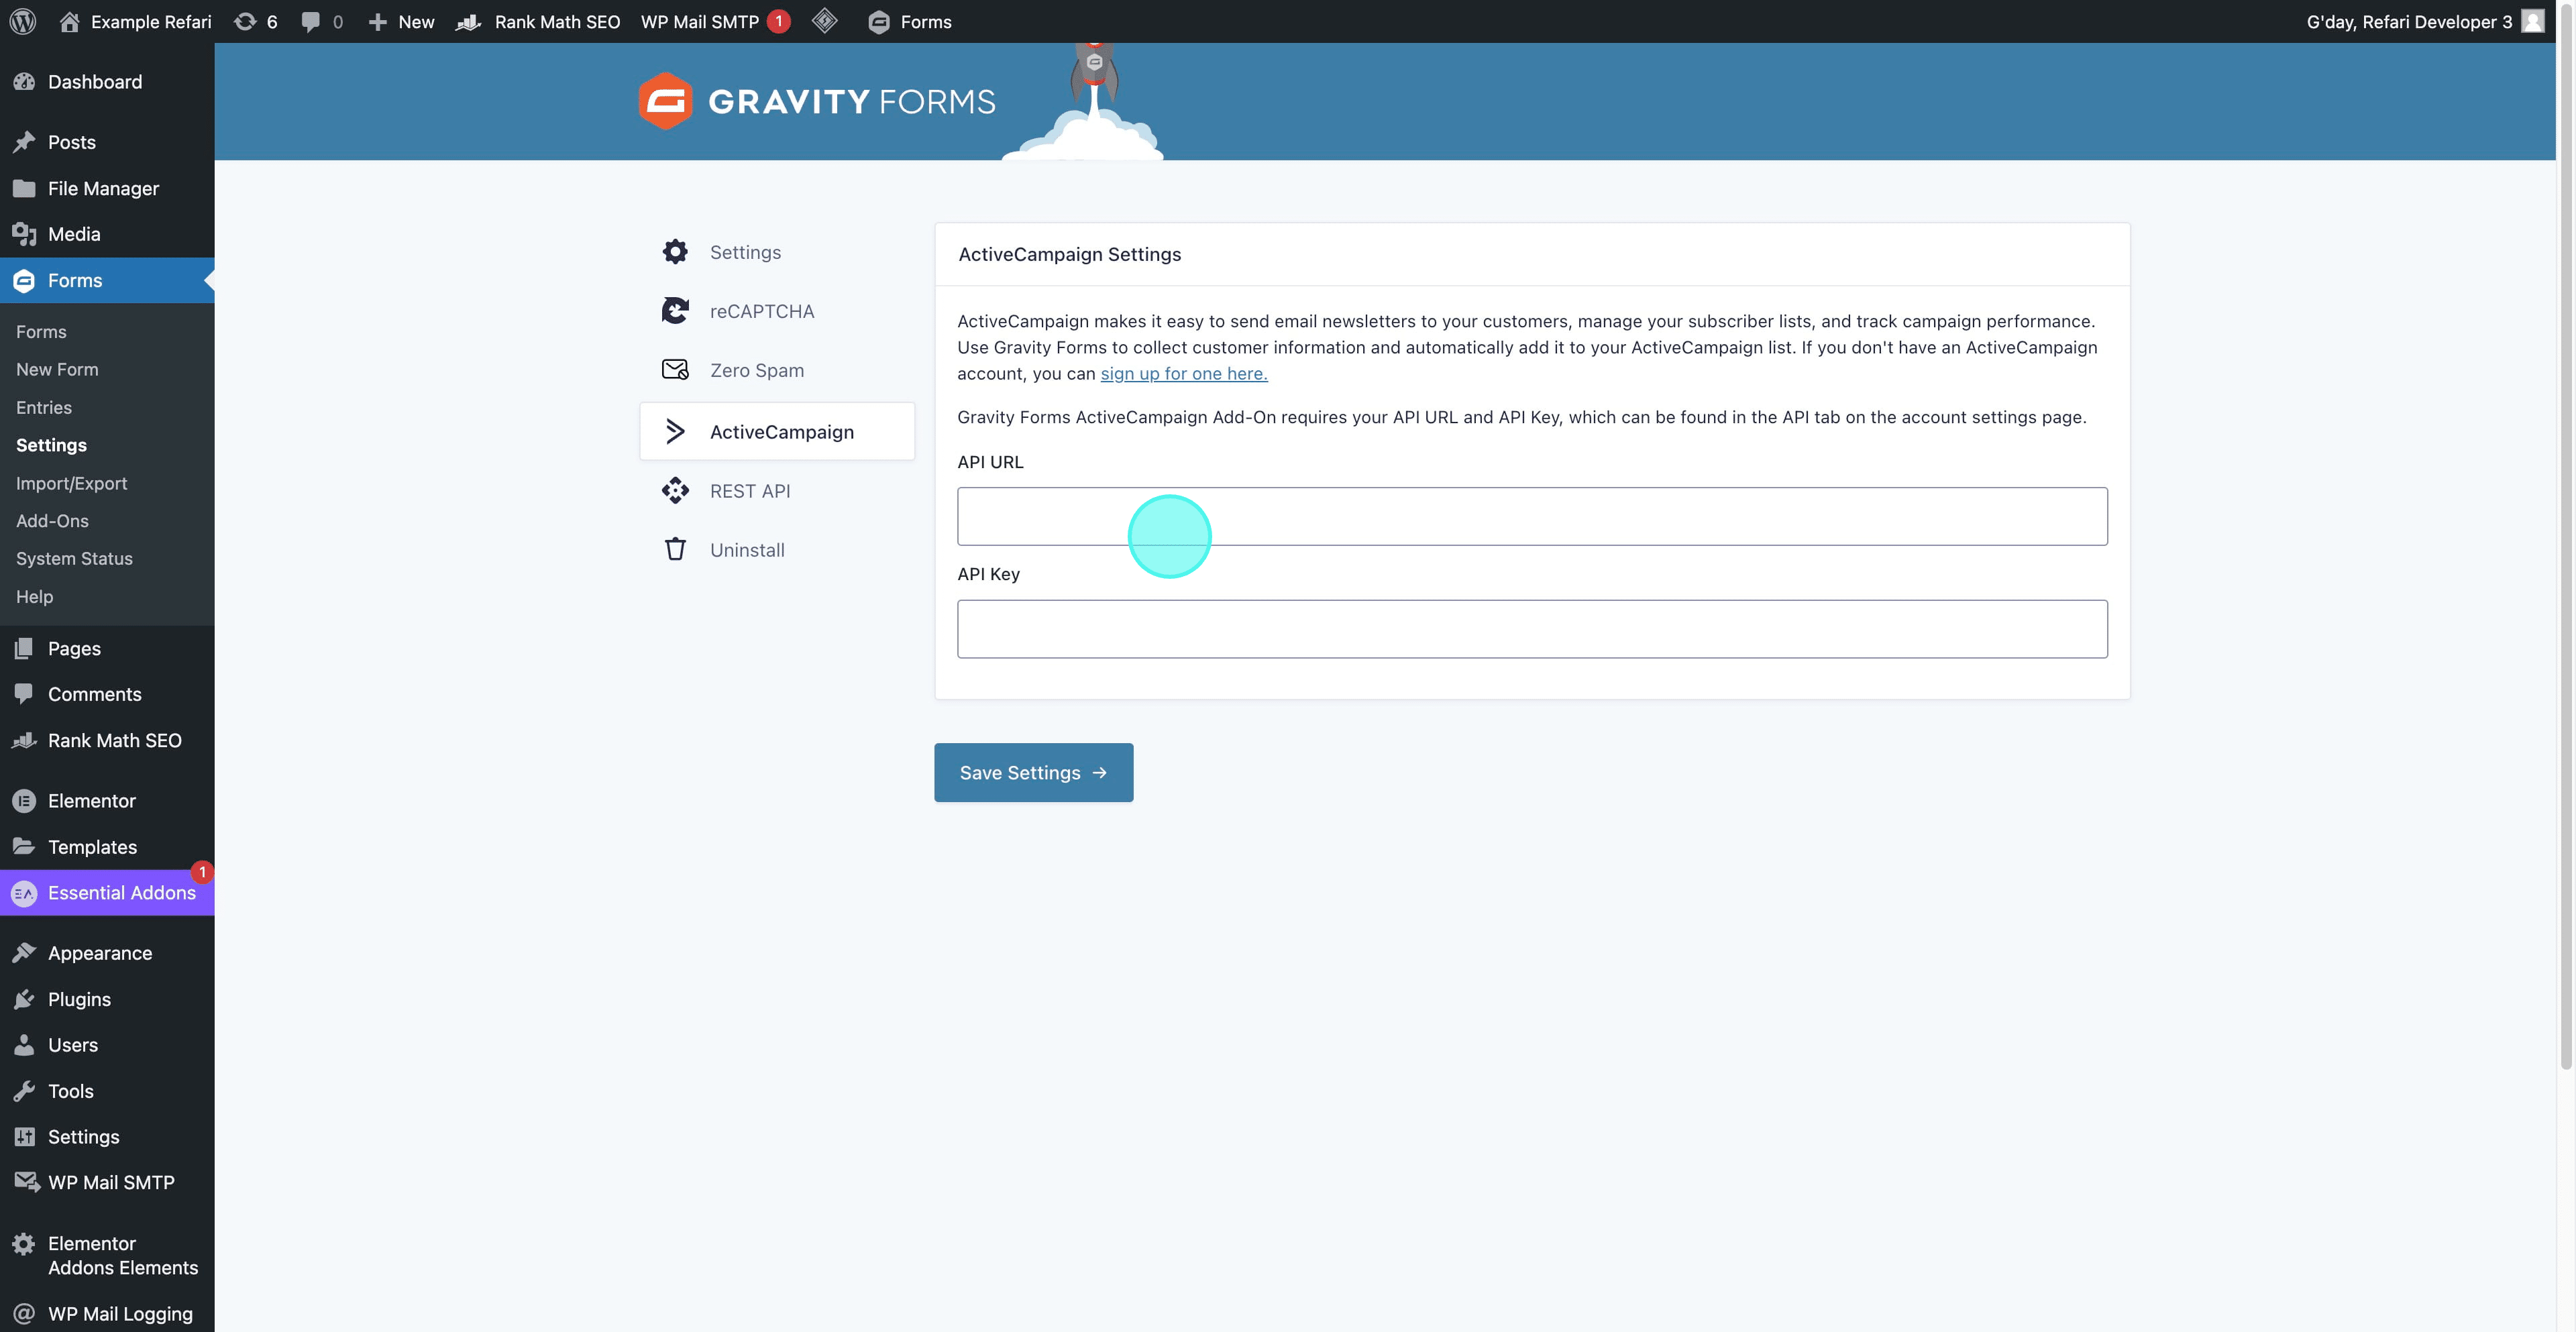
4. After activation, on the plugins page, navigate to and click on "Gravity Forms ActiveCampaign Add-On Settings."
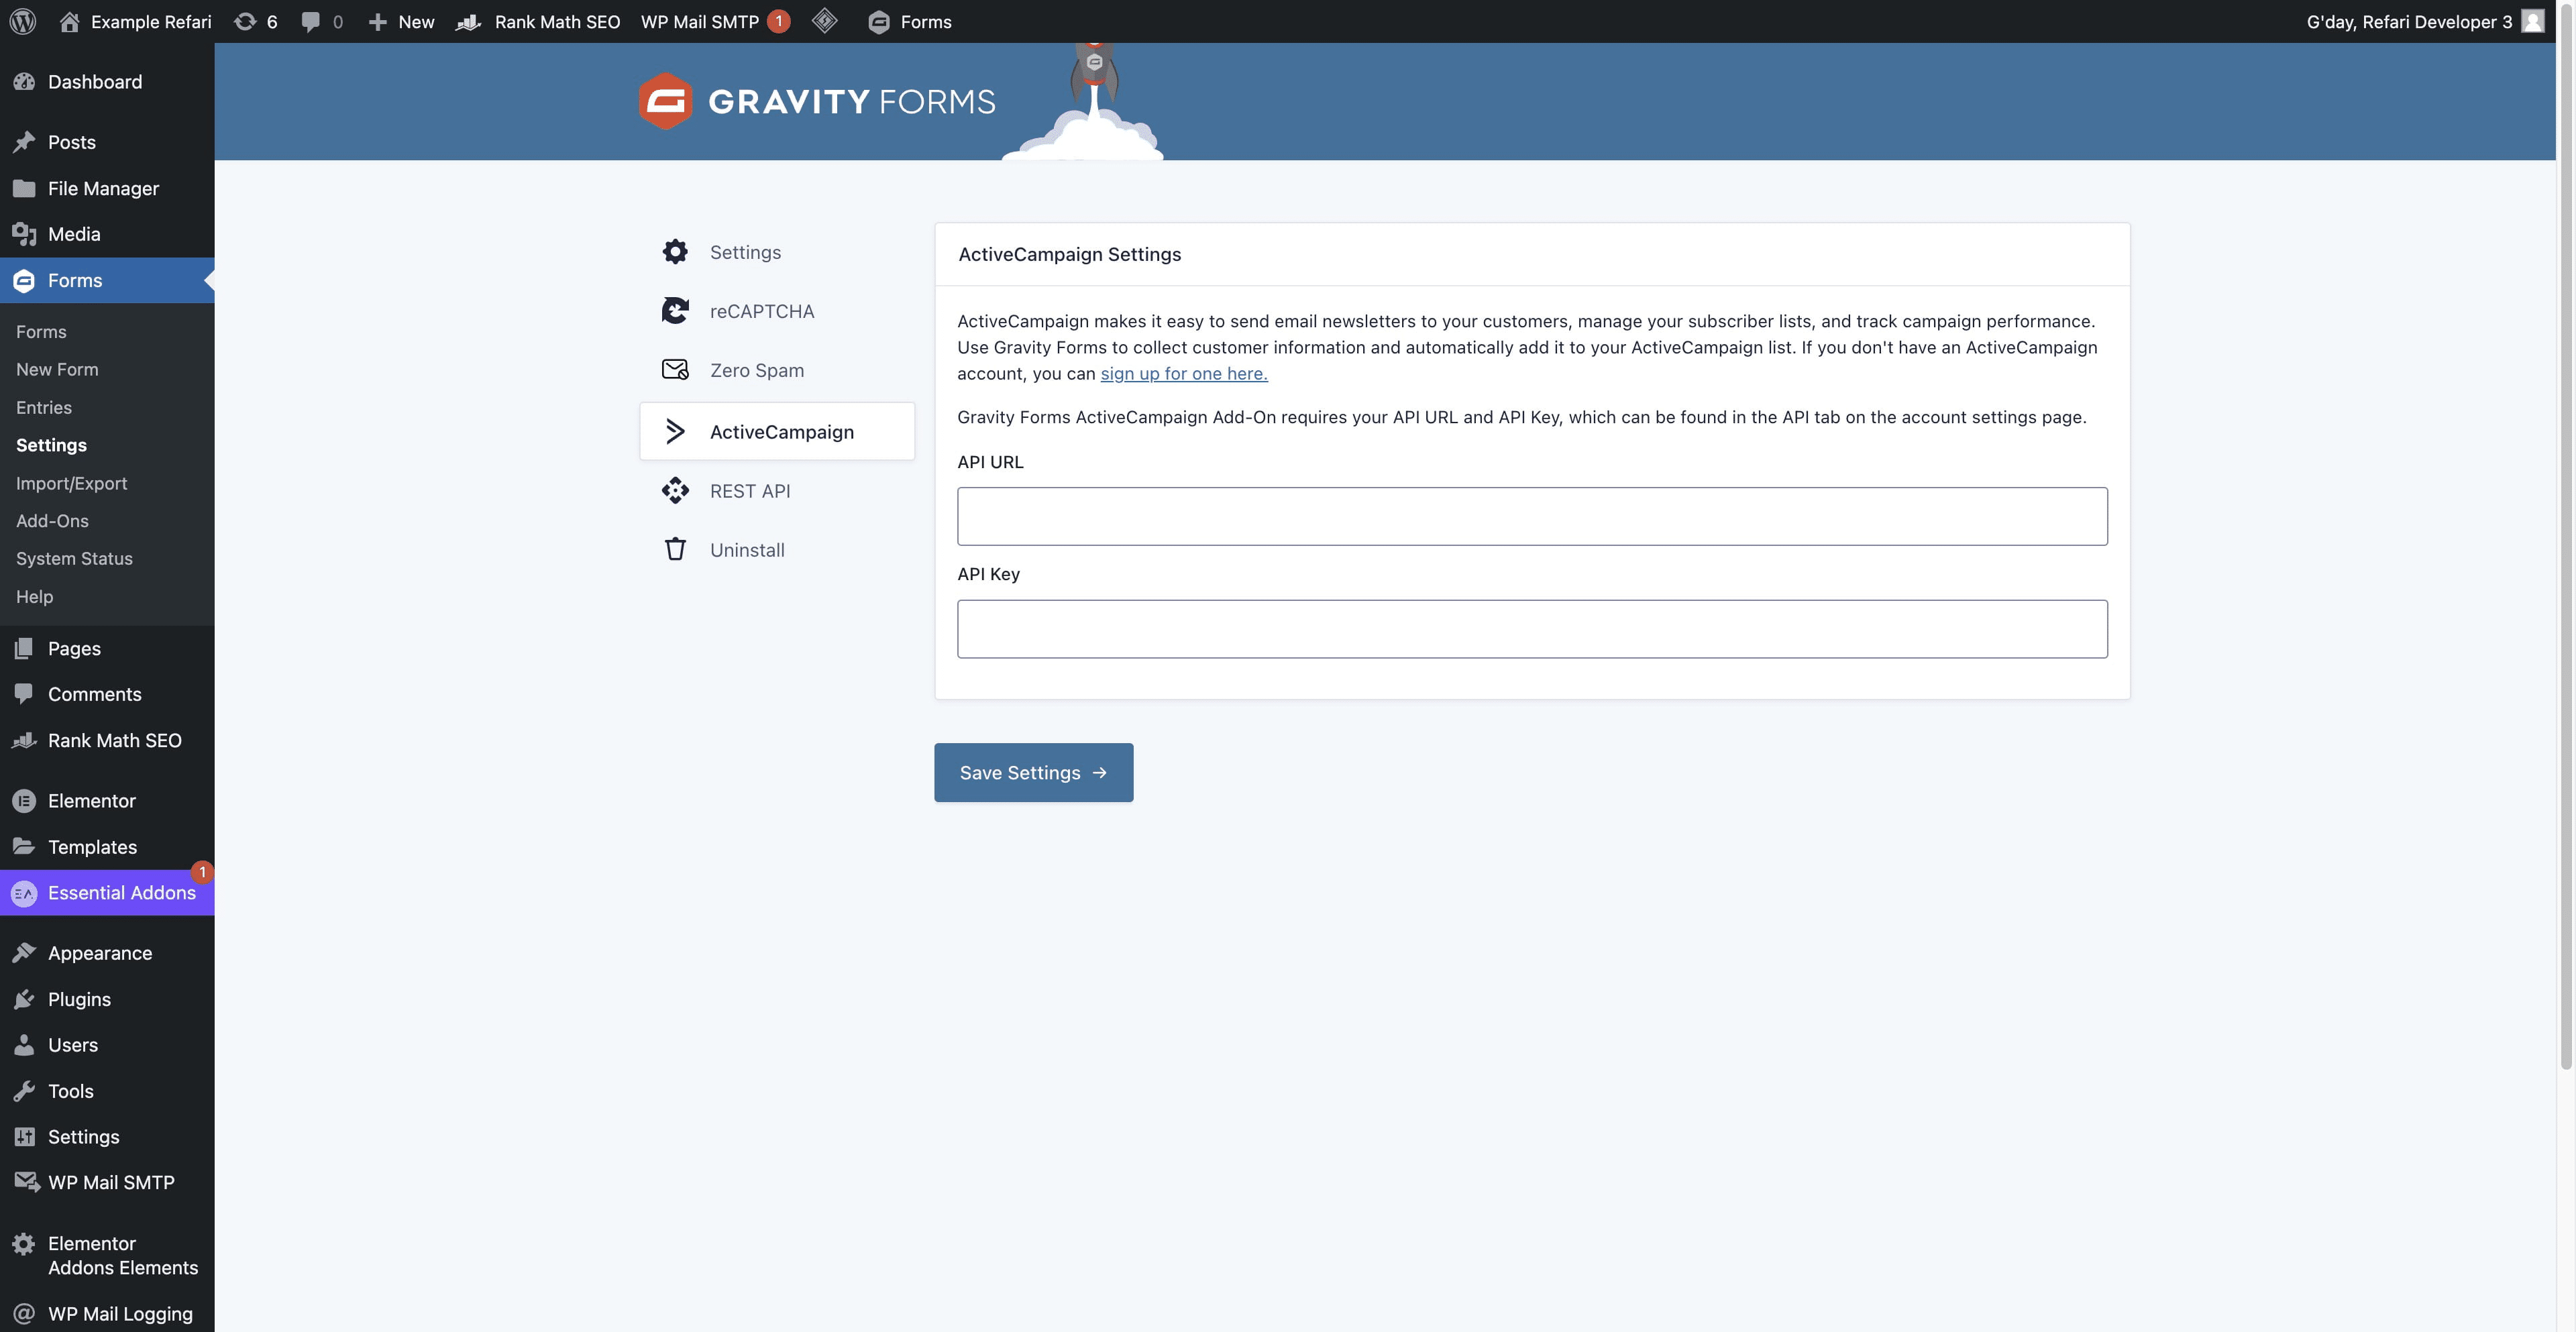
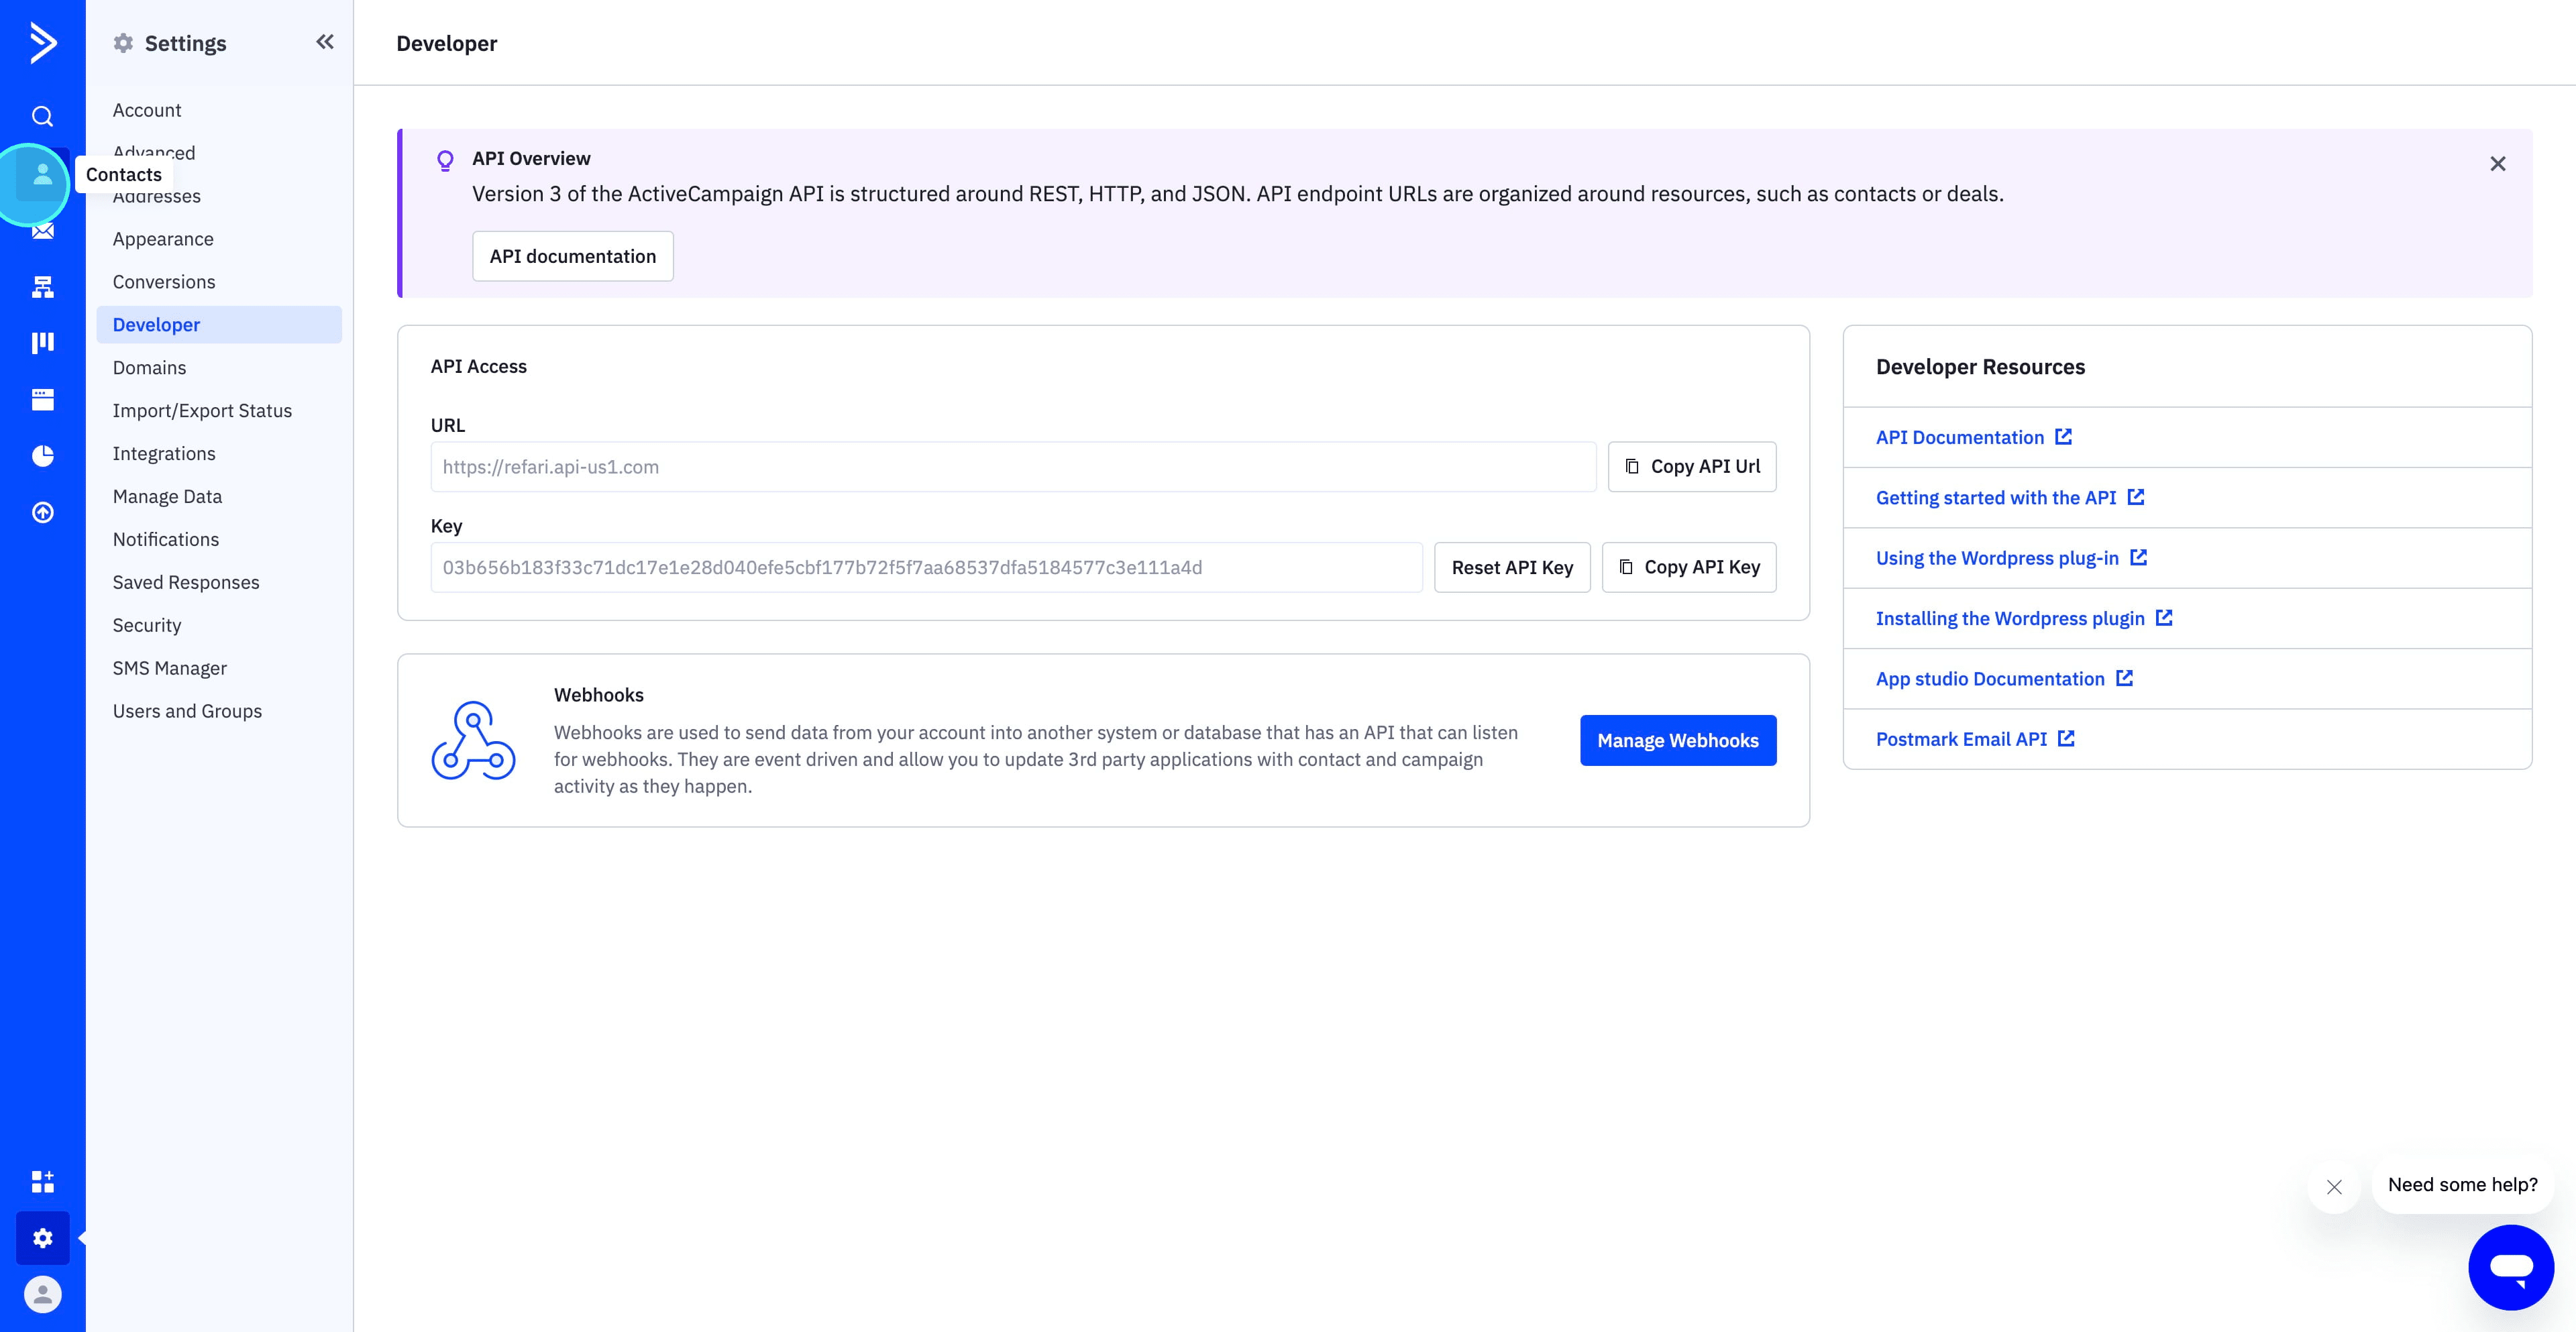
5. To integrate ActiveCampaign, you'll need the API URL and API Key, which can be obtained from your ActiveCampaign account. Please log in to your account to retrieve these details.
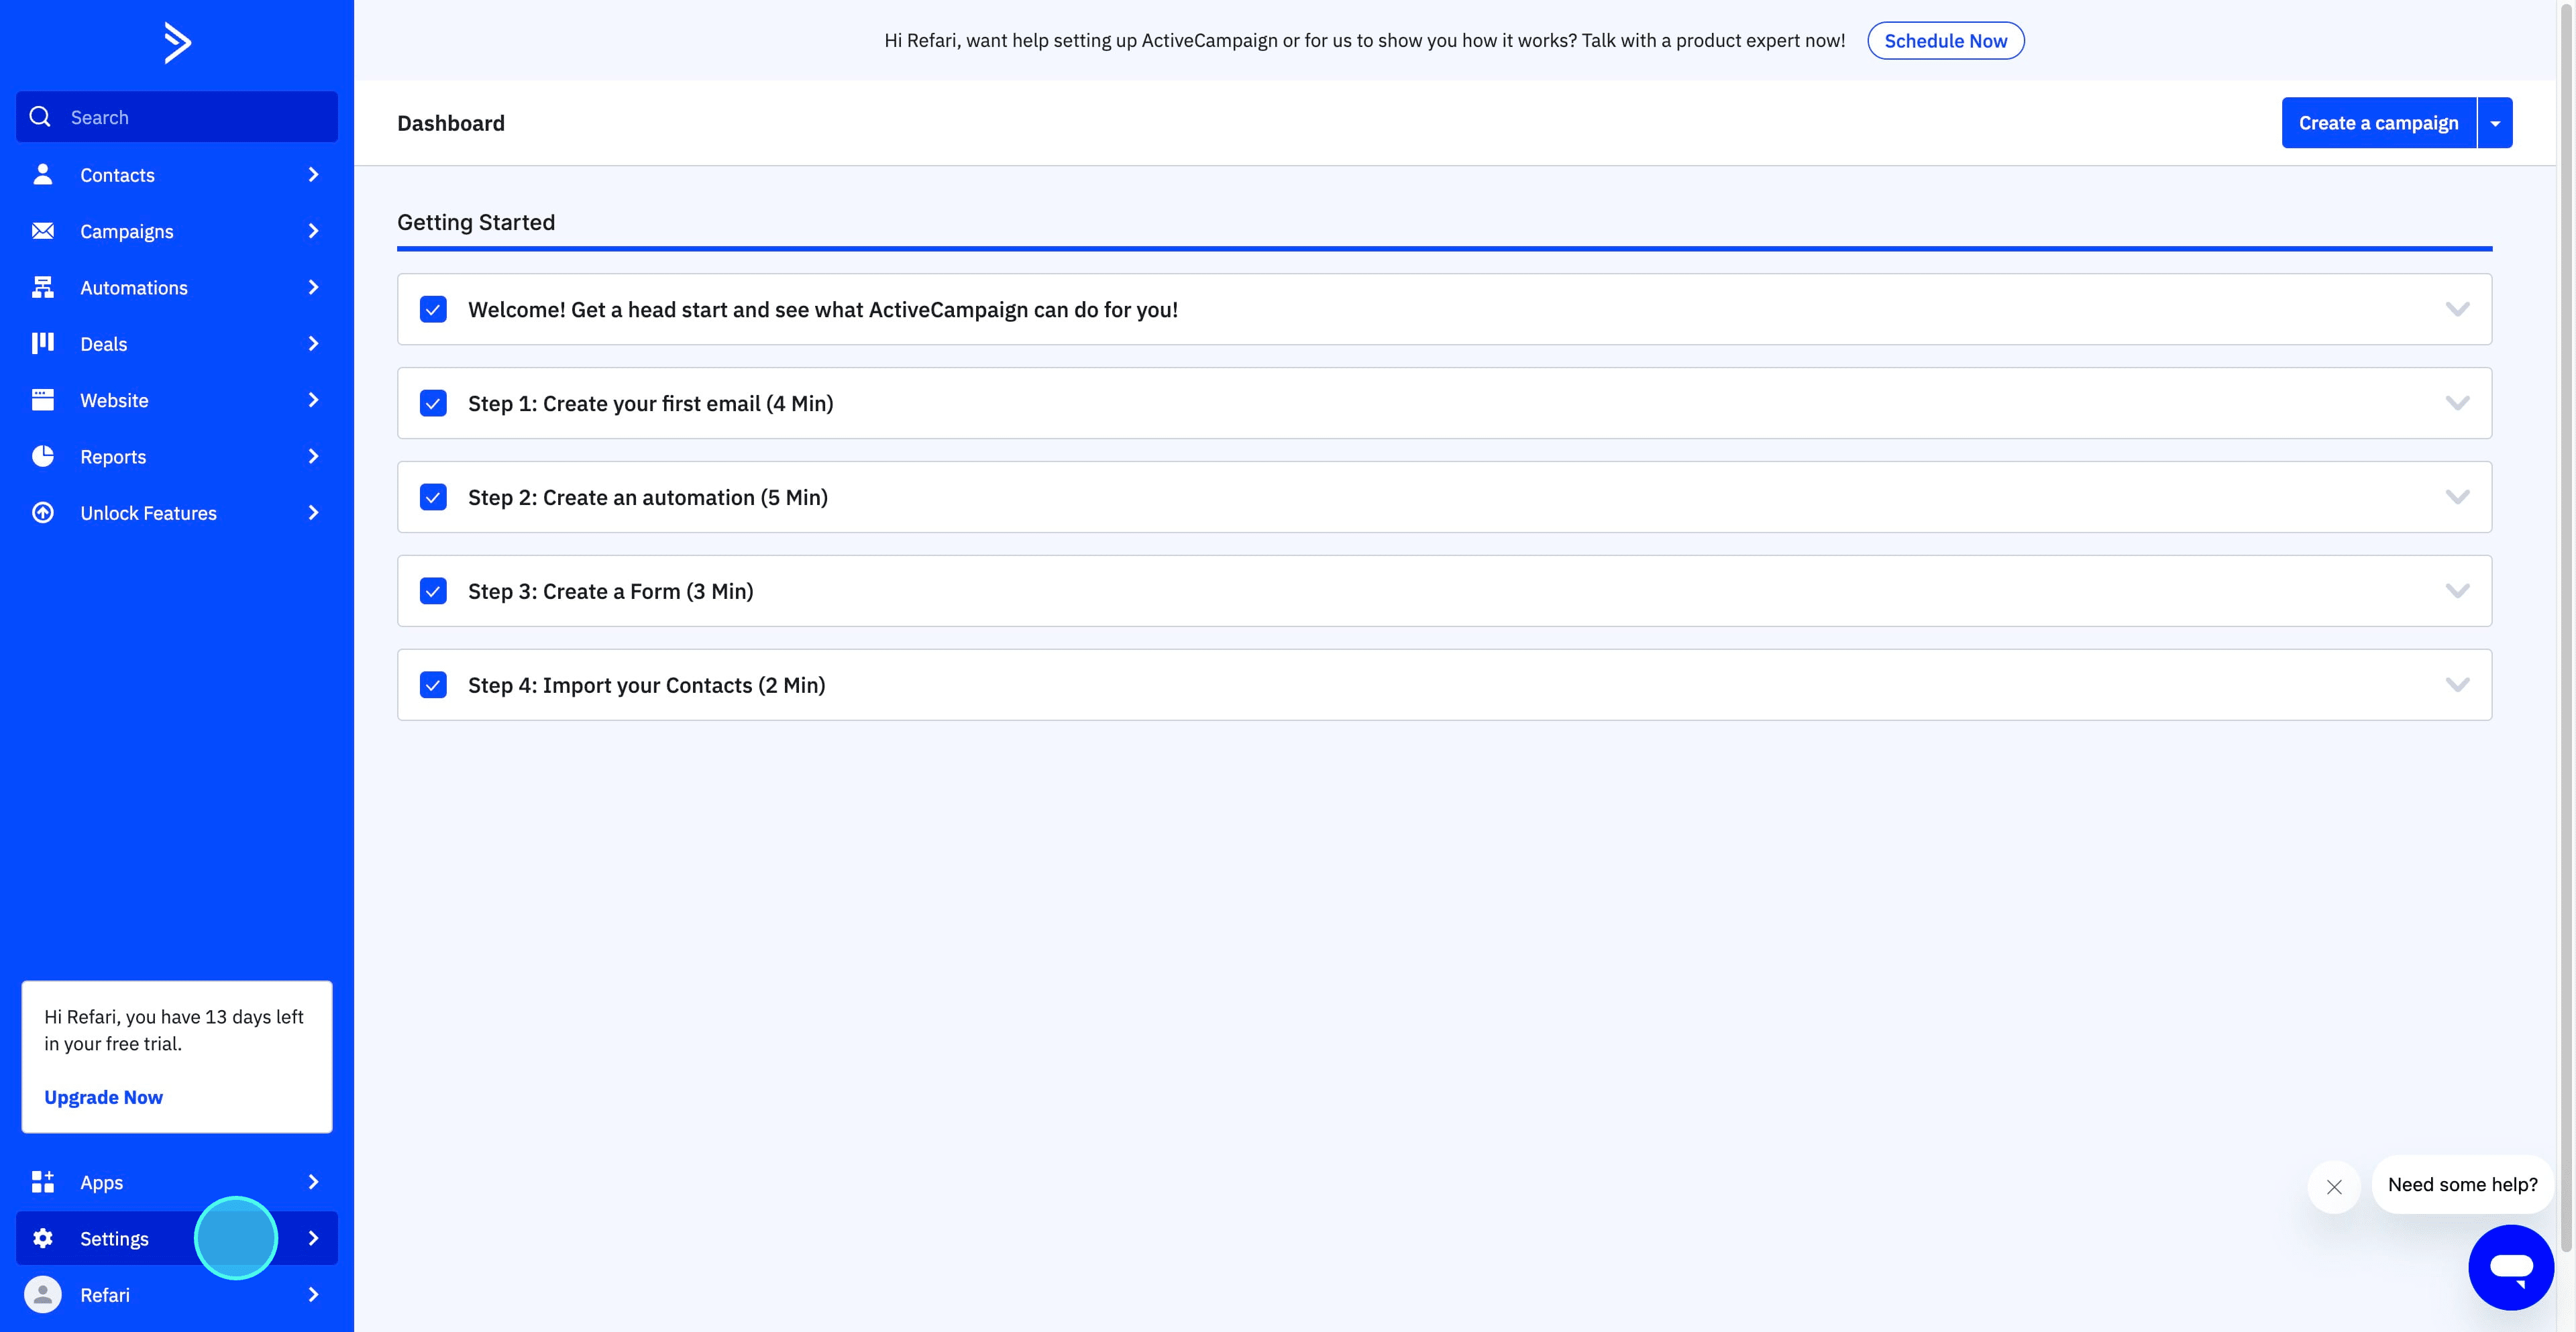
6. After logging into your account, navigate to and click on "Settings."
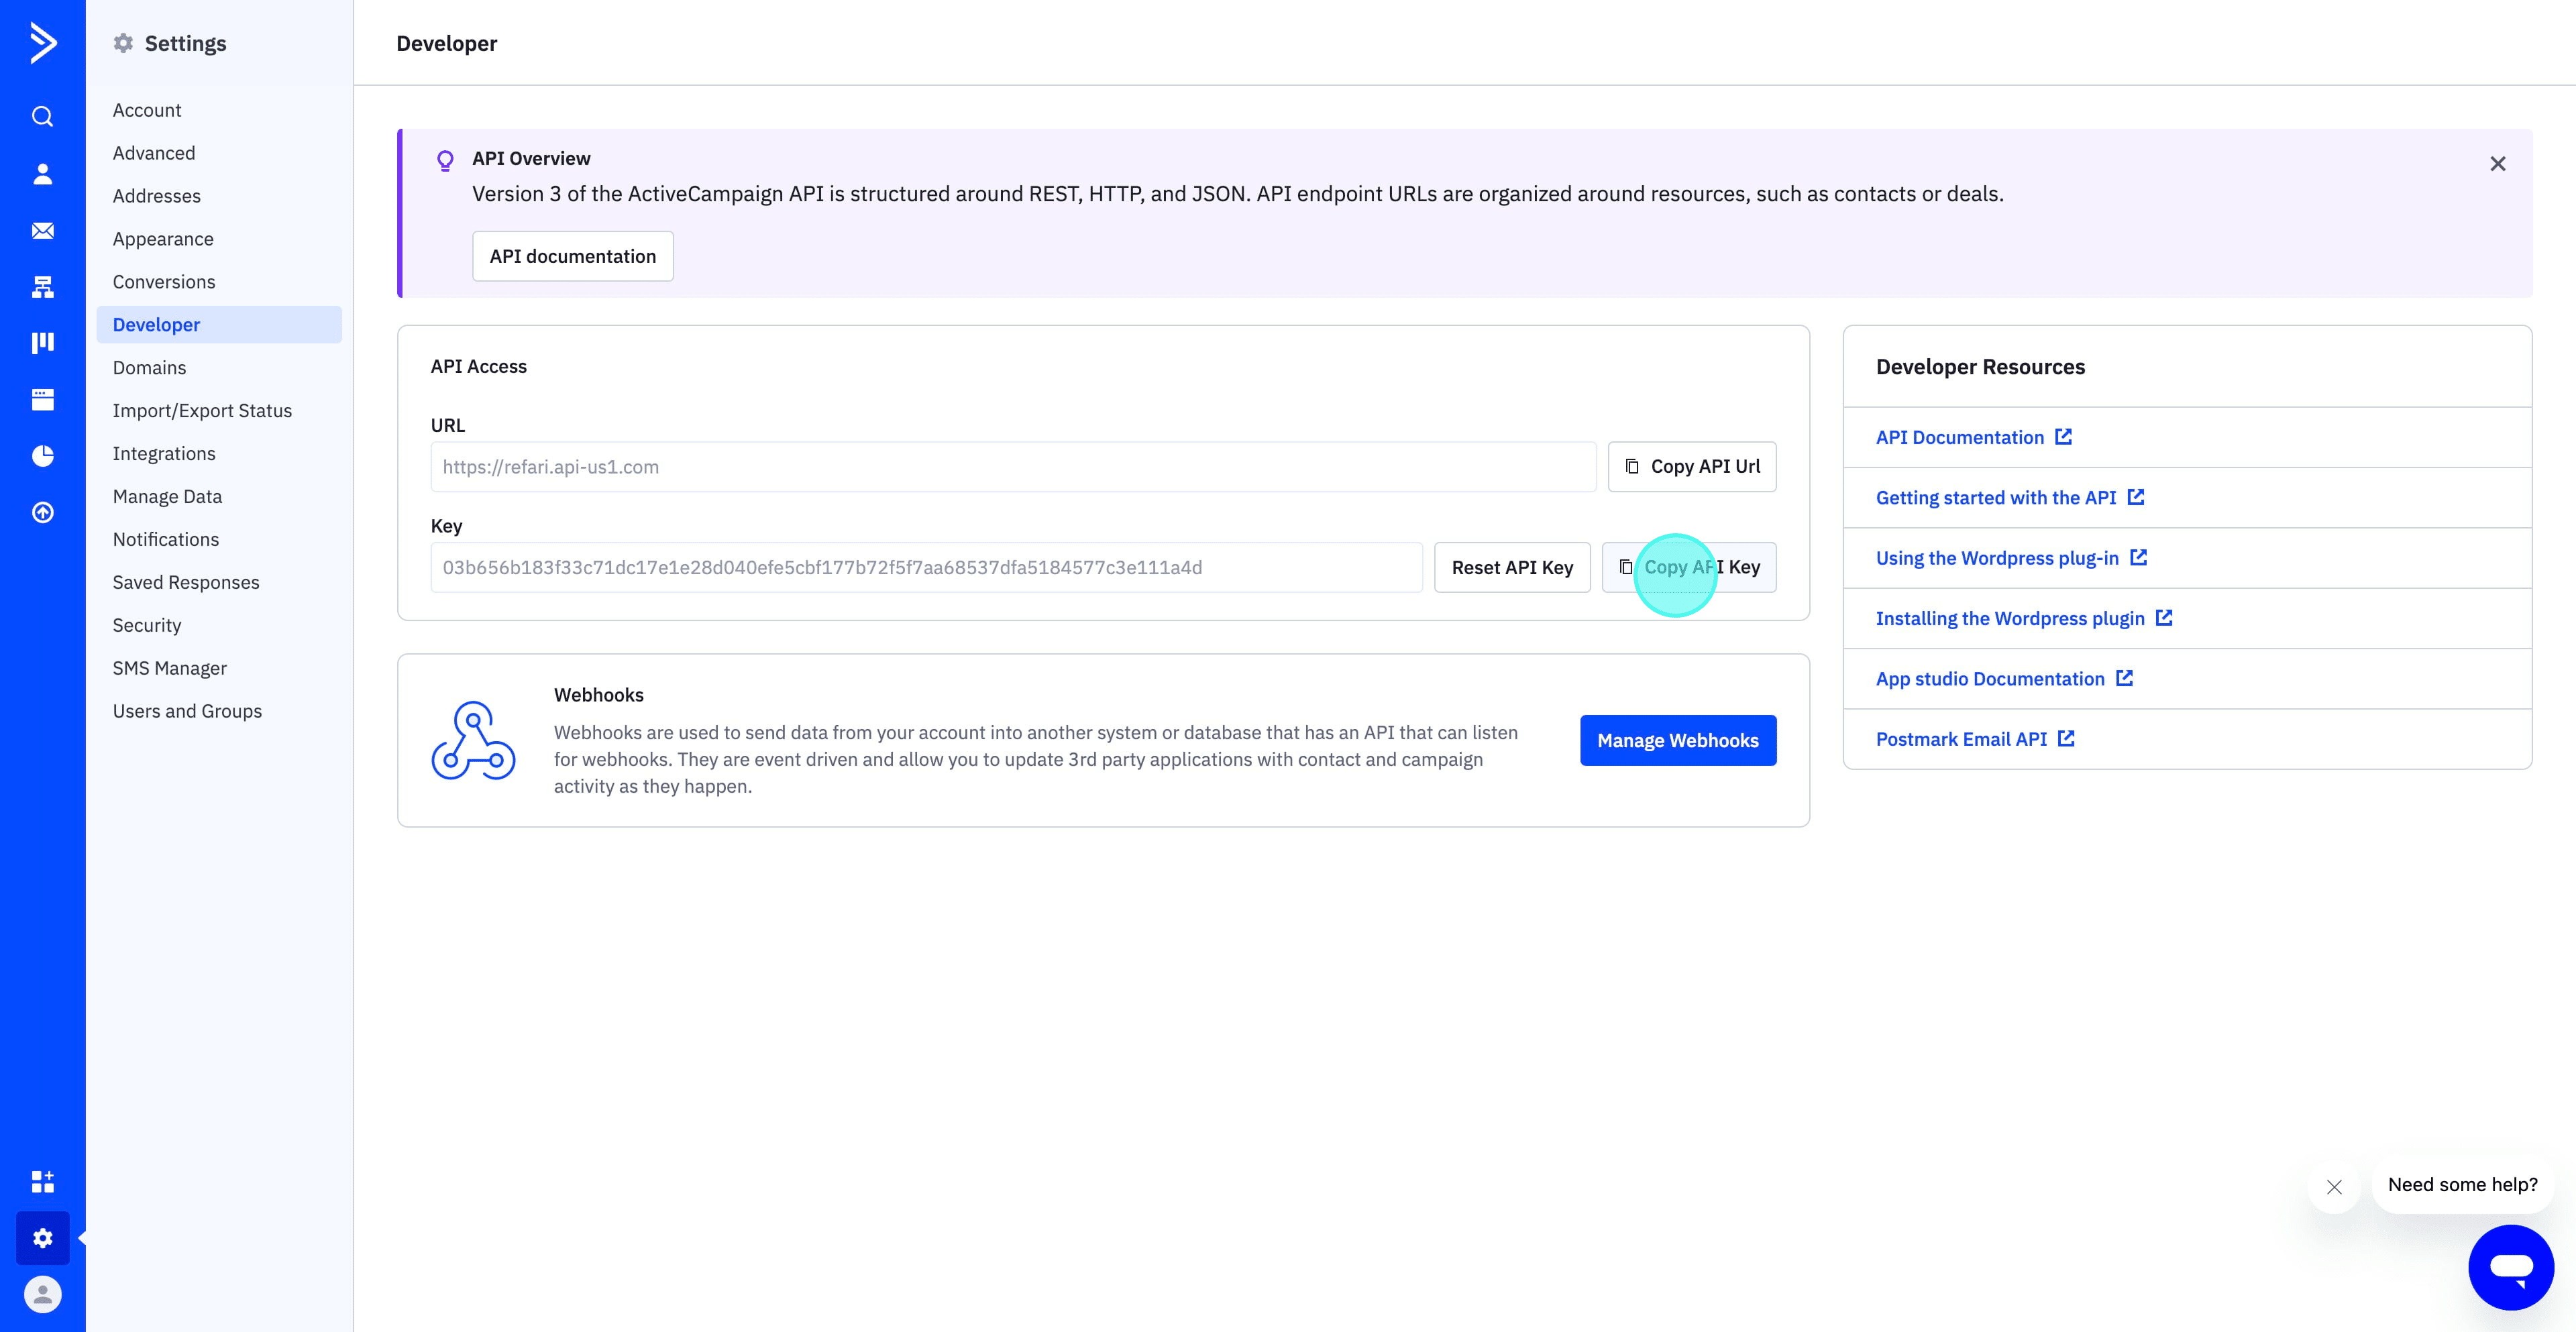
7. Once in the Settings menu, select the "Developer" option.
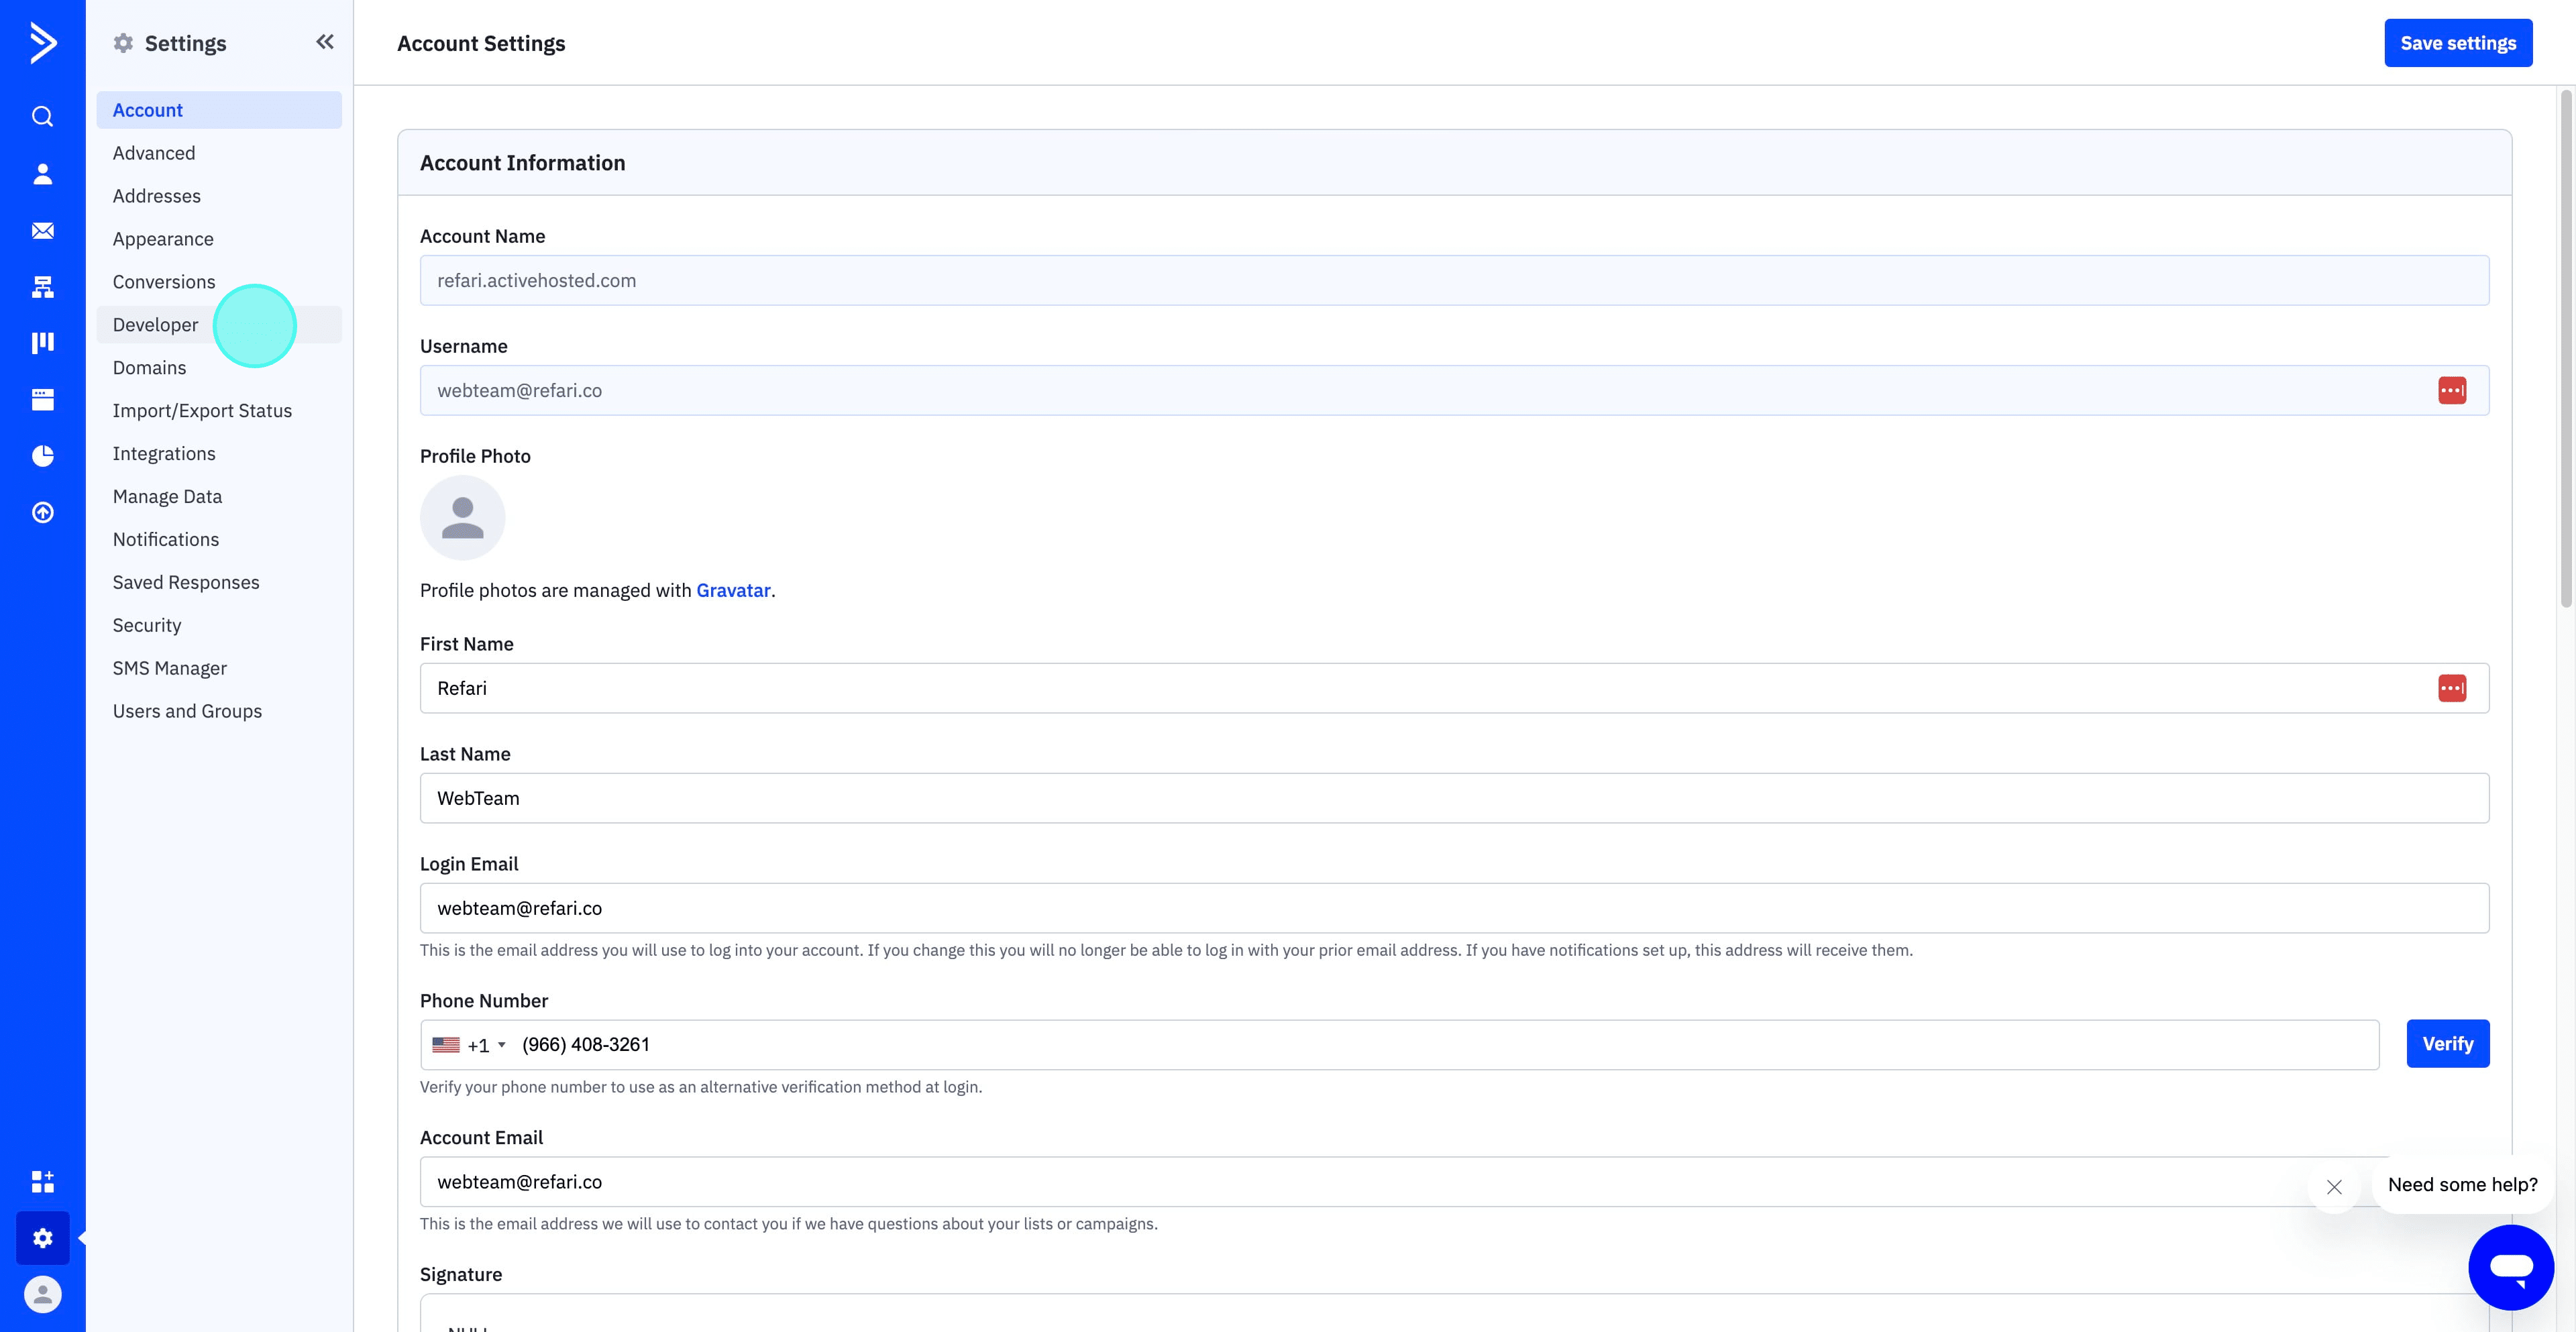
8. Copy the API URL provided in the Developer section.

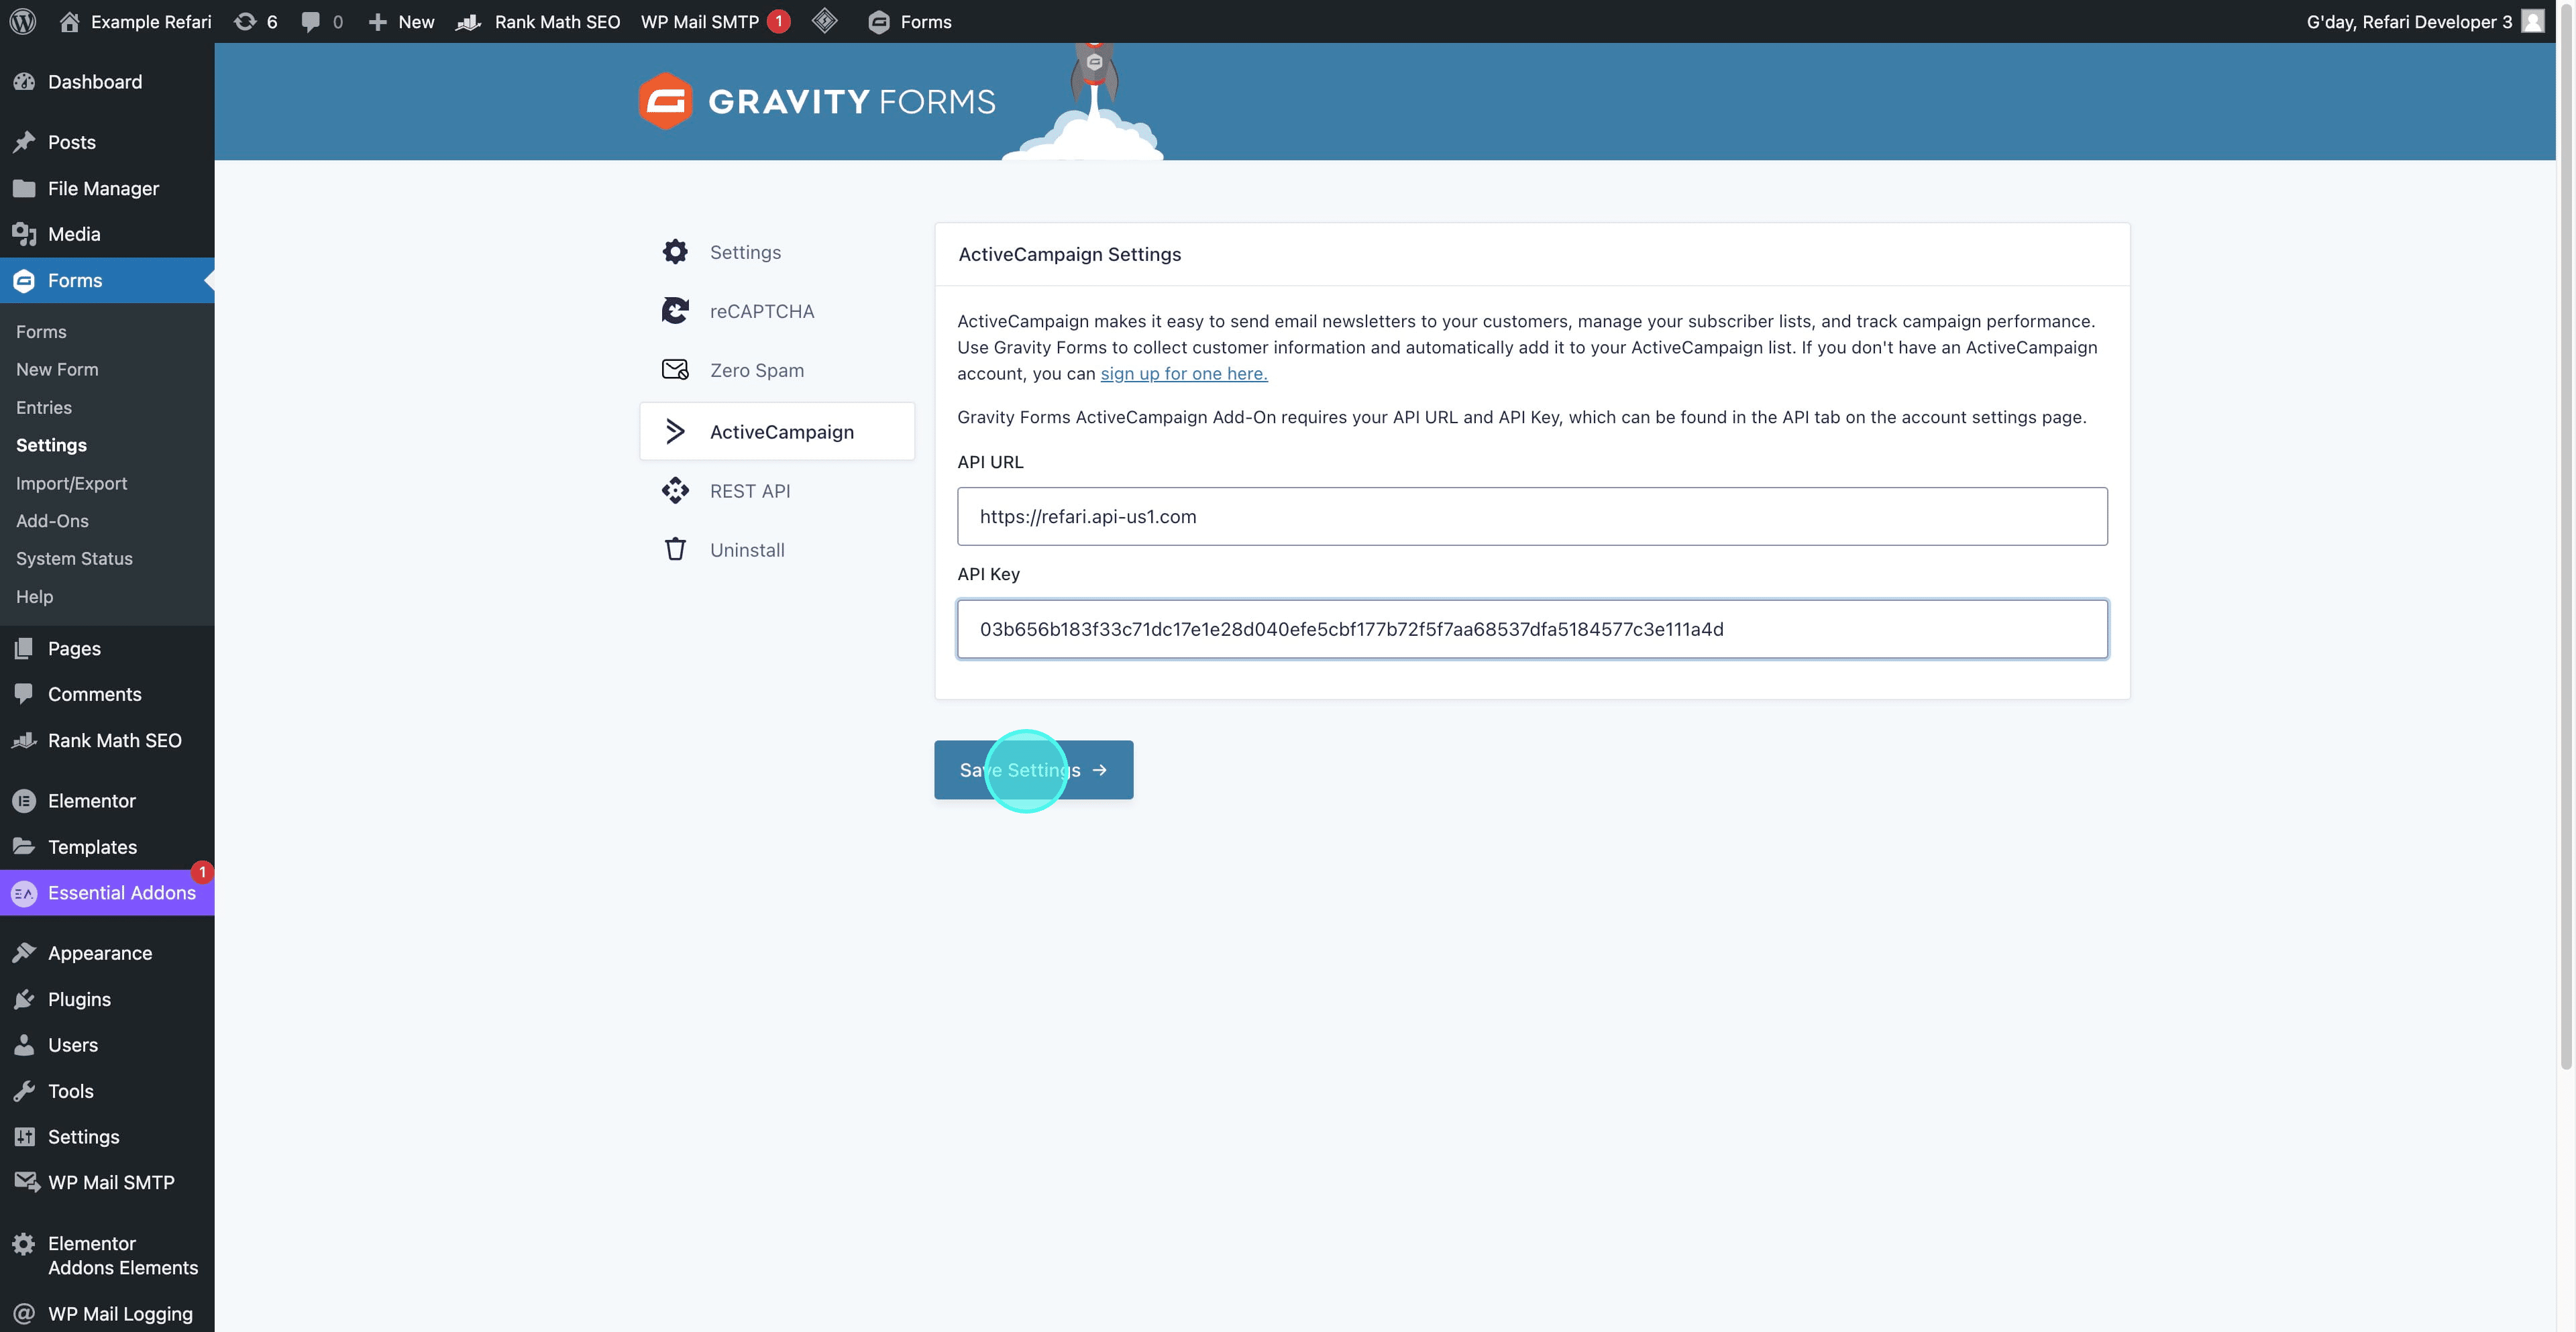
9. Paste the copied API URL into the designated API URL field.
10. Copy the API Key again from the Developer section.
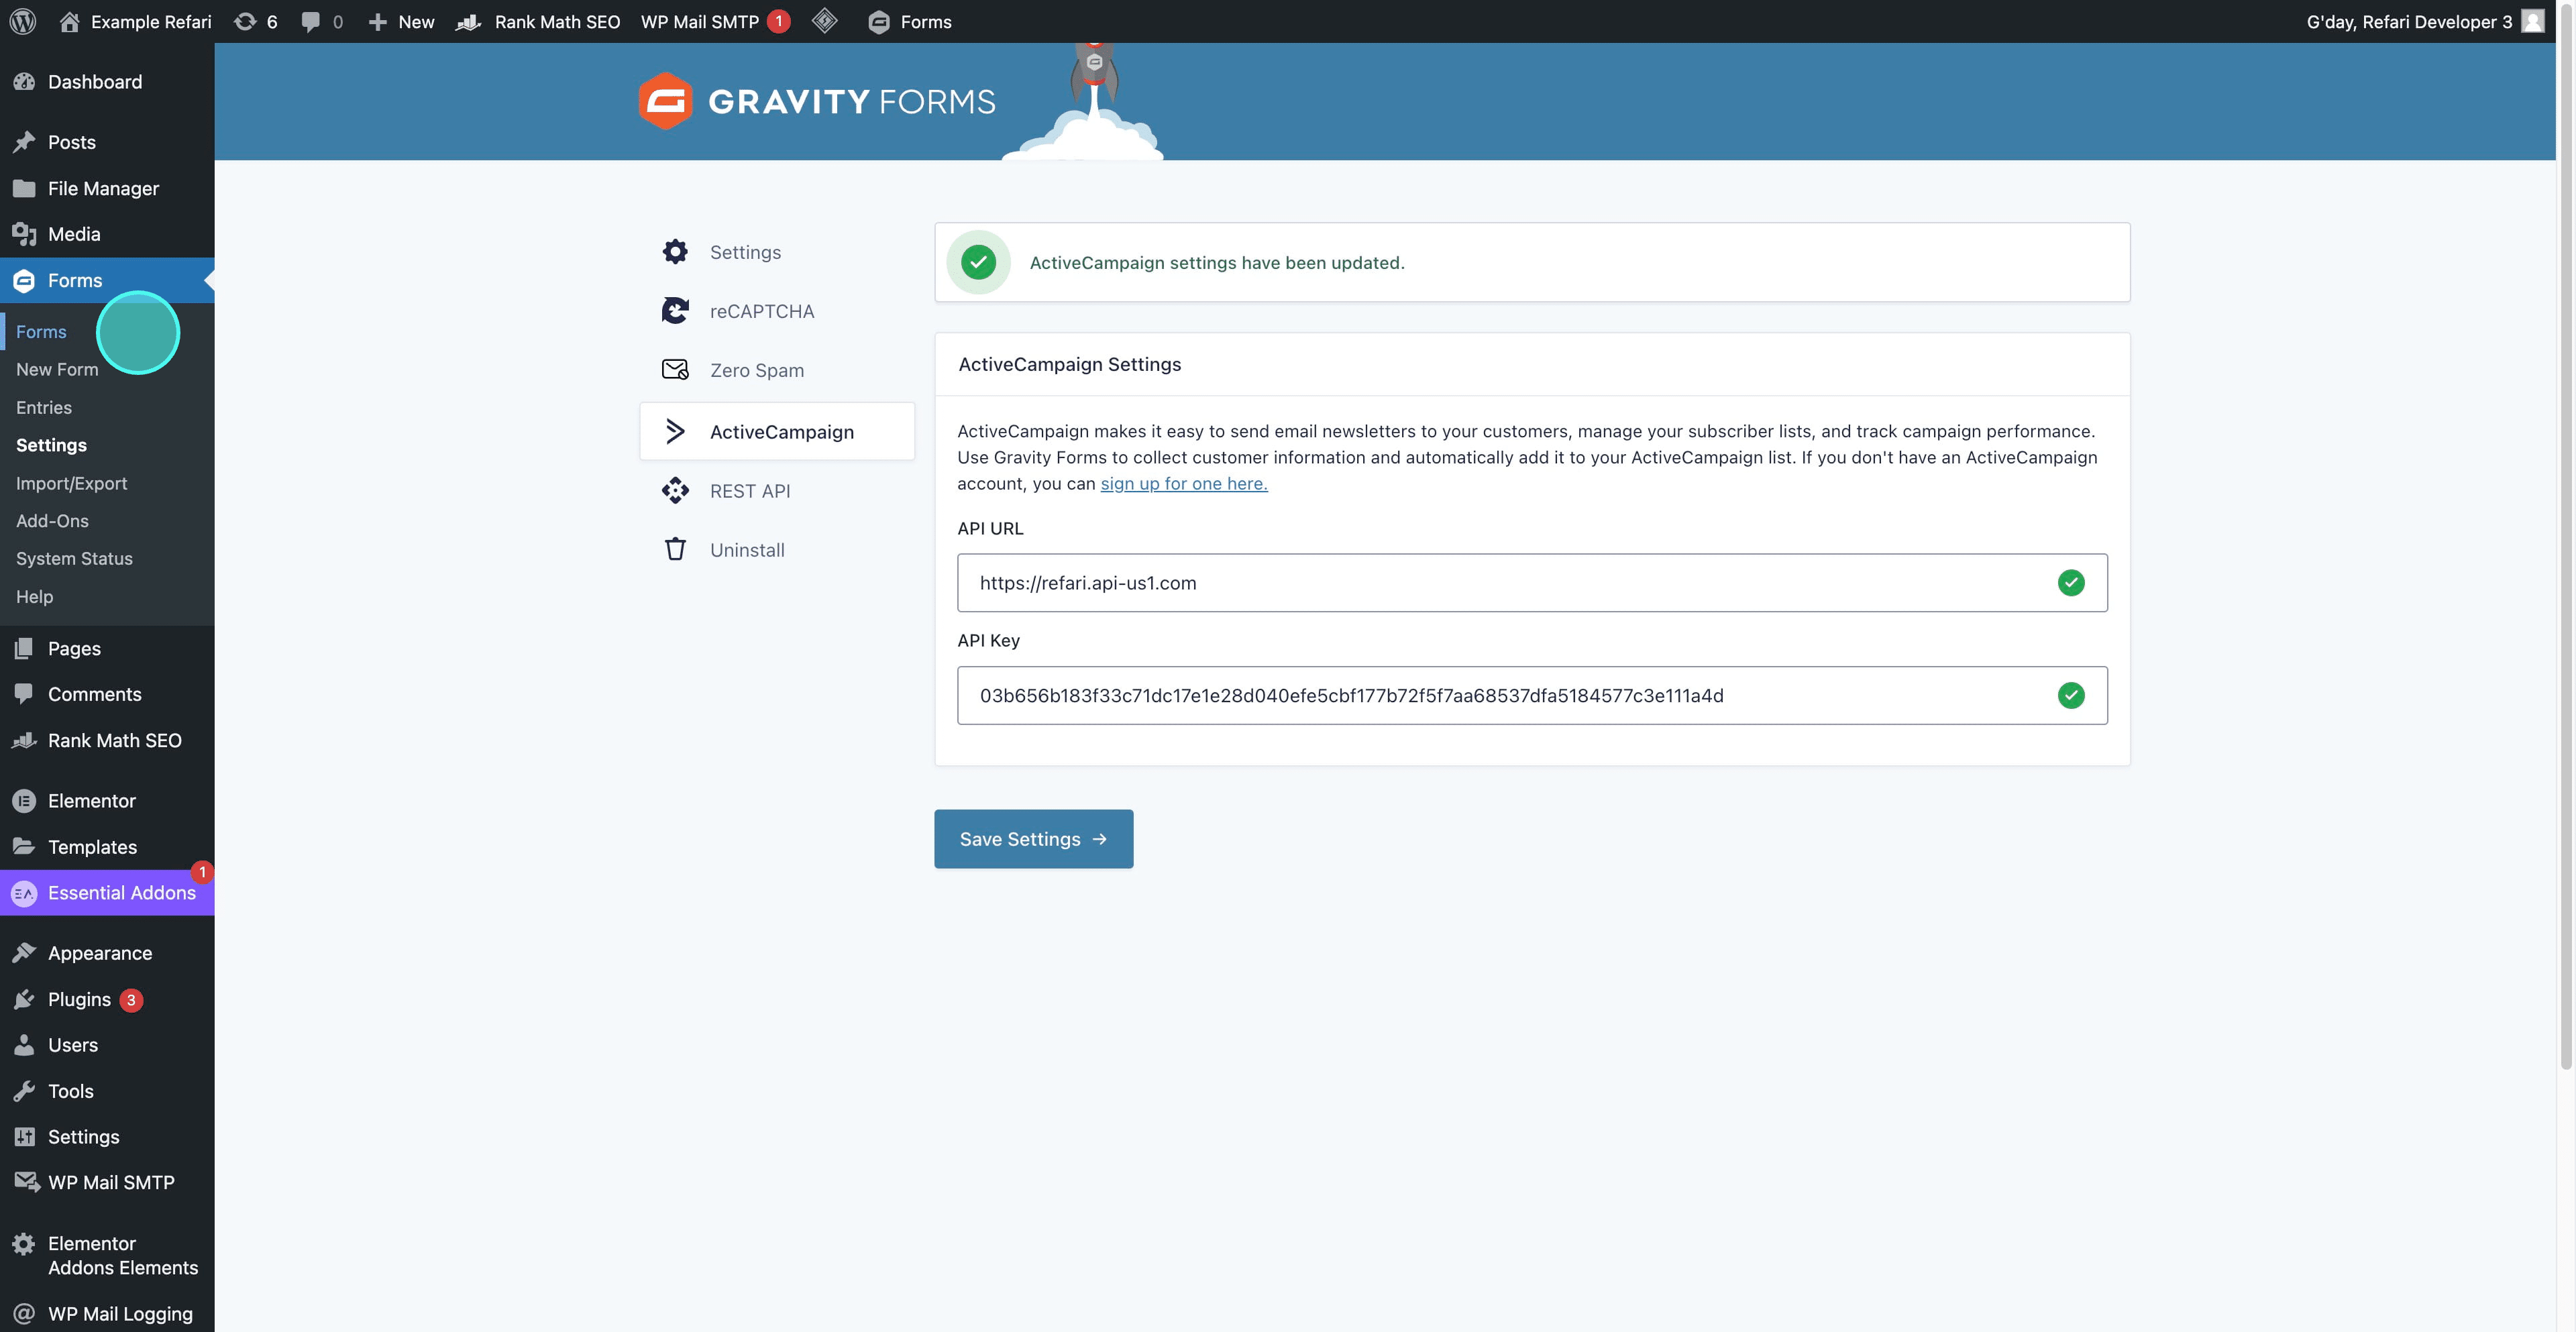
11. Paste the copied API Key into the corresponding field, then click on "Save Settings" and proceed to submit.
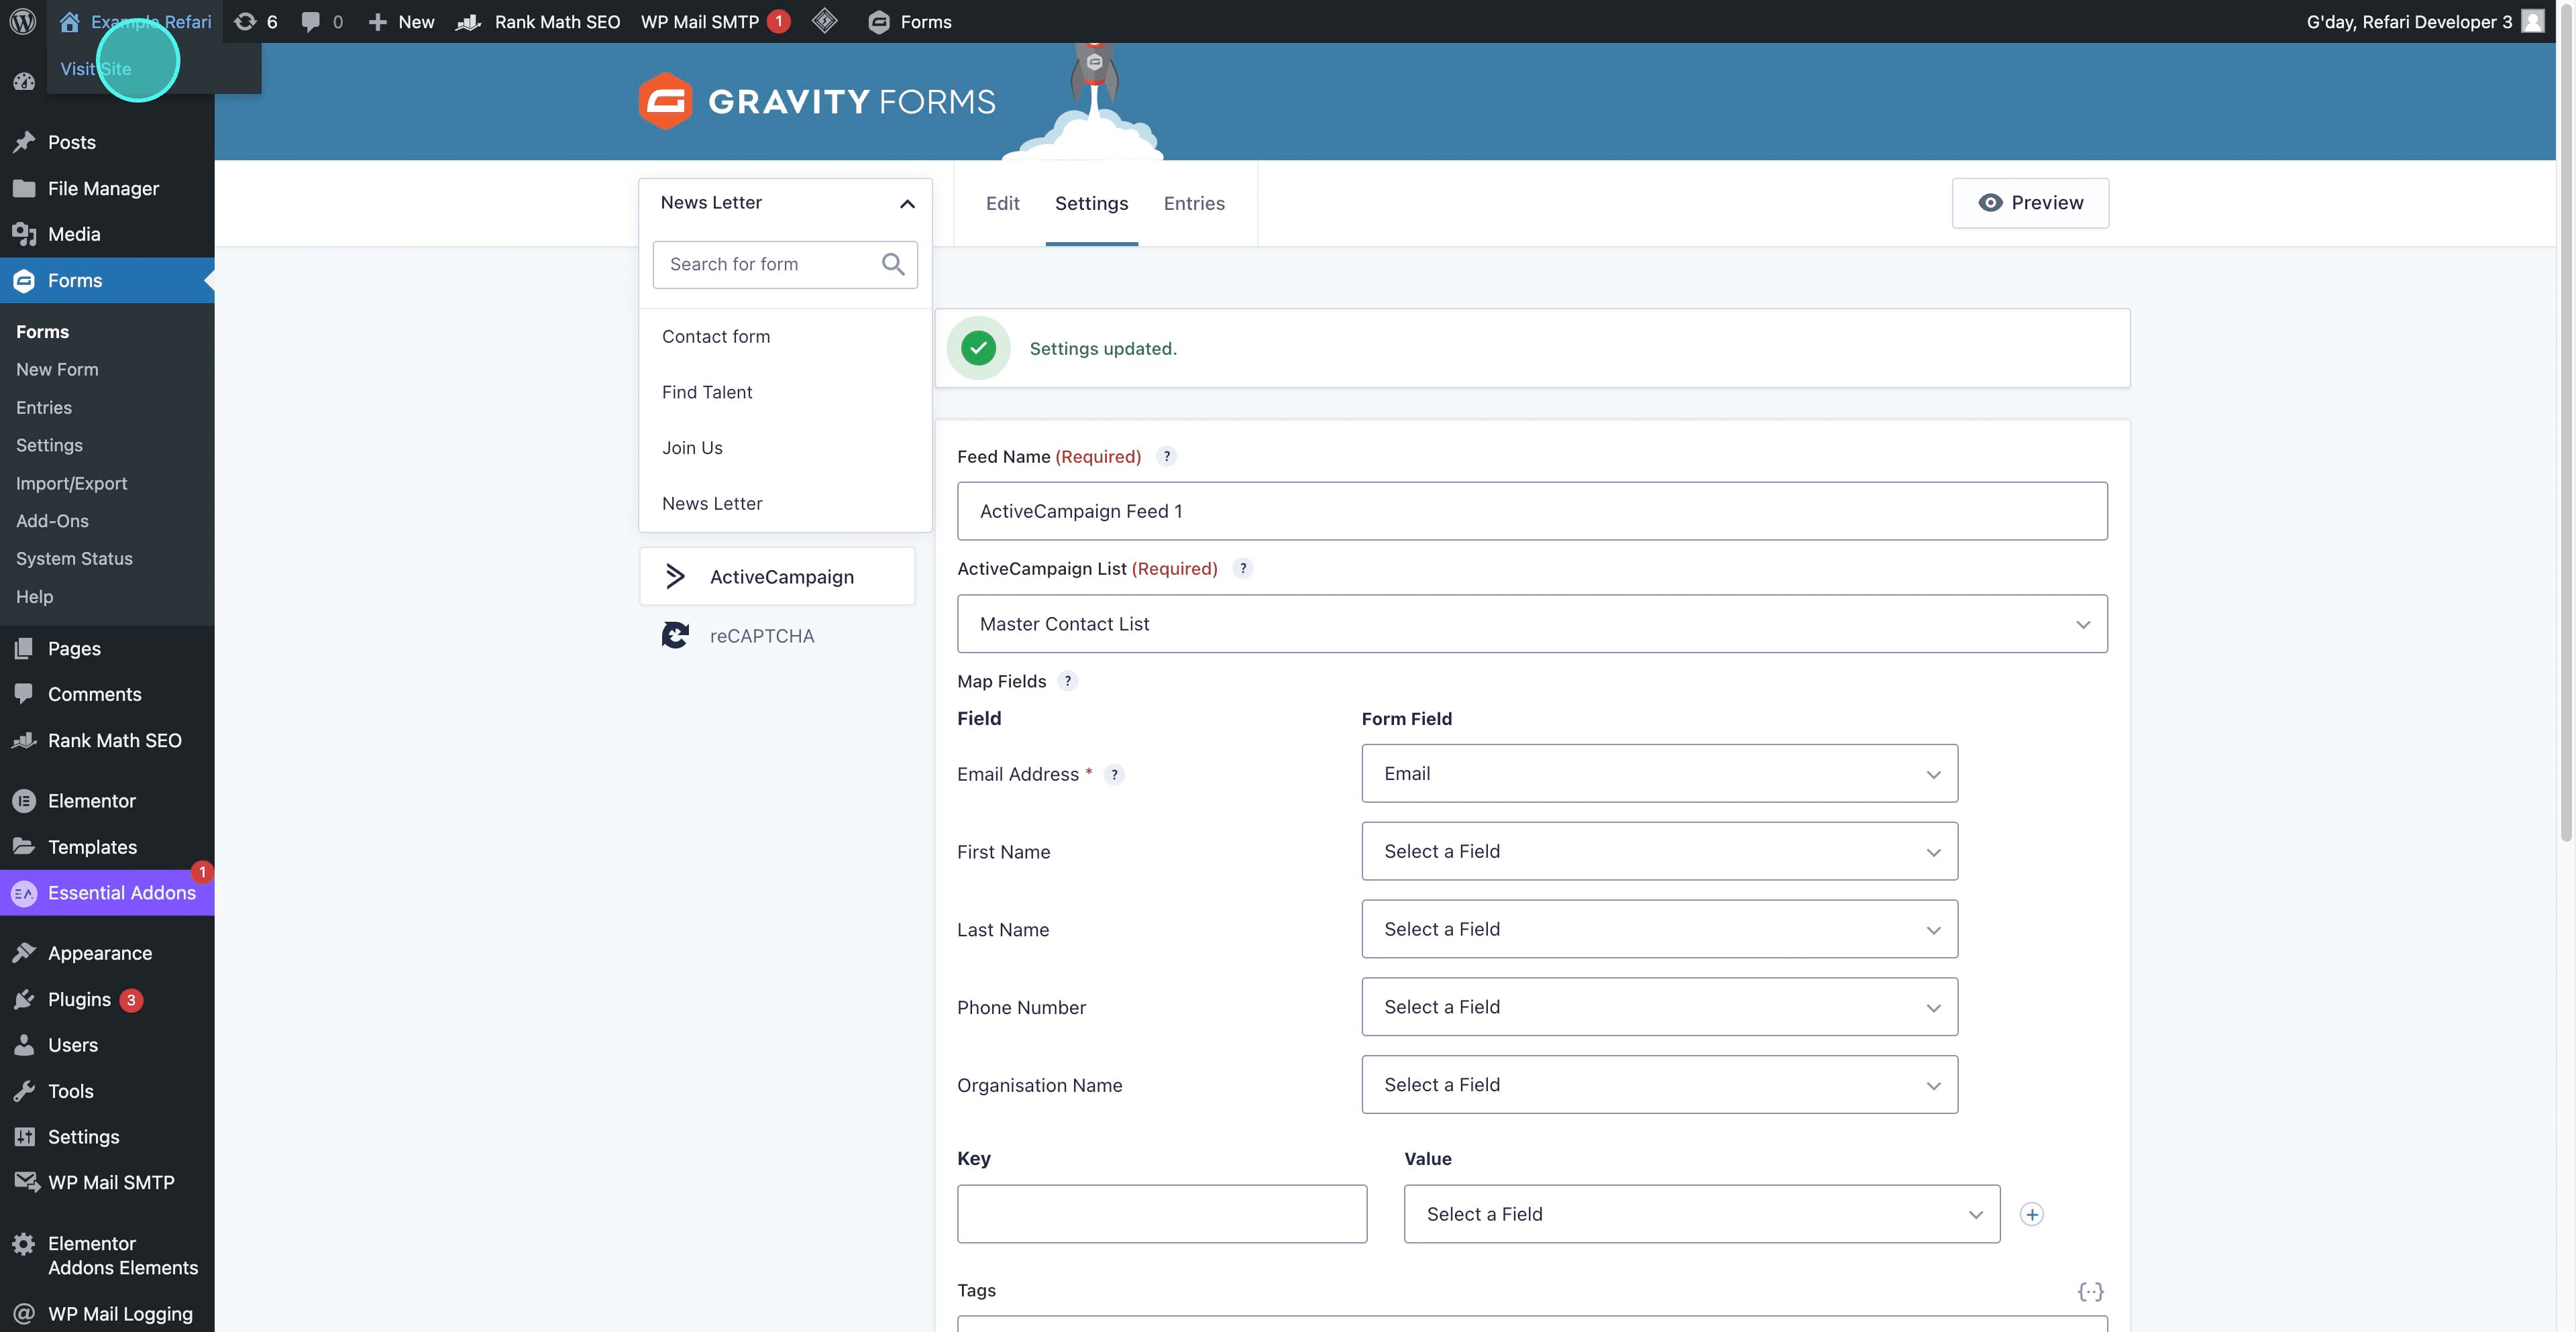
12. Now, to integrate it with an existing form, navigate to and click on "Forms."
13. Select the desired form, hover over "Settings," and then click on "ActiveCampaign."
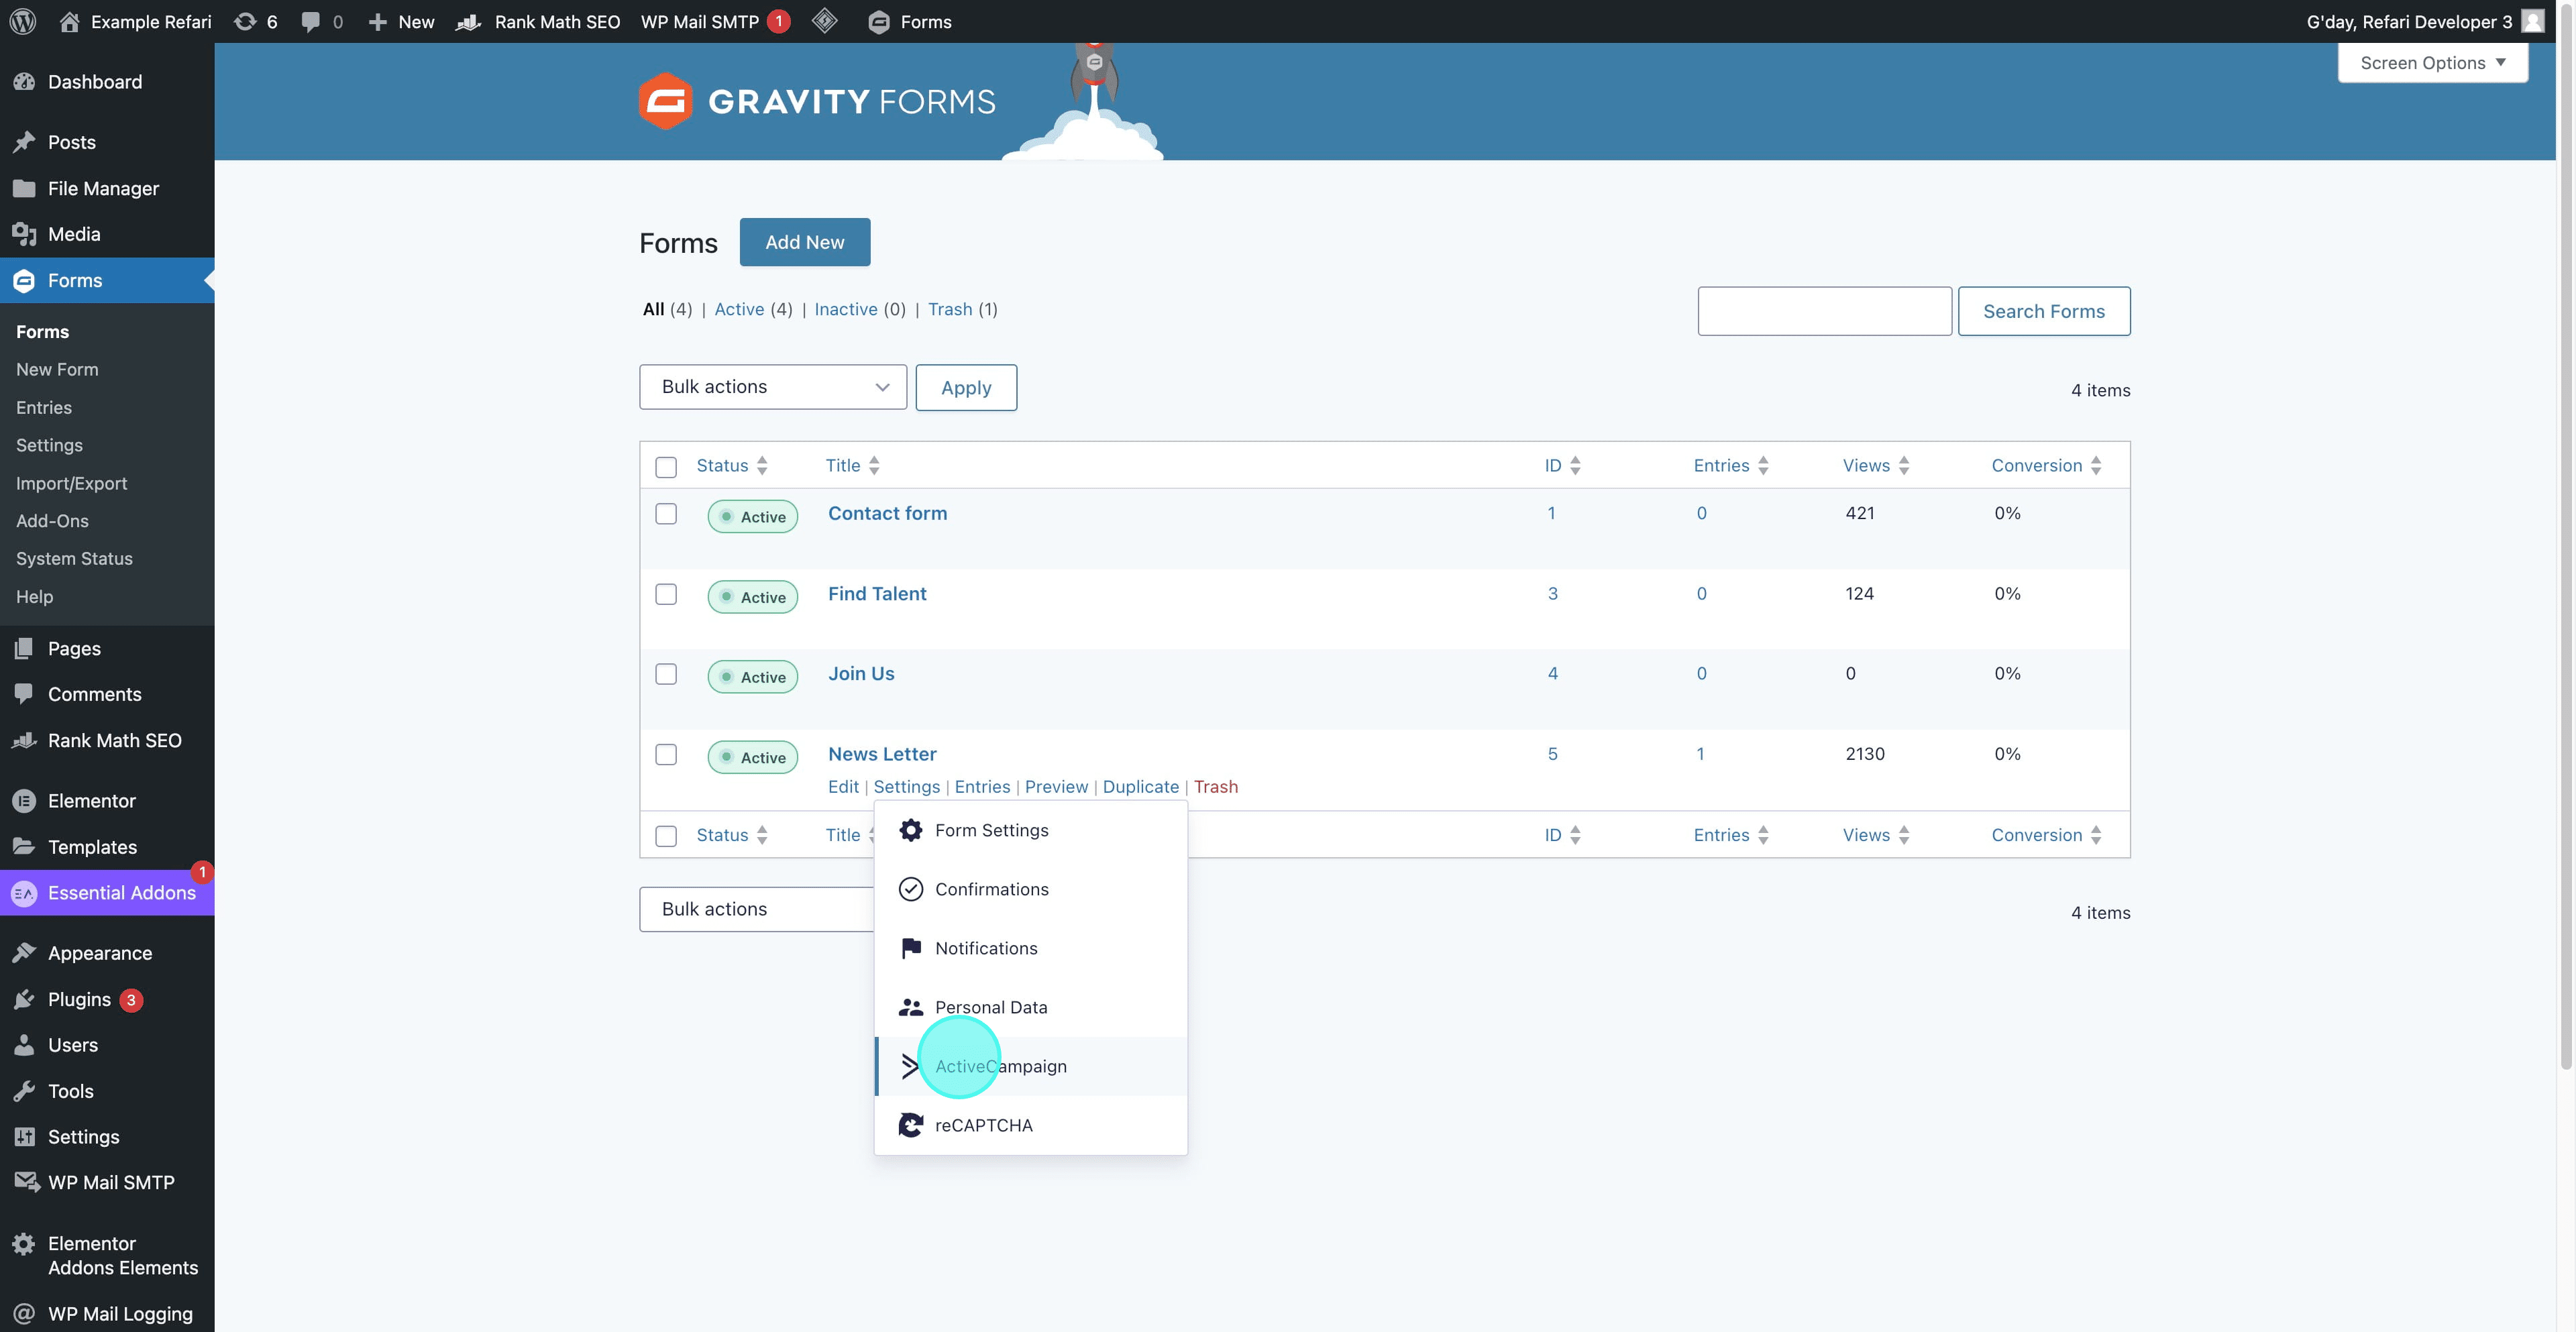
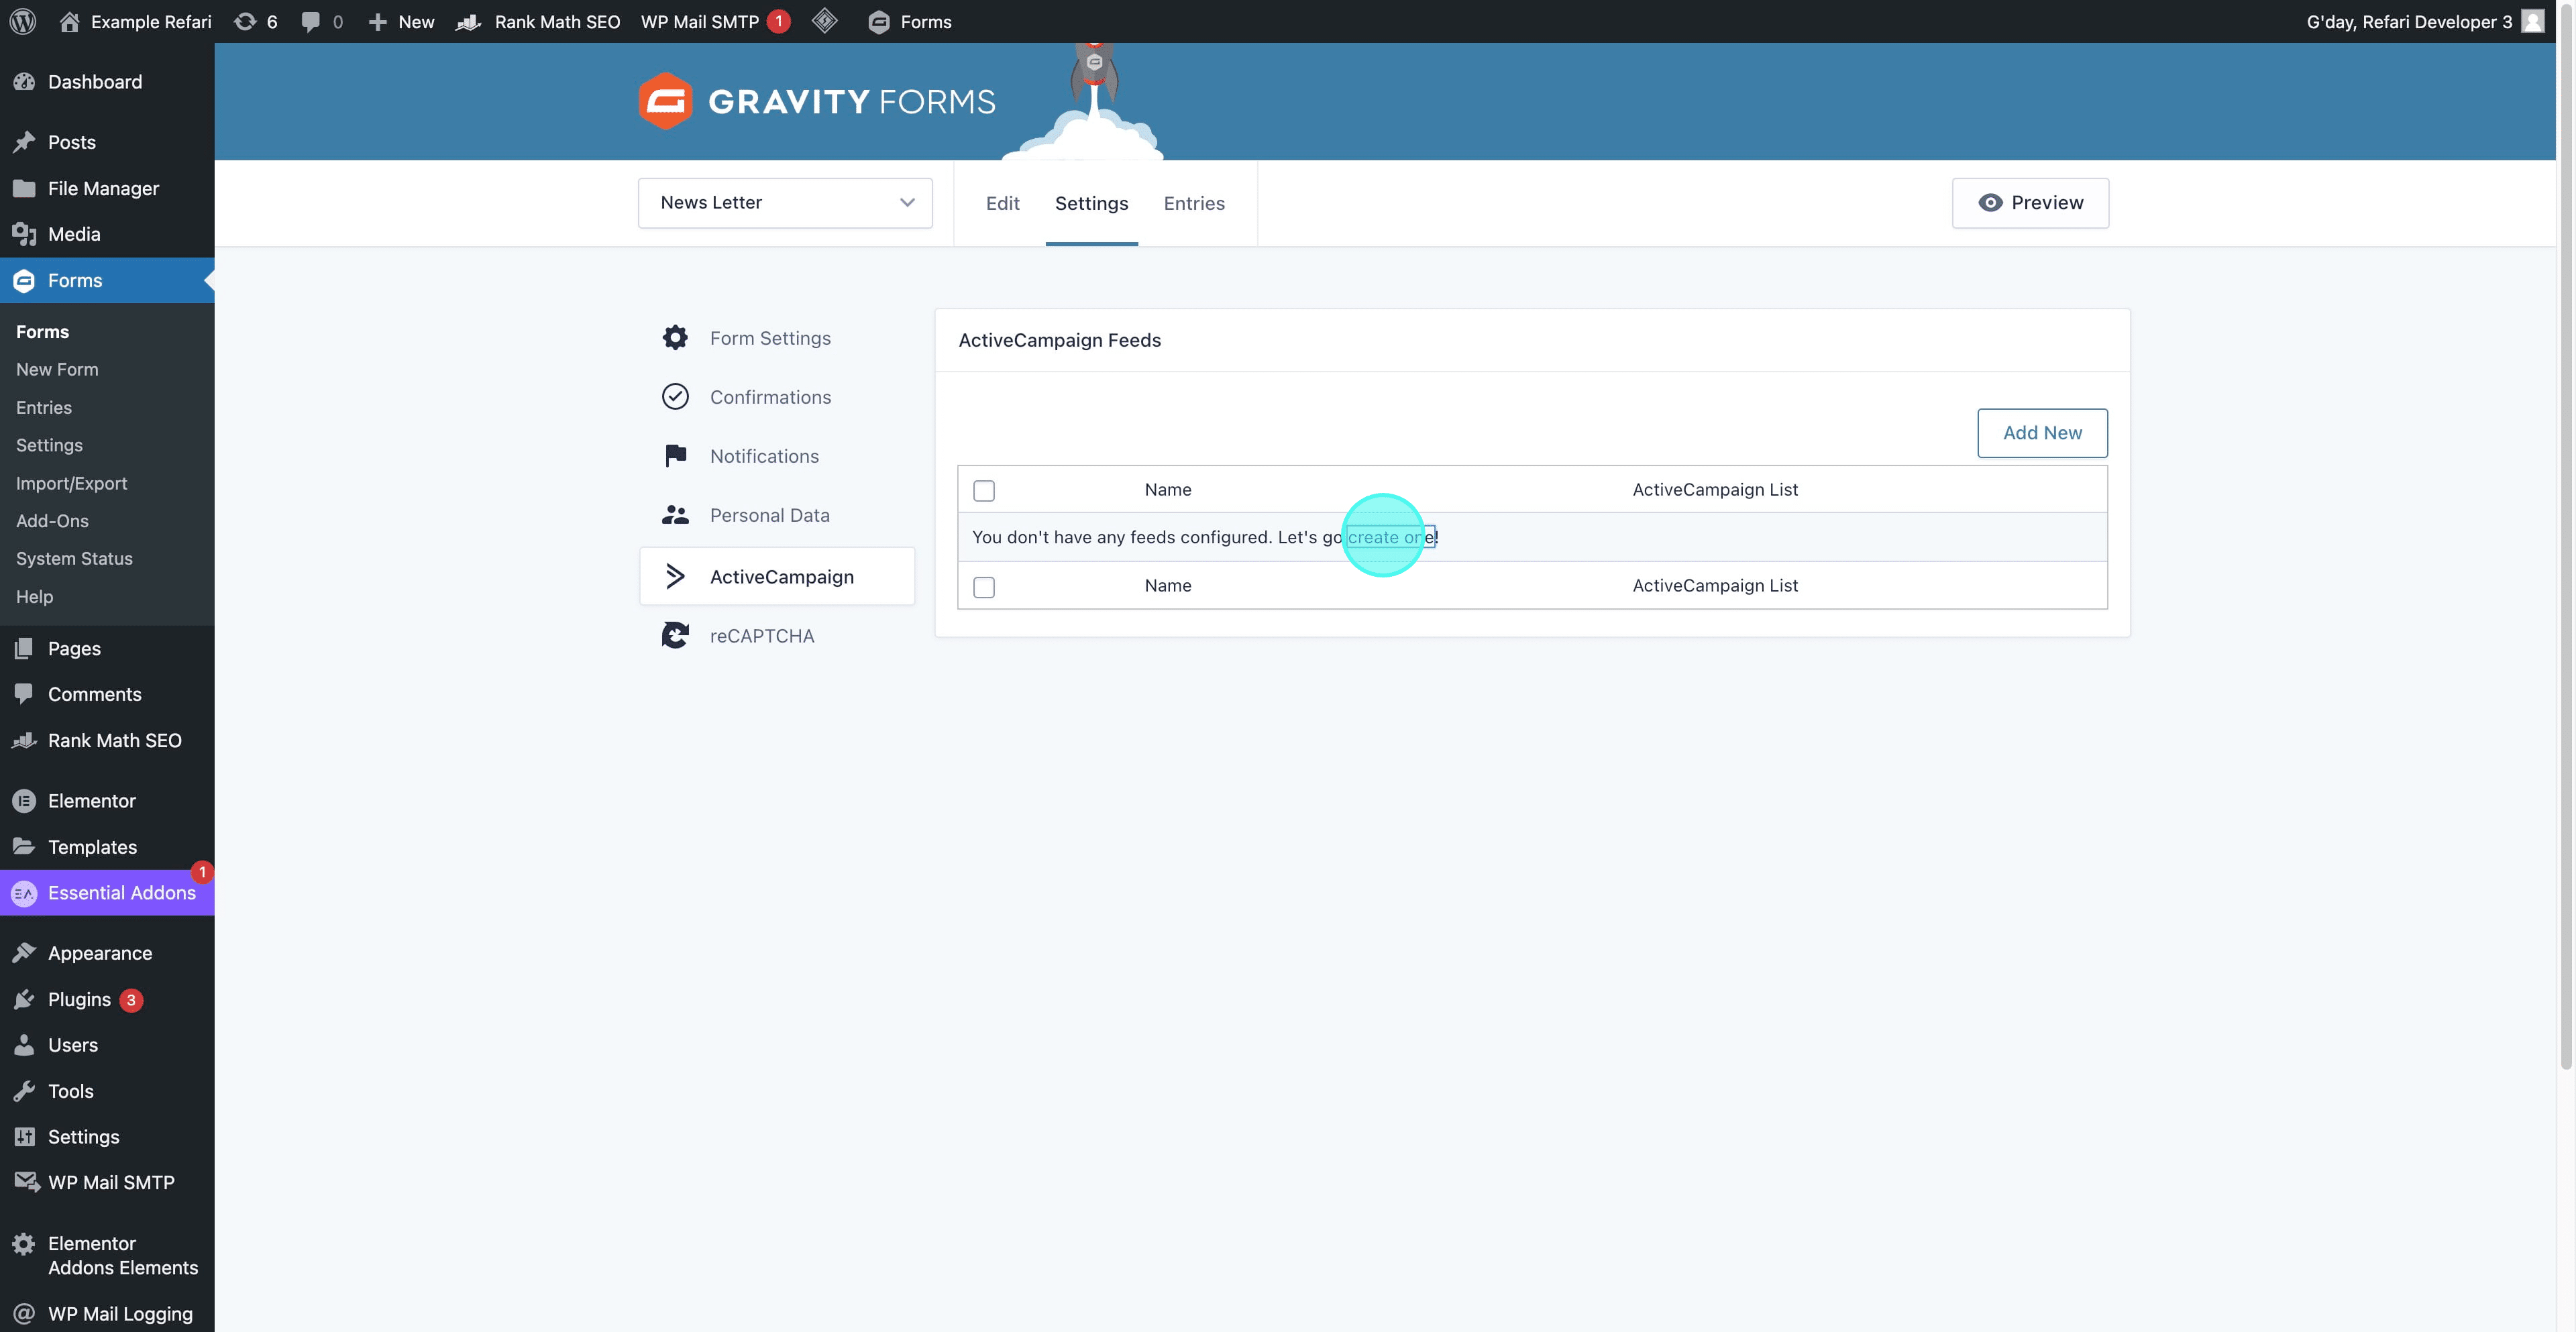
14. Now, to create a new feed, click on "Add New" or "Create one."
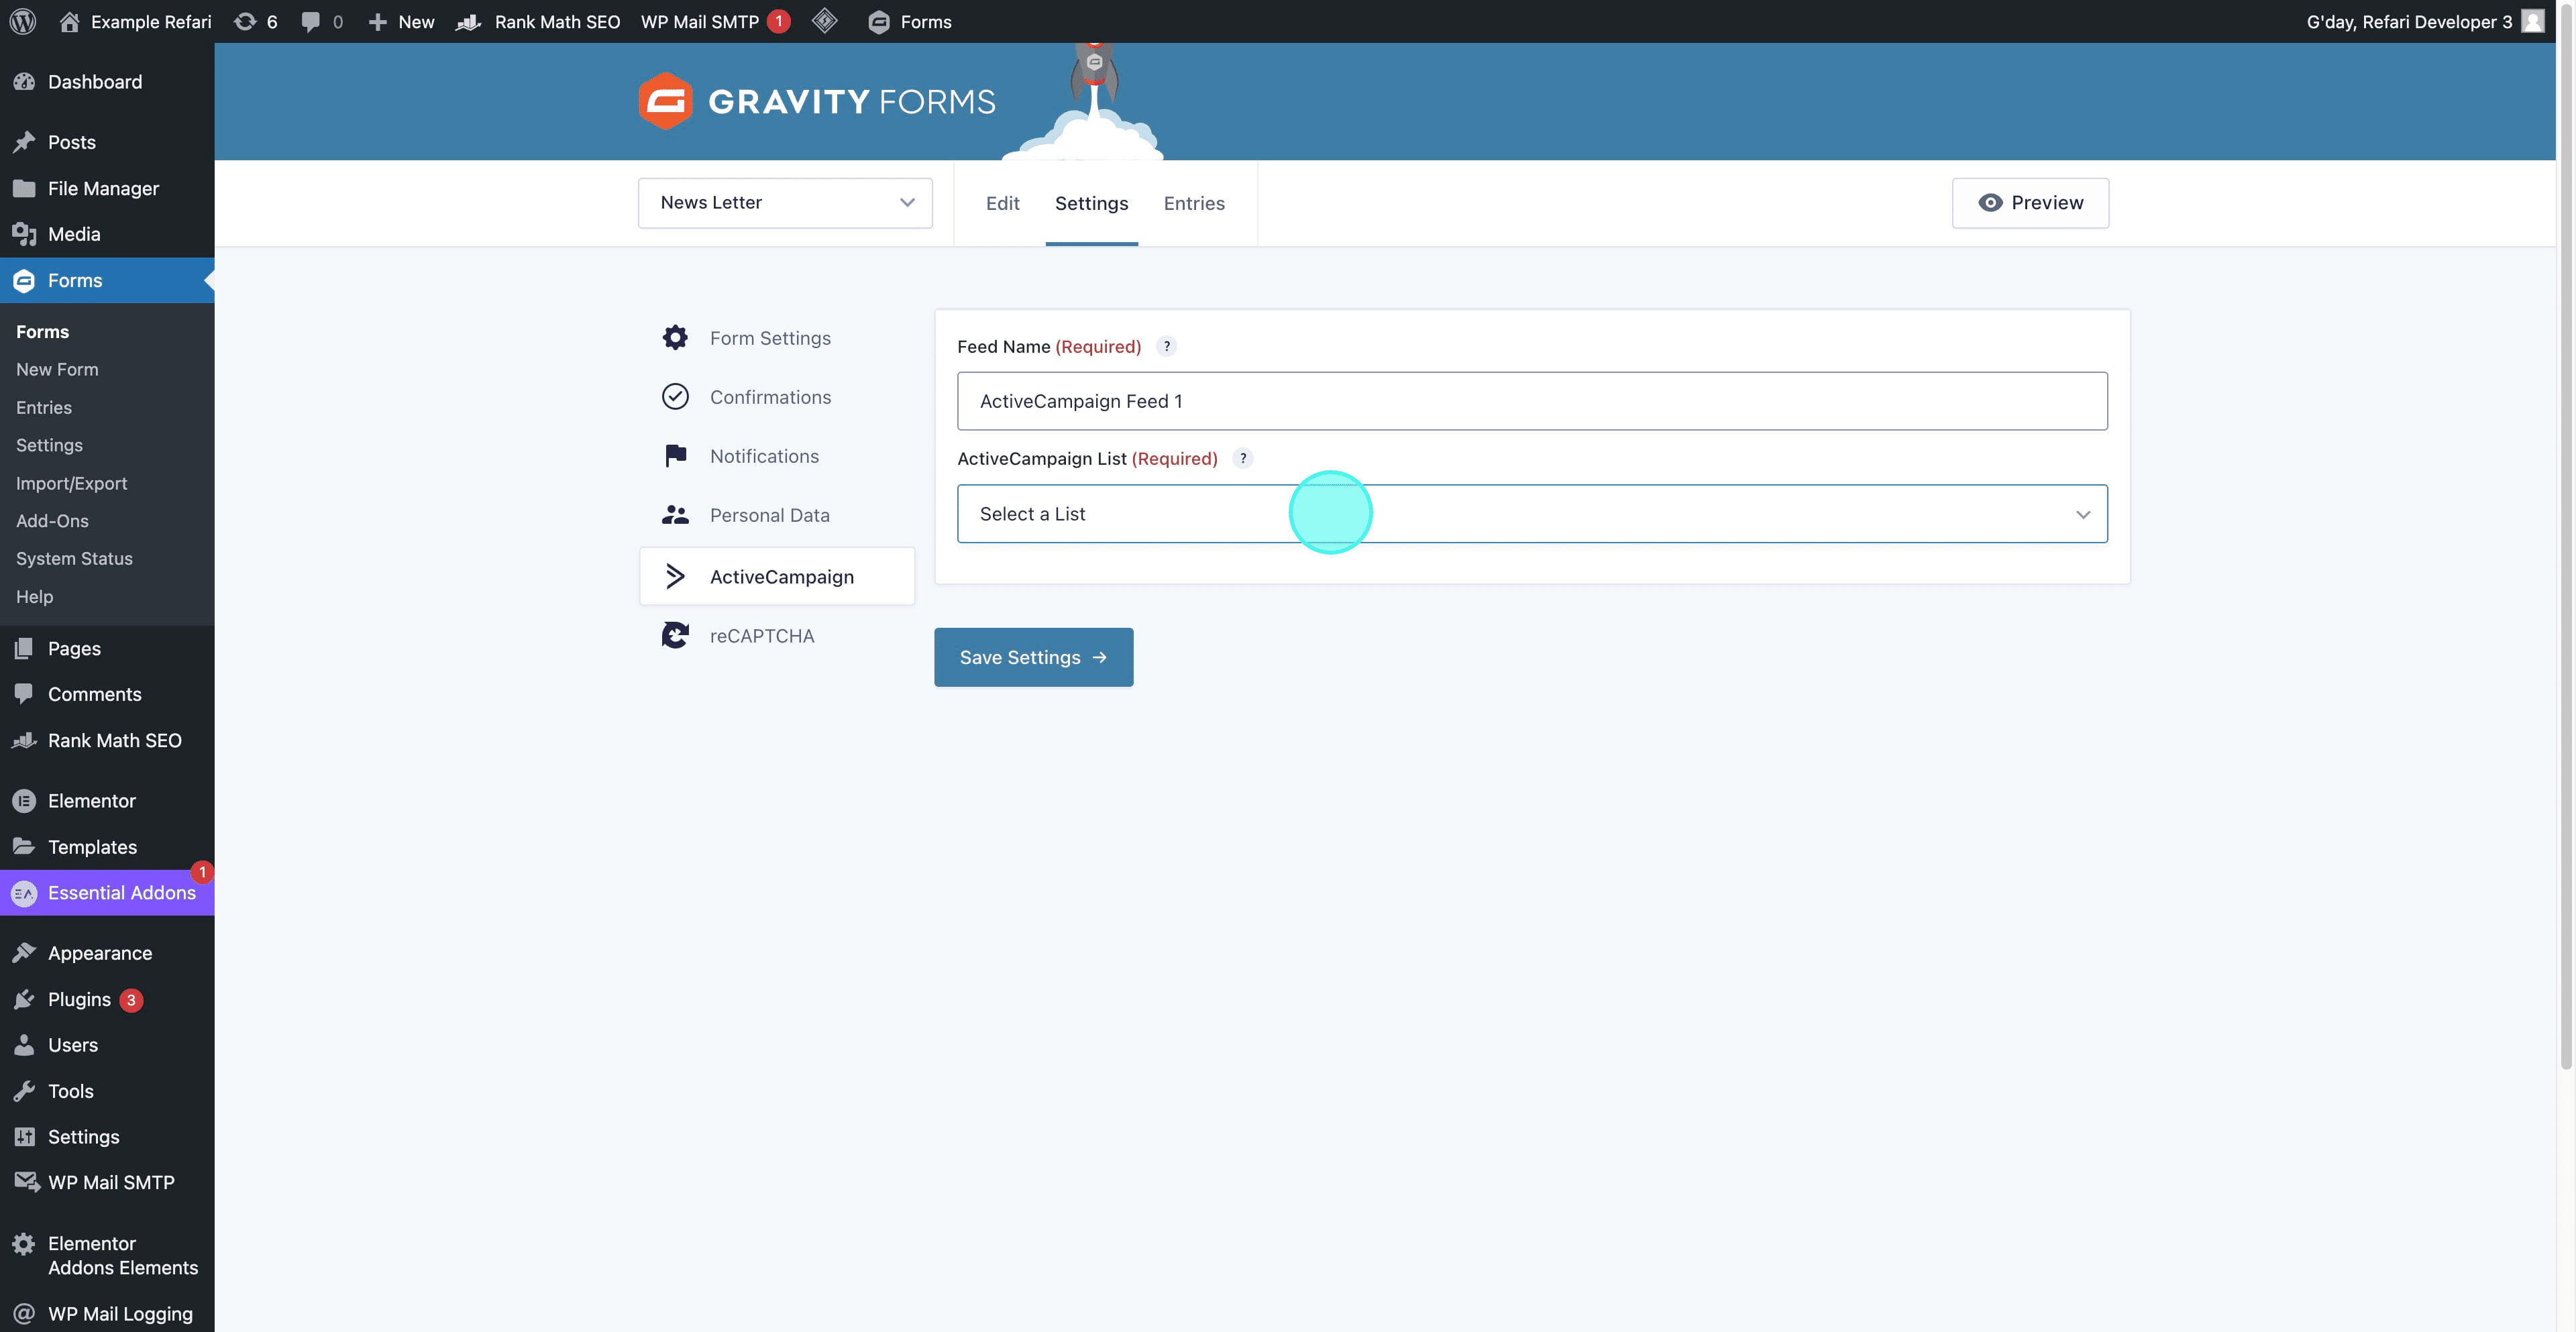
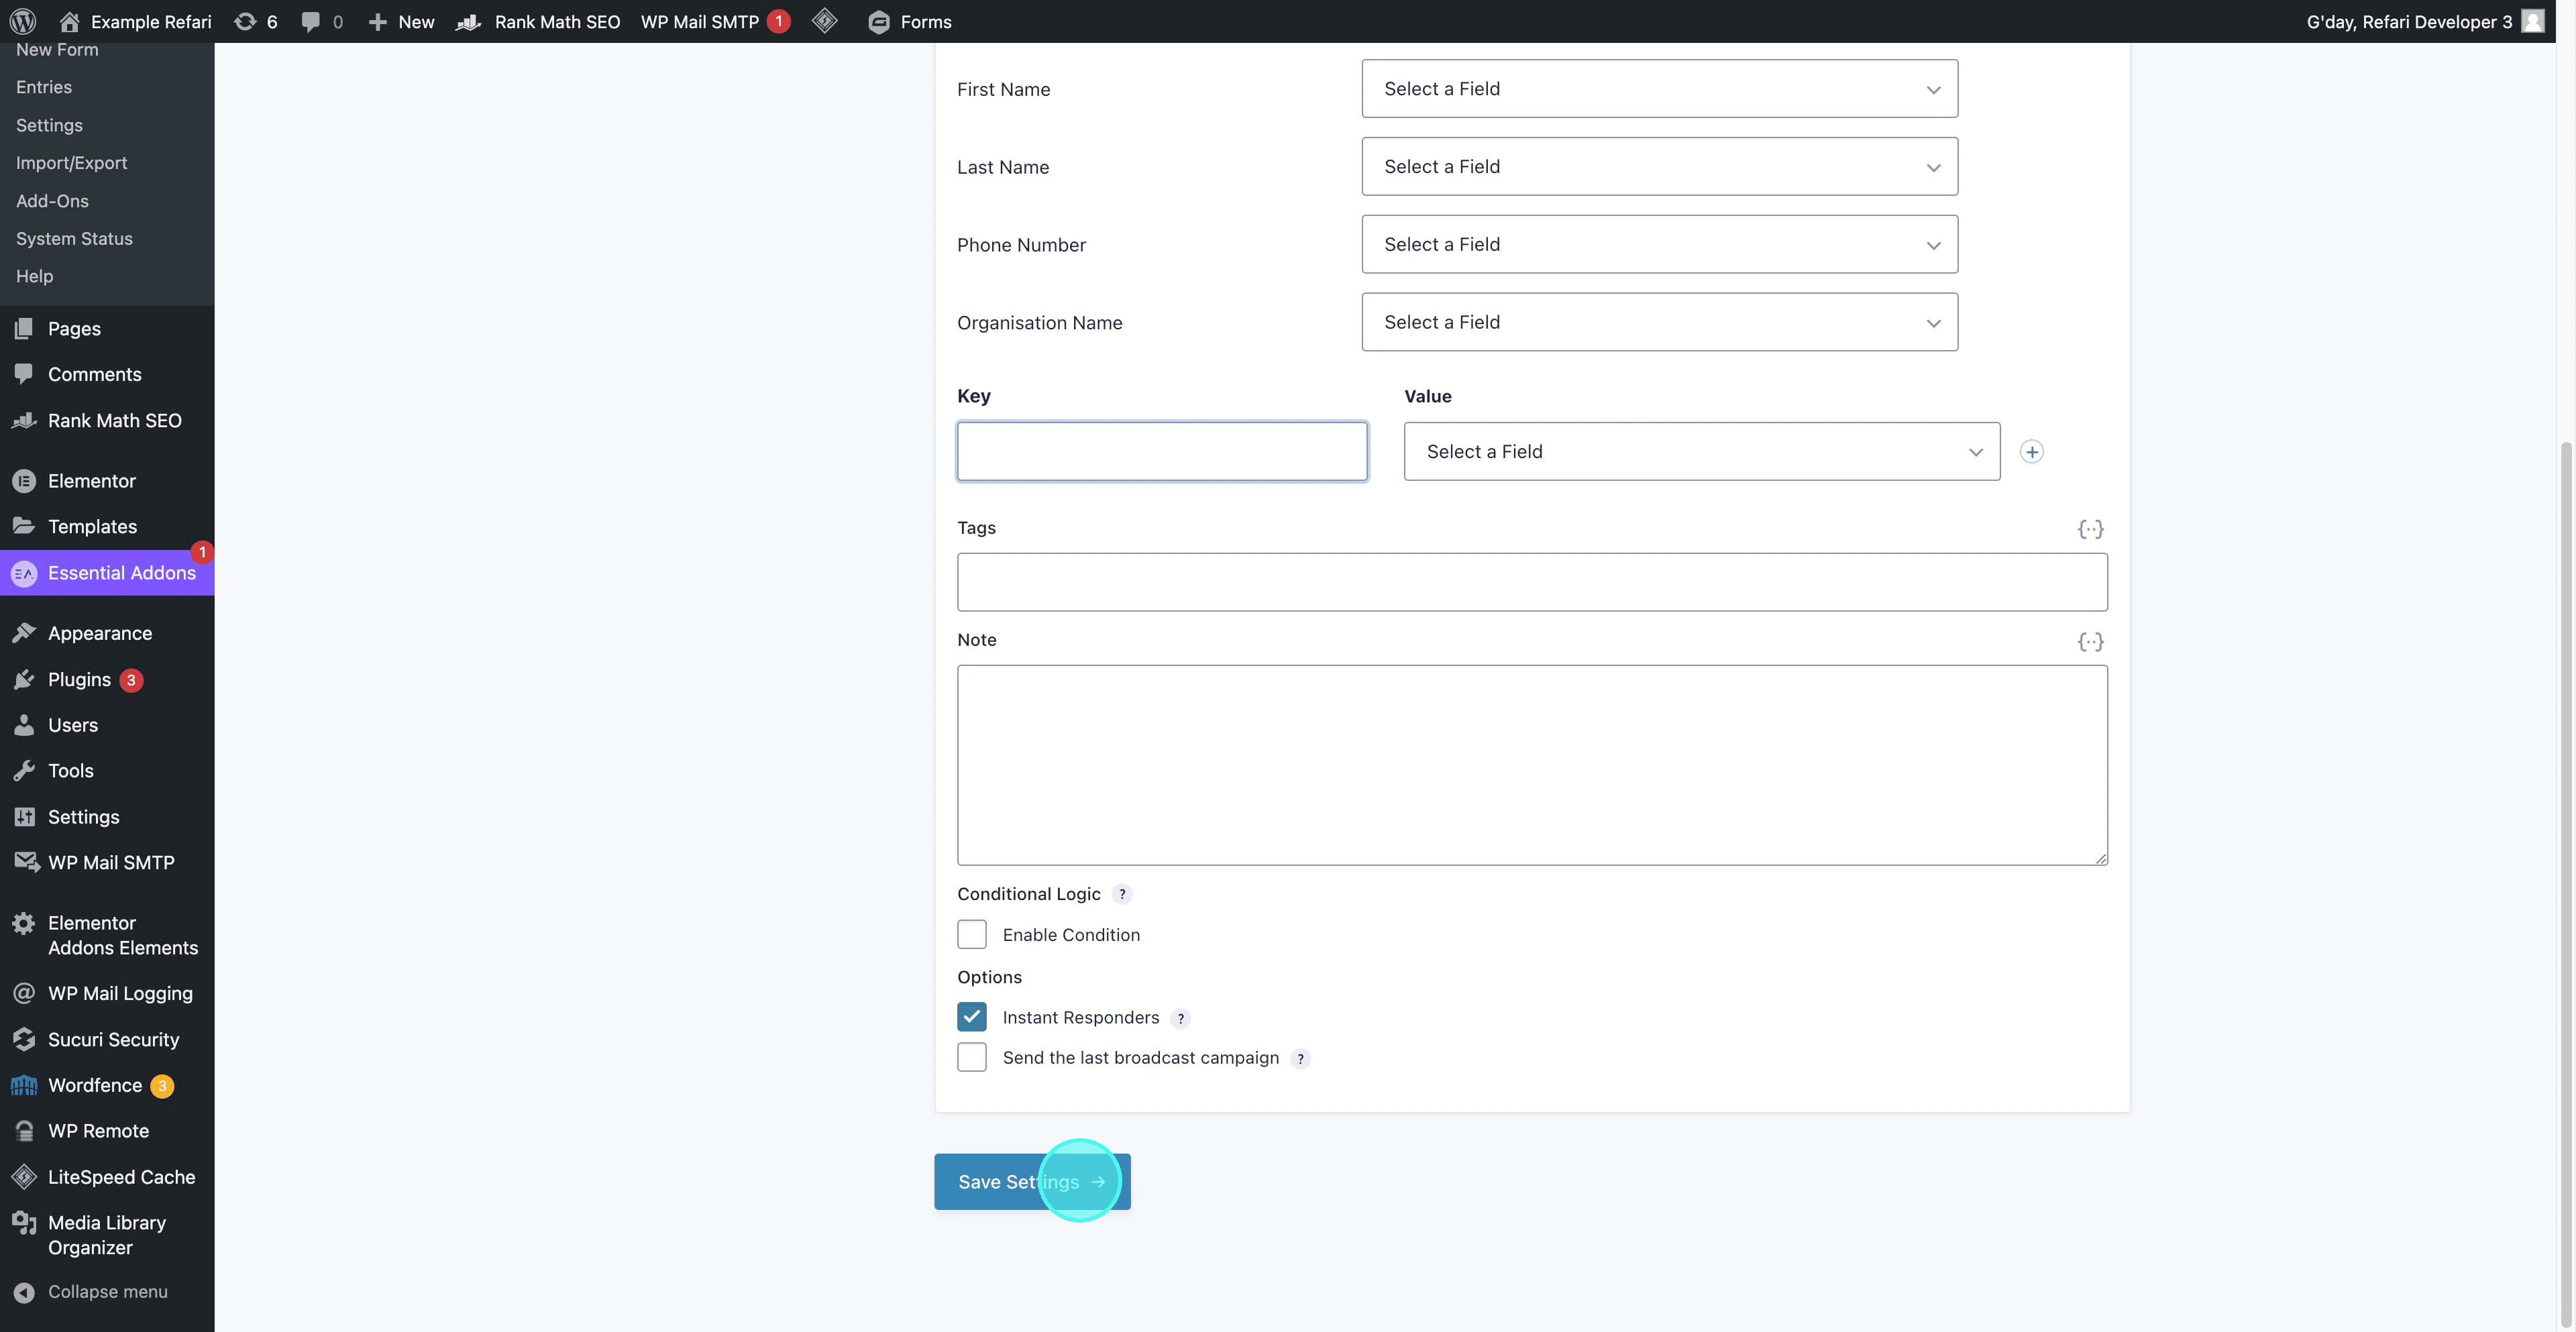
15. You can customize the feed name according to your needs and select your desired ActiveCampaign List from the dropdown menu.
16. After selecting your list, you will be shown a list of fields from both your ActiveCampaign account and your form. This stage allows you to align the corresponding fields between the two. In this particular case, as our form only includes an email field, we will select this for mapping.
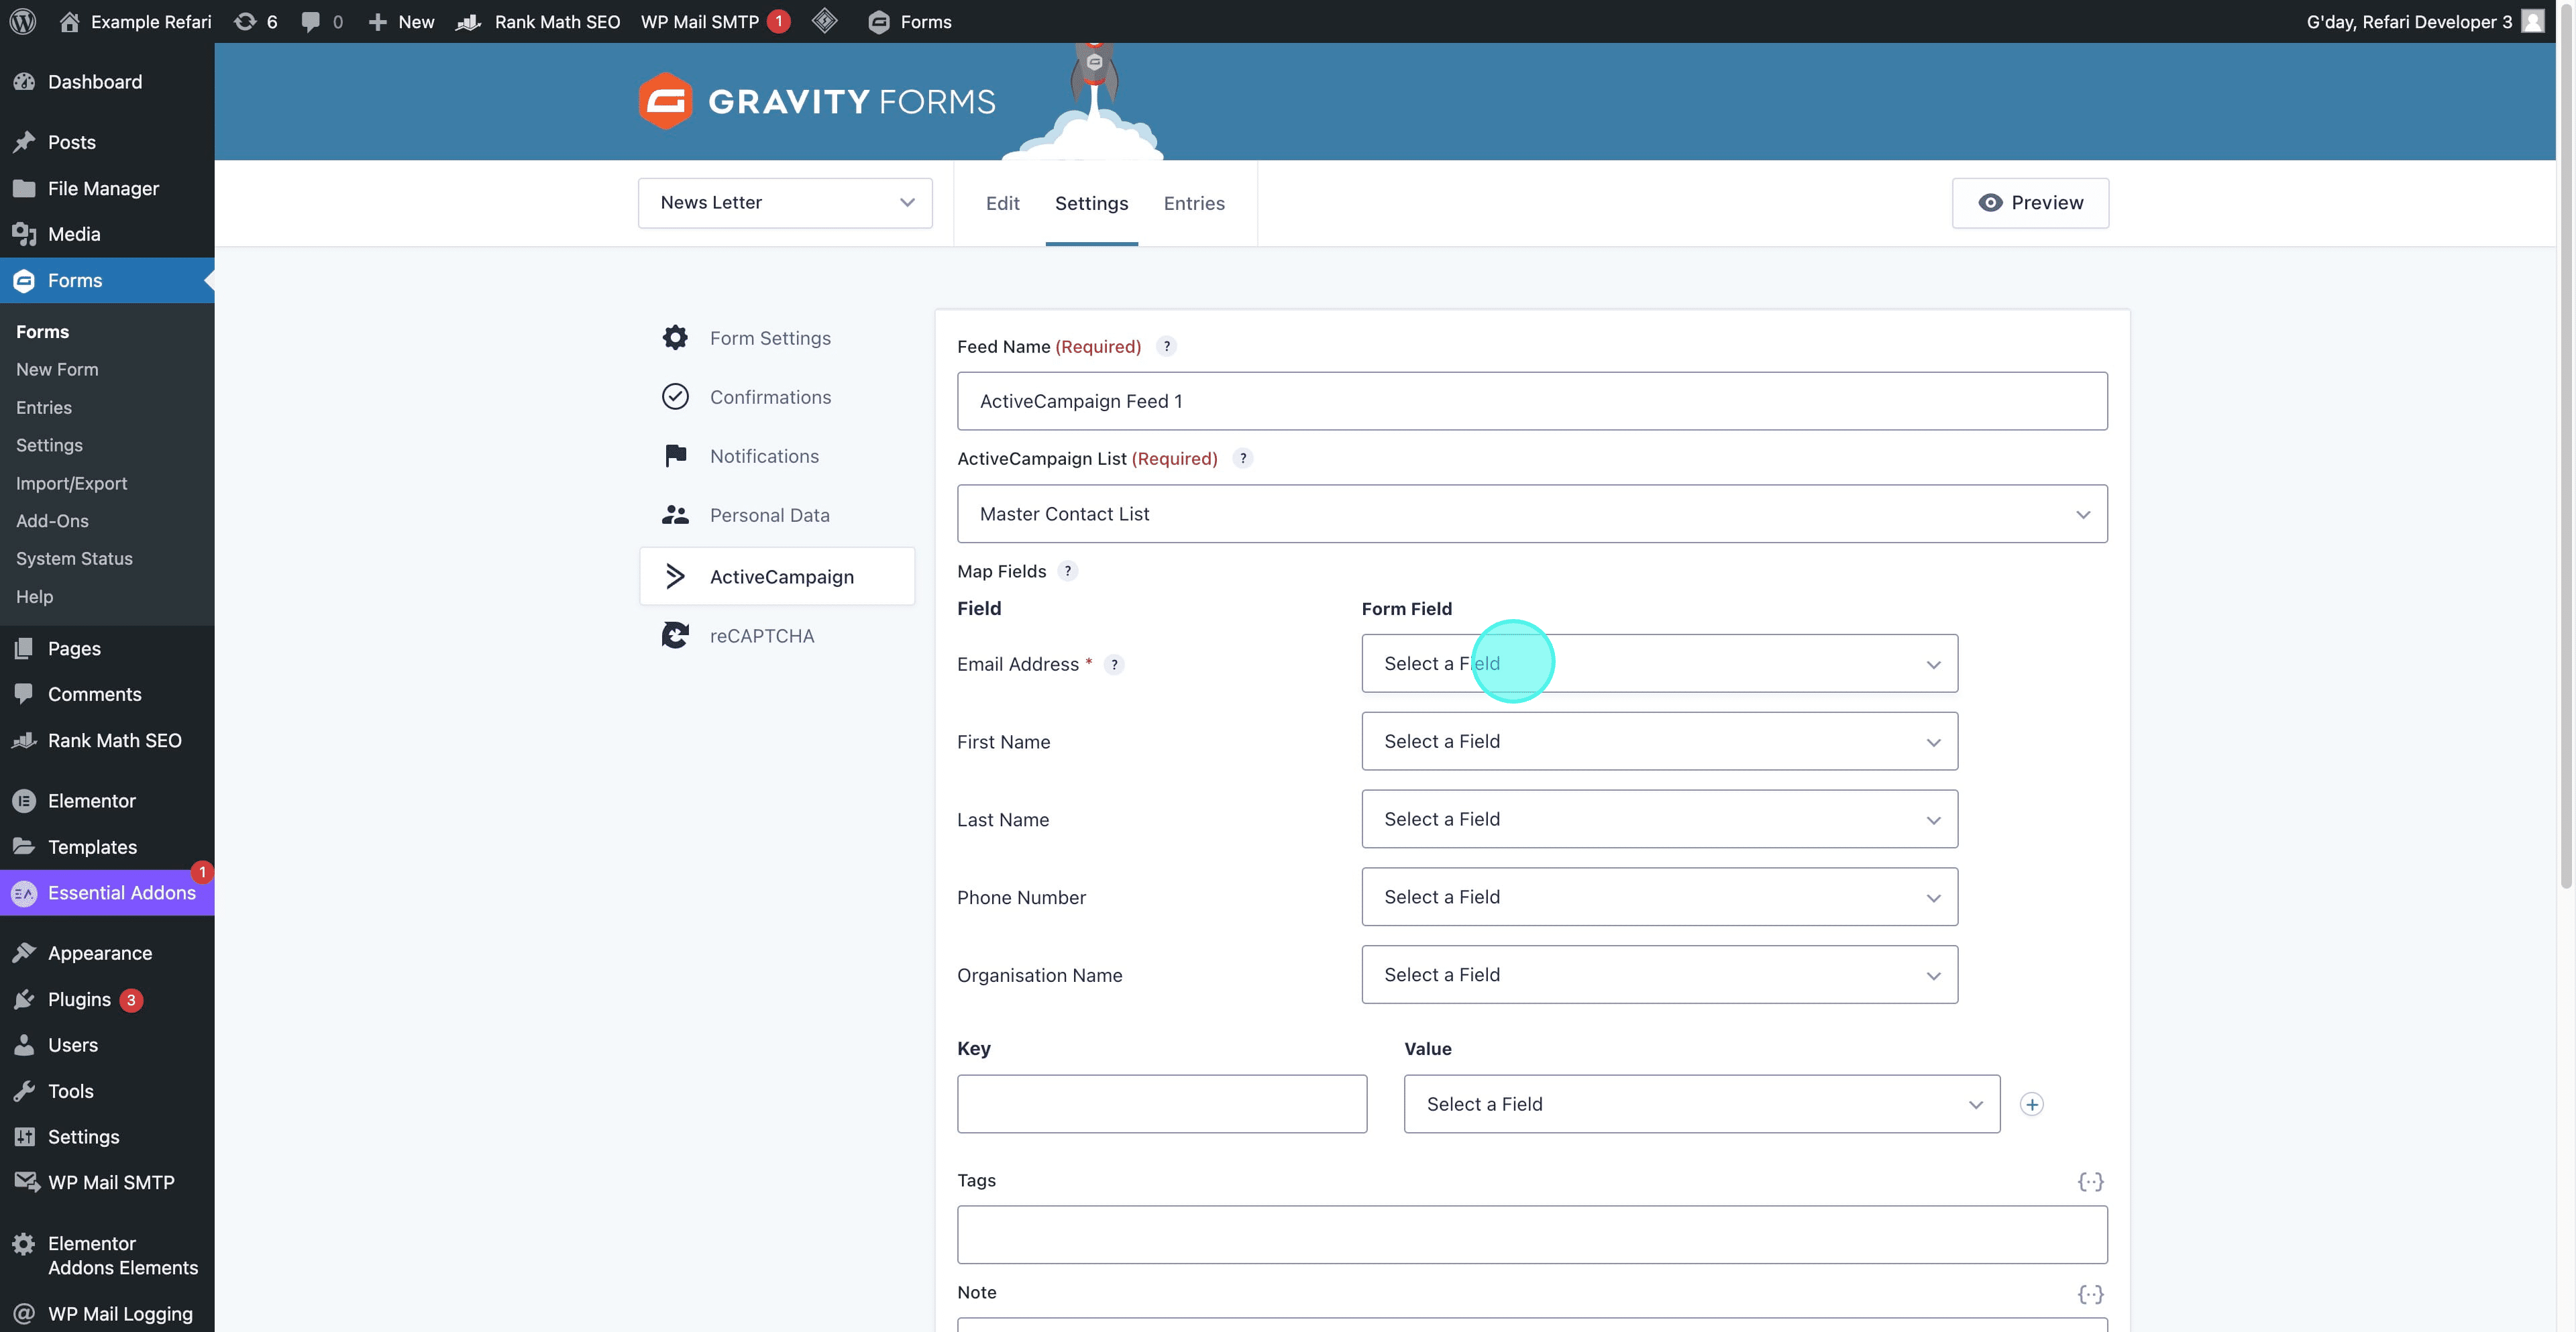
17. You can add keys, values, tags, and notes according to your specific requirements.

18. After completing all steps, click on "Save Settings" to finalize your configurations.
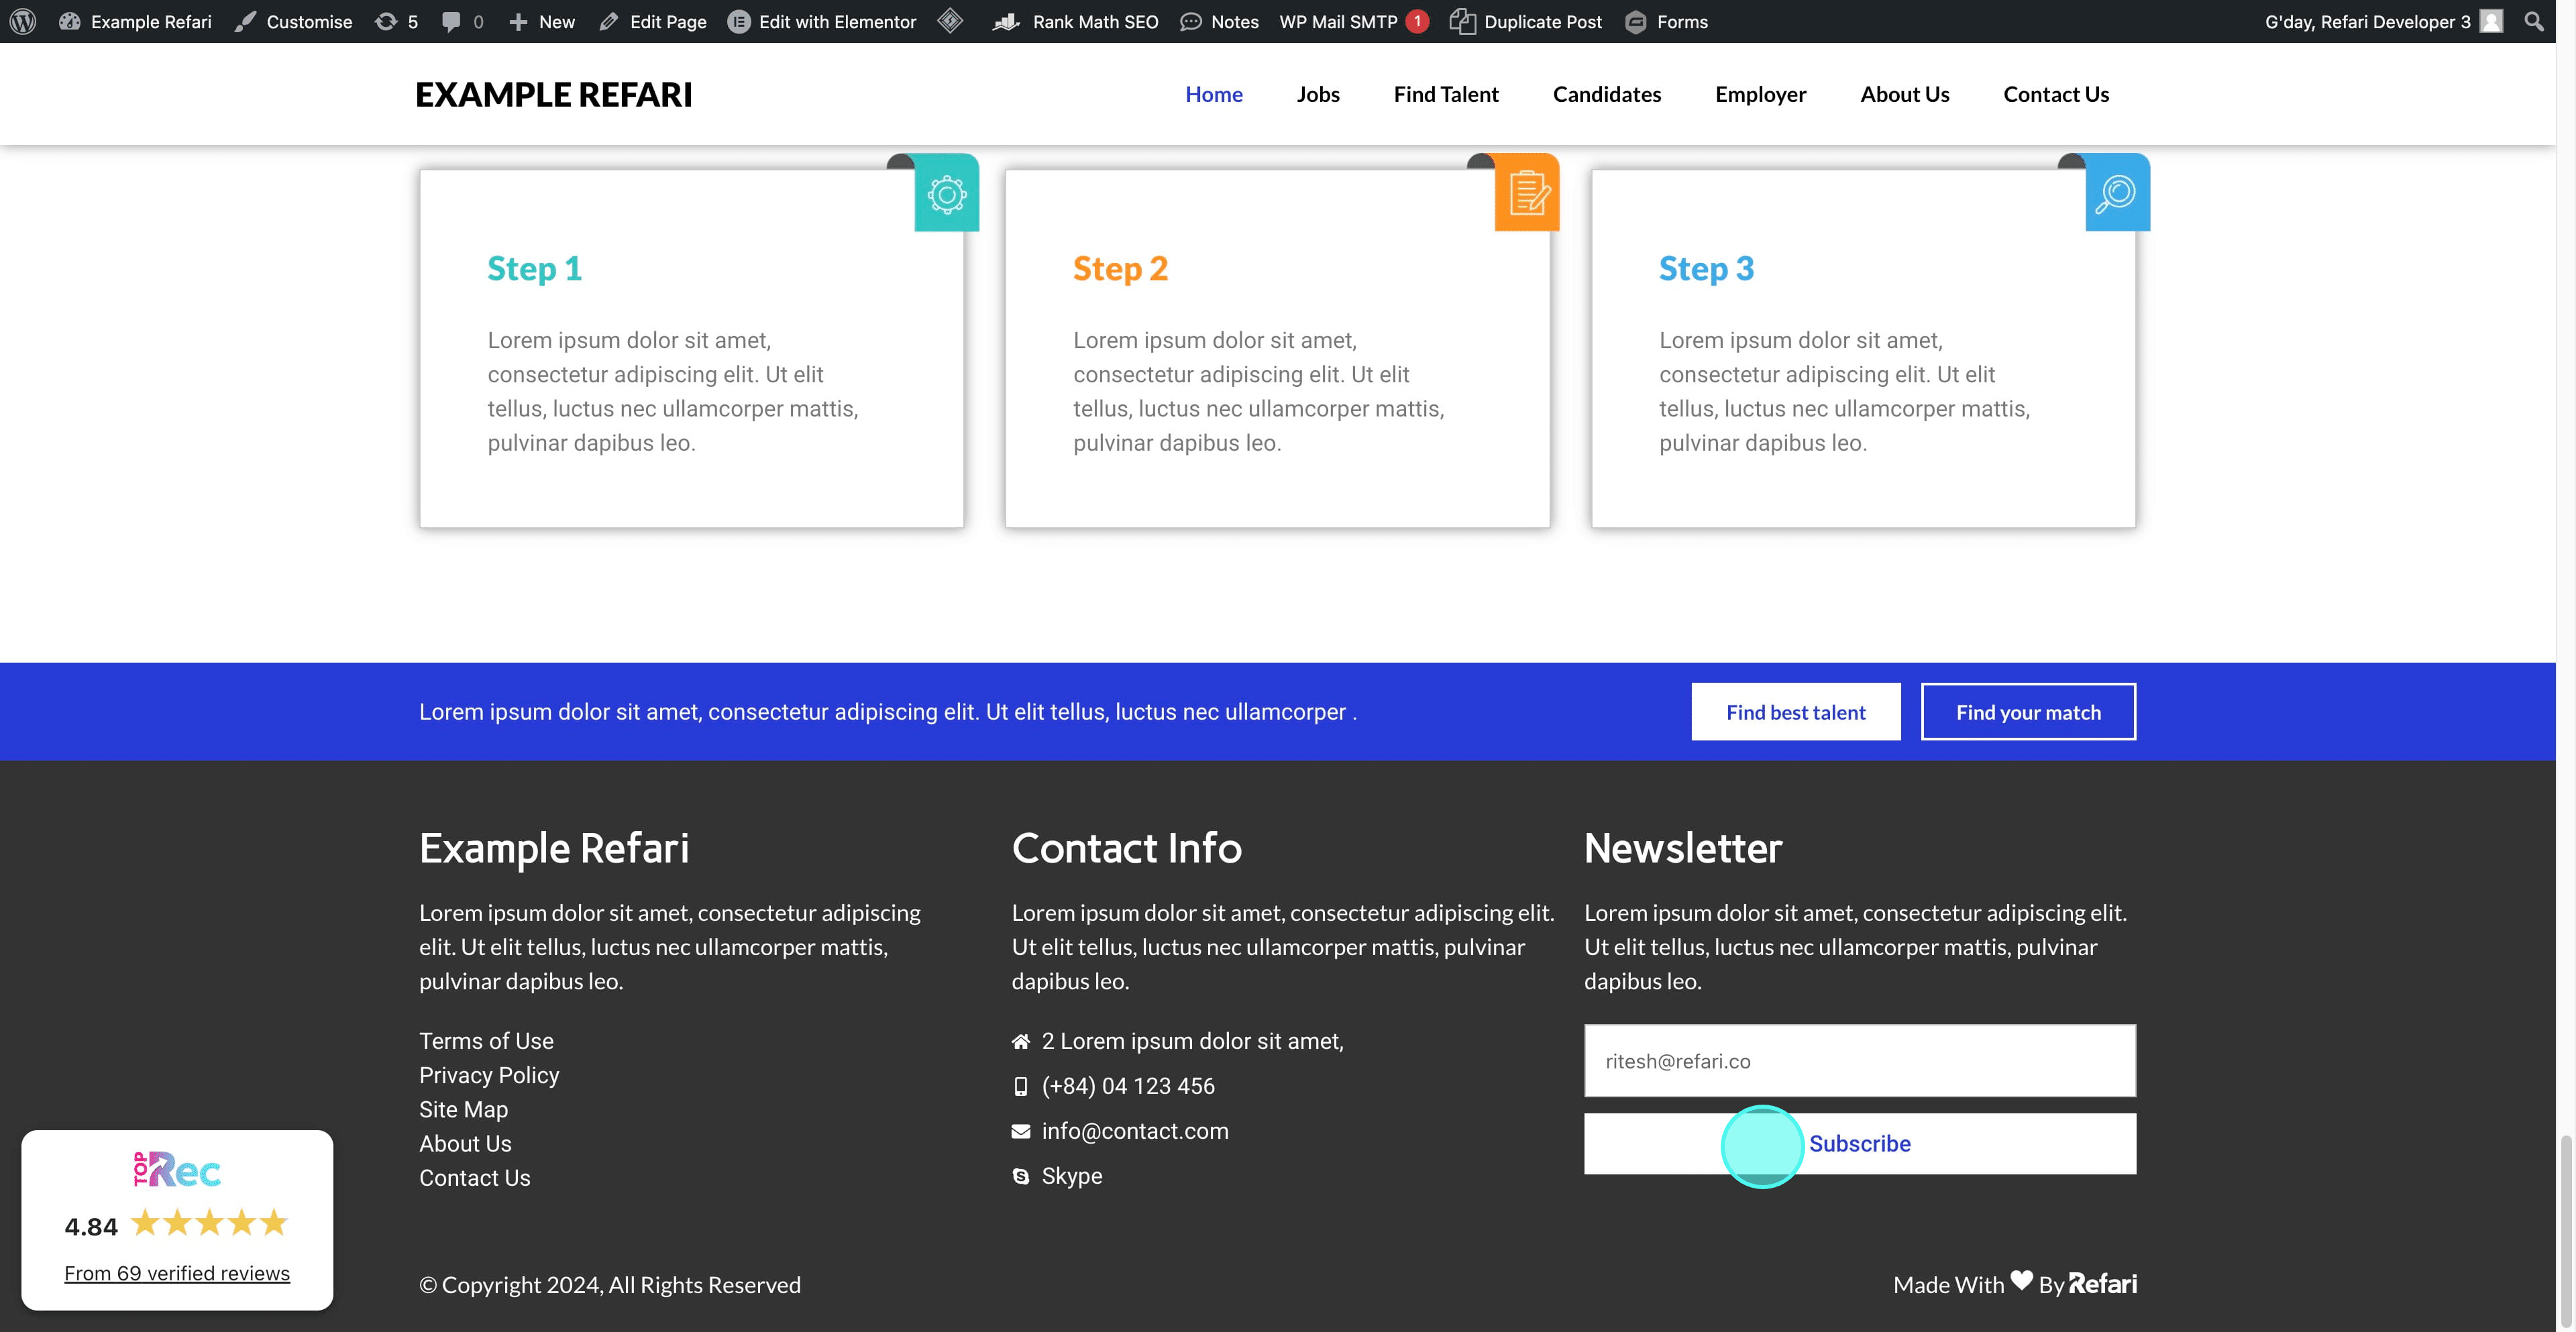
19. Now it's time to test the implementation. Navigate to the page where the form is embedded to proceed with the testing.
20. Fill out the form with the required information and click on the "Subscribe" button to submit your details.
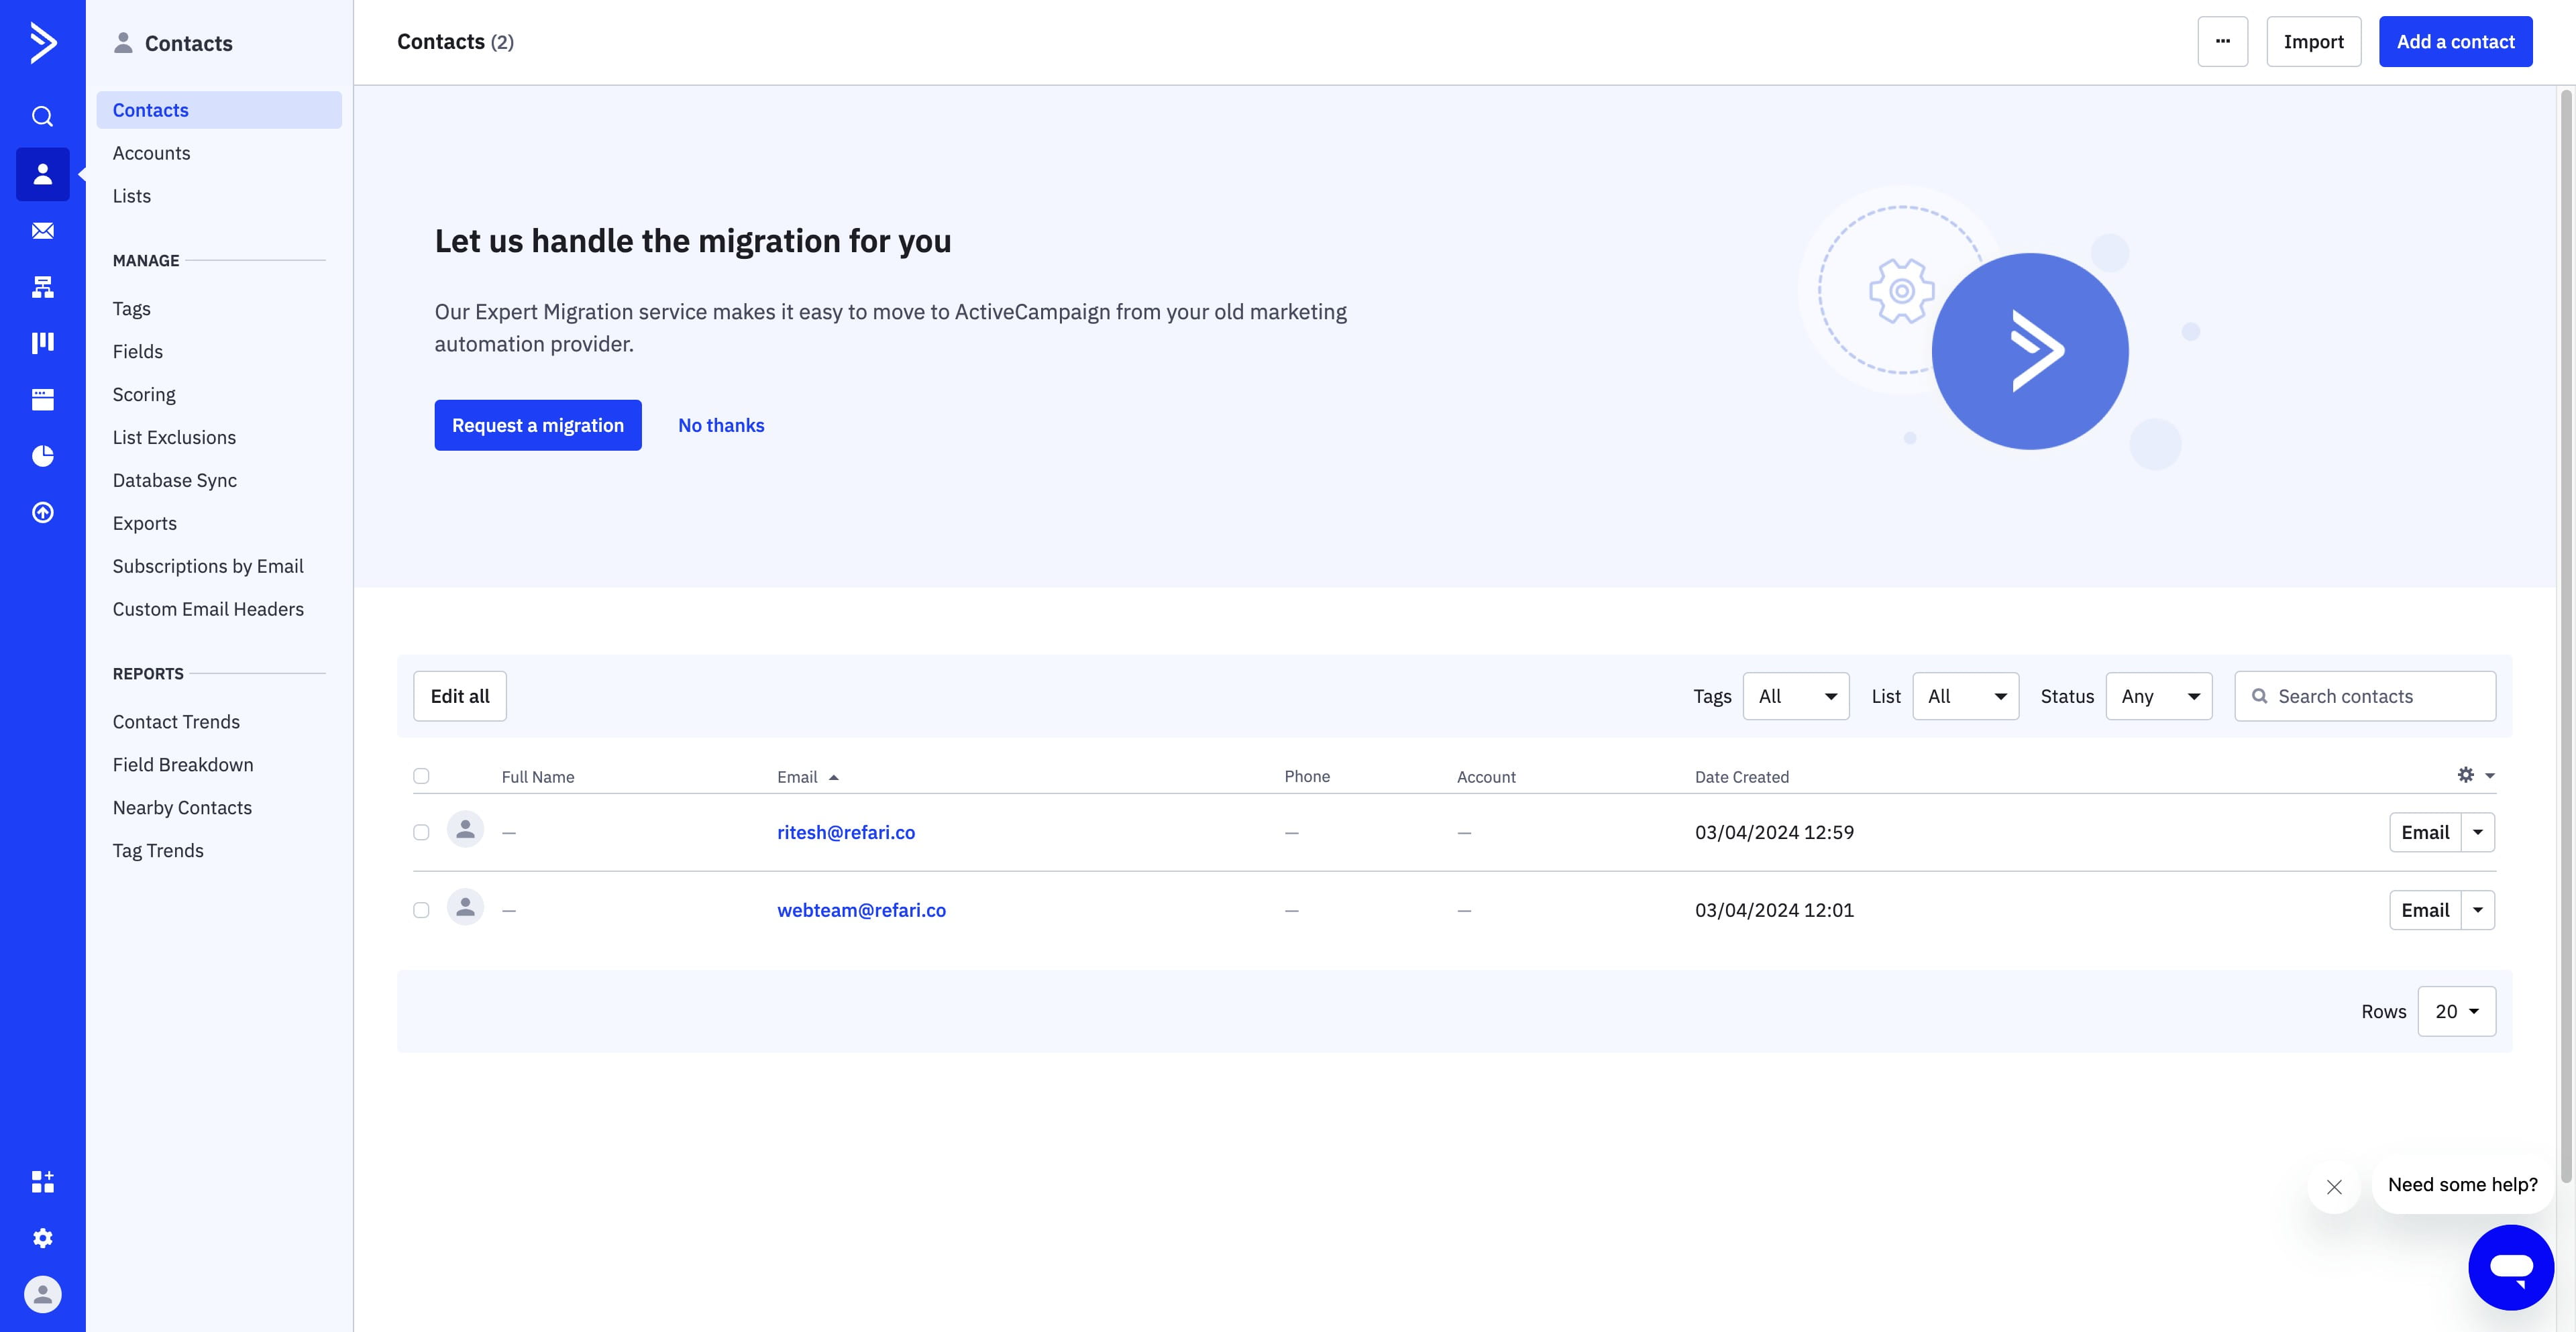
21. Now, navigate to the "Contacts" tab within your ActiveCampaign account.
22. As observed, the email has been successfully added to our contact list, marking the successful completion of the integration.
Successfully integrating your form with ActiveCampaign represents a significant step forward in optimizing your recruitment process. By following the steps outlined in this guide, you've not only simplified the task of capturing potential candidate information but also unlocked the powerful automation and segmentation capabilities of ActiveCampaign. This integration ensures that each form submission is a seamless entry point into your recruitment funnel, allowing for more targeted and effective candidate outreach. Congratulations on completing this integration! Embrace this enhanced functionality to drive your recruitment efforts to new heights.
Was this article helpful?
That’s Great!
Thank you for your feedback
Sorry! We couldn't be helpful
Thank you for your feedback
Feedback sent
We appreciate your effort and will try to fix the article